Deploy Node-Express Server in AWS EC2 Instance
Last Updated :
18 Sep, 2023
AWS or Amazon Web Services is a leading cloud services provider which gives access to a number of on-demand computational services, databases, storage space, etc.EC2 or Elastic Compute Cloud is an on-demand computing service on the AWS cloud platform. Under computing, it includes all the services a computing device can offer to you along with the flexibility of a virtual environment.
Steps to Create a New AWS Instance For Deployment
To create a free AWS account refer to Amazon Web Services (AWS) – Free Tier Account Set up.
Step 1: Go to the AWS website and search for EC2.
Step 2: Click on Launch Instance to create a new instance. To know the instance types refer to Amazon EC2 – Instance Types
Step 3: Give a suitable name for your instance.
.jpg)
Step 4: Select UBUNTU as the Amazon Machine Image.

Step 5: In the Key-pair section, create a new key pair (if you don’t have one already). Give a suitable name for your key and save it on your local machine. This key would help to log in to our instance using an SSH client.

Step 6: In the Network Settings section, allow HTTPS and HTTP request traffic which are required when creating and using a web server.

Step 7: With all these settings, we are good to launch the instance. Click on the launch instance button on the right-hand bottom side.
Step 8: It will take a few seconds for the instance to start completely and go into a running state.
Connect to the Instance Using SSH Client
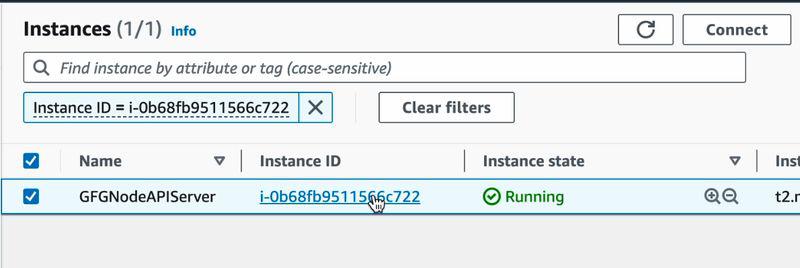
Step 1: Once the instance is in a running state, click on Instance ID. It will open up a page with all the details of a particular instance. Click on Connect button on the top right-hand side of the page.

Step 2: Open the SSH client on your system. (Terminal for Linux/MacOS, PuTTy for Windows).
Step 3: Go to the folder where you stored your private key file onto the terminal using the following command:
cd <path-to-your-folder>
Step 4: To give execute permission to the secret key file, execute the following command:
chmod 400 <privateKeyFile.pem>
Step 5: Connect to your instance using its public DNS. Copy the command given in the Example section and execute it on your terminal.
Step 6: After running this command, you will be asked “Are you sure you want to continue connecting (yes/no/[fingerprint])?”. Put “yes” and click Enter.

Step 7: You are now successfully connected to your instance on AWS from your local machine using an SSH client.
Download the Code For Node Express Server
Step 1: Go to your GitHub repository and copy the HTTP link to clone the repo.
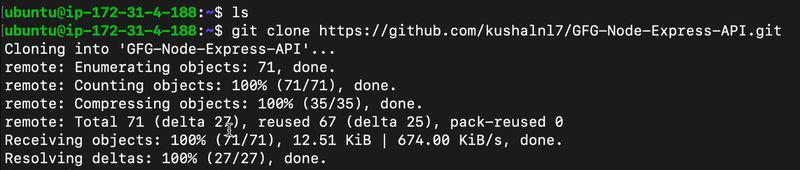
Step 2: Run the following command on the terminal. It would work fine if the repo is public, for private repos you will need to insert your GitHub username and password.
git clone <http-link-for-github-repo>
Install Node To Run The Server
Step 1: Use the following command to install curl on the instance.
sudo apt-get install curl

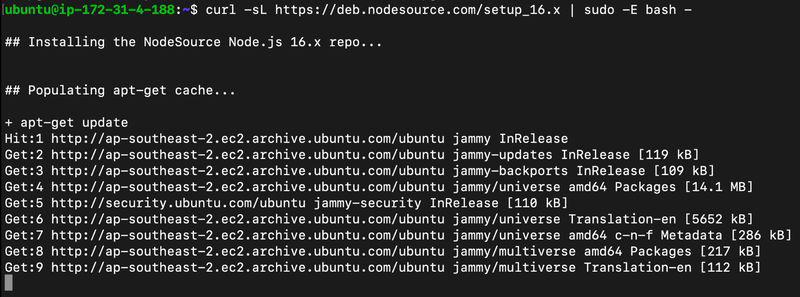
Step 2: Use this curl command to install node.
curl -sL https://deb.nodesource.com/setup_16.x | sudo -E bash -
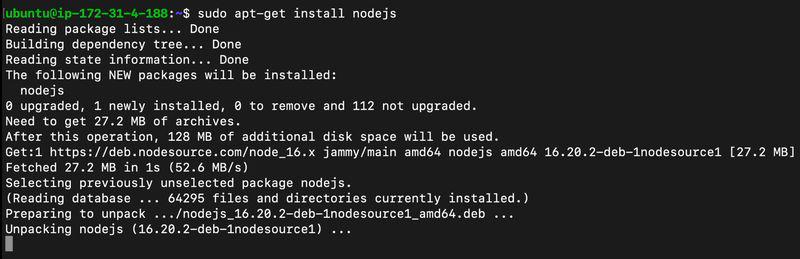
Step 3: Run the below command to install nodeJs on our AWS instance.
sudo apt-get install nodejs
Step 4: Check if the node is properly installed on the instance.
node -v
Install All Dependencies Required to Run The Node Express Server Project
Step 1: Go to the project folder which we cloned from git.
cd path/to/folder
Step 2: Execute the following command to install all the dependencies to run the project.
npm install
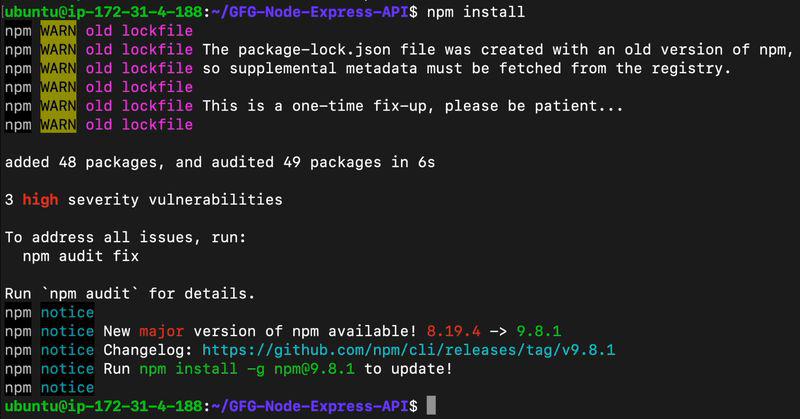
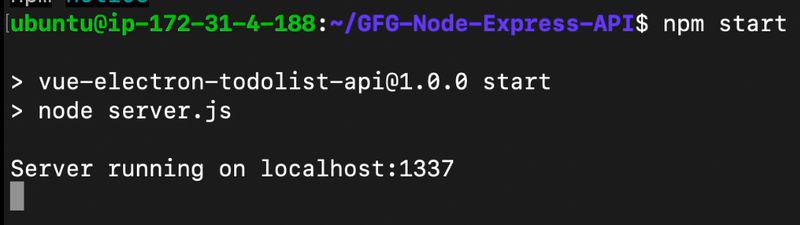
Step 3: Use the following command to run the server. (This can be different based on the project settings. Check the scripts section in your package.json to get the start command). This will start the node server which will be listening for requests on some port number
npm start
Configure the Security Group For the Port Where Our API is Running
Step 1: Go to your AWS instance and select the Security tab.

Step 2: Click on the security group to which your instance is configured and it will open up the configuration settings.
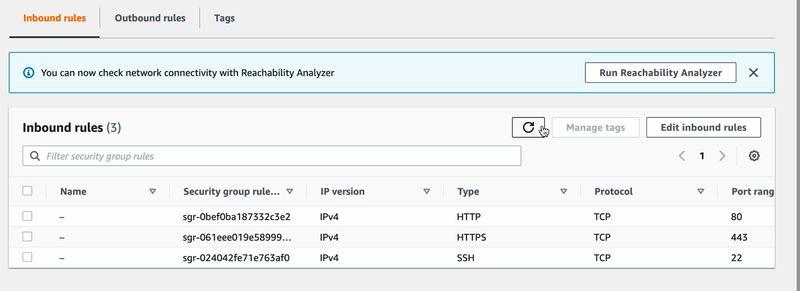
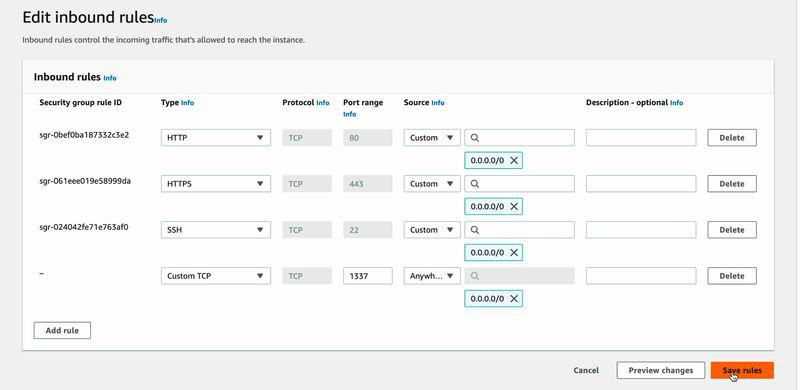
Step 3: In the Inbound Rules section, go to Edit Inbound Rules and it will open up a dialog box. Go to Add Rule and add a new Custom TCP type with your Node server’s port number as Port Range and source as Anywhere-IPv4. Please refer to the screenshot to see how final settings on the dialog box should look like.
Access the Application
Step 1: Go to your instance and copy the public IPv4 address.
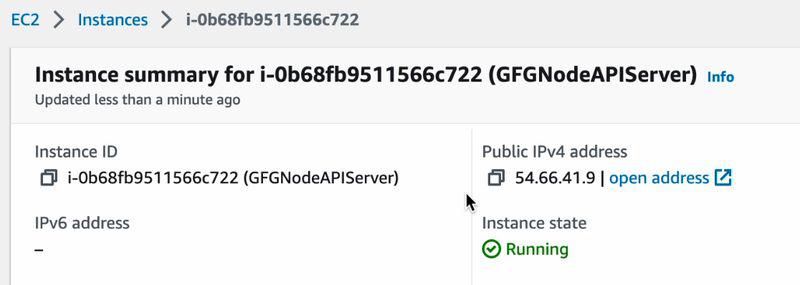
Step 2: Go to your preferred browser and hit the server endpoint using the following URL:
http://<publicIPv4Address>:<PortNumber>/<Endpoint>

FAQs On Node-Express Server to AWS
1. What are the different ways in which the Node.js Express server database can be managed on AWS?
There are different options available on AWS to host your own databse for the server. Few of them are DocumentDB, DynamoDB, RDS, etc. You first need to evaluate your design and the requirements and based on that a particular service can be integrated.
2. What are the different ways in which the Node.js Express server on AWS can be monitored?
You can do it using Amazon CloudWatch. This is a service provided by AWS which can be used by any application/server to help monitor different metrics of the instance and take corresponding actions on the basis of that.
3. How can I set up my AWS Node.js Express application on a custom self-owned domain?
AWS allows you to host your AWS application on a custom domain. It can be configured using Route 53. This route can be used to point our custom and self-owned domain to the AWS server.
4. What are the different ways to secure the Node.js Express Server on AWS?
AWS provides a number of different ways to for the security of your Node.js Express Server. They include implementing user access controls, adding security groups, and using a secure socket layer (i.e. HTTPS), etc.
Share your thoughts in the comments
Please Login to comment...