Creating custom domain name instead of localhost in Ubuntu
Last Updated :
01 Nov, 2023
In ubuntu, the local server by default is referred by the name “localhost”. However, you can also create a custom domain name for your local server instead of using
localhost
. This article explains the process to
create your own custom domain name instead of using localhost
. Here ‘hackdx.md’ is created as our domain, which can be taken as per need.
Note:
This article is compiled focusing on
Linux users
but the process is similar for windows user with some minor changes. Below are the steps to create your own custom domain name instead of using localhost, in
Ubuntu
:
- Step 1: If you are new to Linux you can install apache server and PHP as given below otherwise skip this step. Apache is used to host PHP script. If you have already installed then also skip this step.
sudo apt-get update sudo apt-get install apache2 php
You can check your server by typing ‘localhost’ into your browser. If you get apache ubuntu default page i.e you have successfully installed apache2 server. 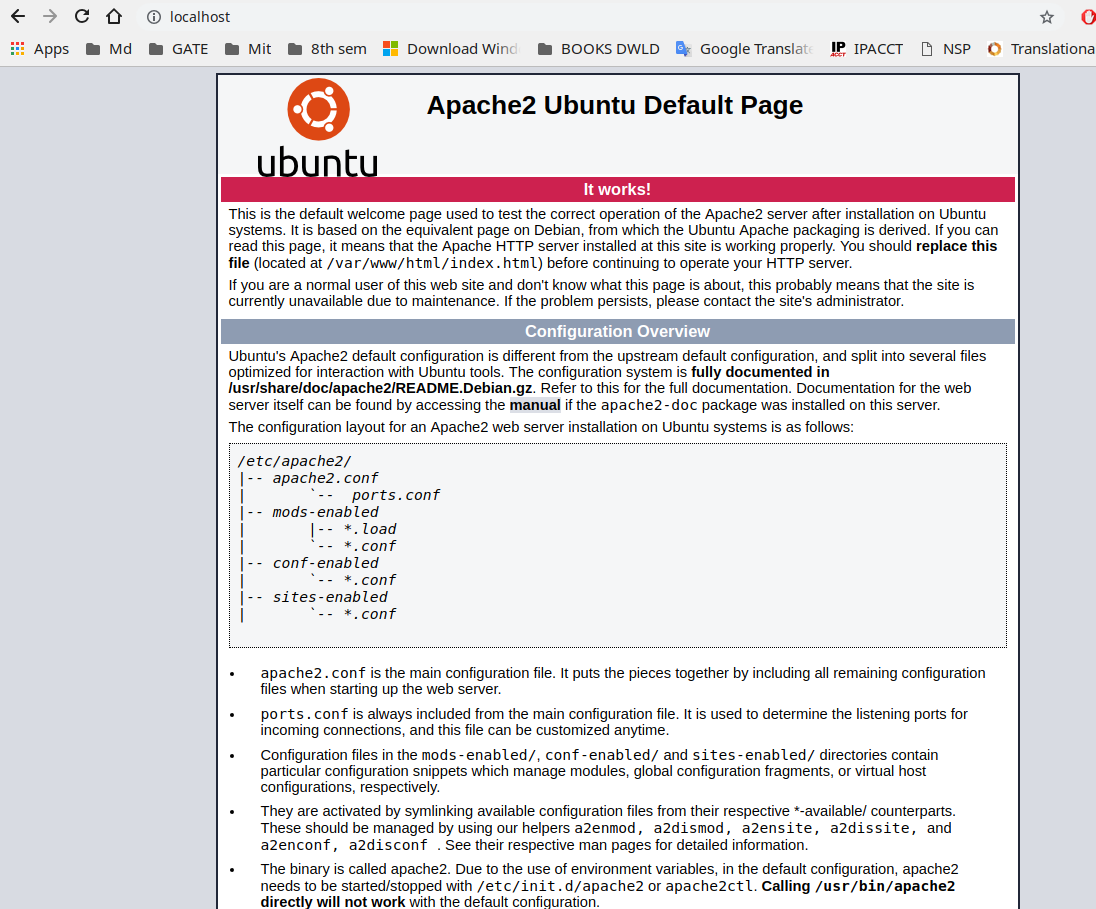
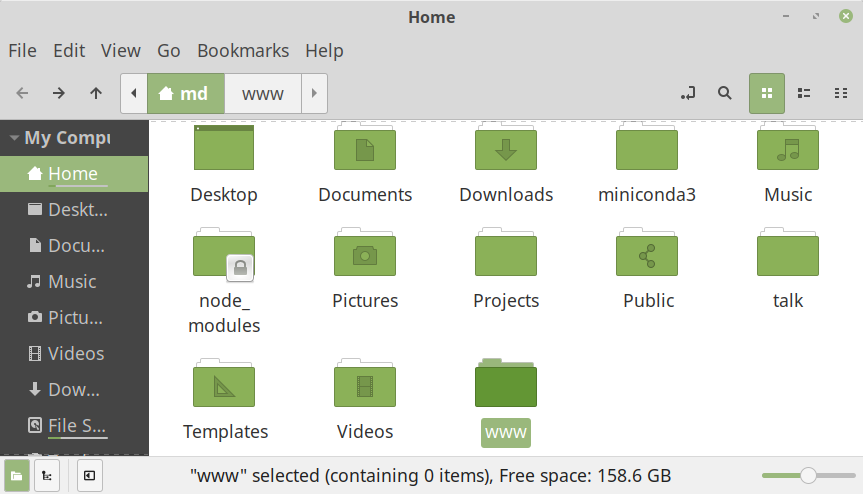
- Step 2: Create a folder which you want to use as root directory of your server. Here I am using /home/md/www as my root directory. You can name it anything you like, naming www is not mandatory.
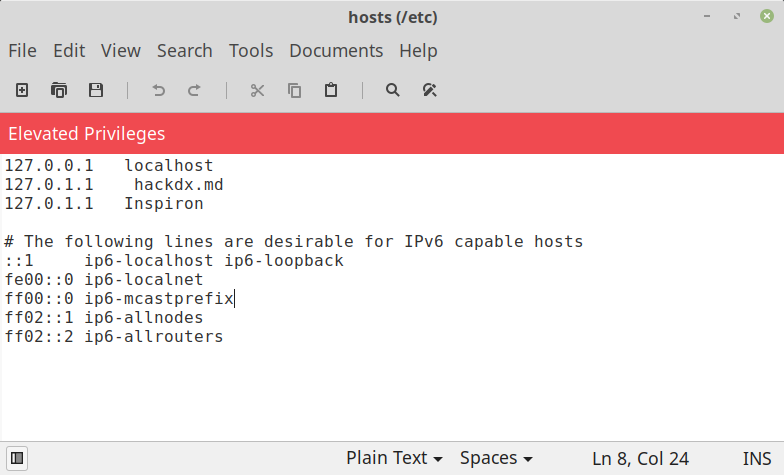
- Step 3: Now one of important step to create domain name in your hosts file under ‘/etc/hosts’. Open your terminal and type the following.
- Install ‘xed’ if not already done using:
sudo apt-get install xed
- Then Execute this command to edit the hosts file
sudo xed /etc/hosts
- Enter your domain name in front of localhost IP as given in the figure. Here we are using hackdx.md, so we are writing ‘127.0.1.1 hackdx.md’. Now you can see default apache page by typing hackdx.md in your browser.
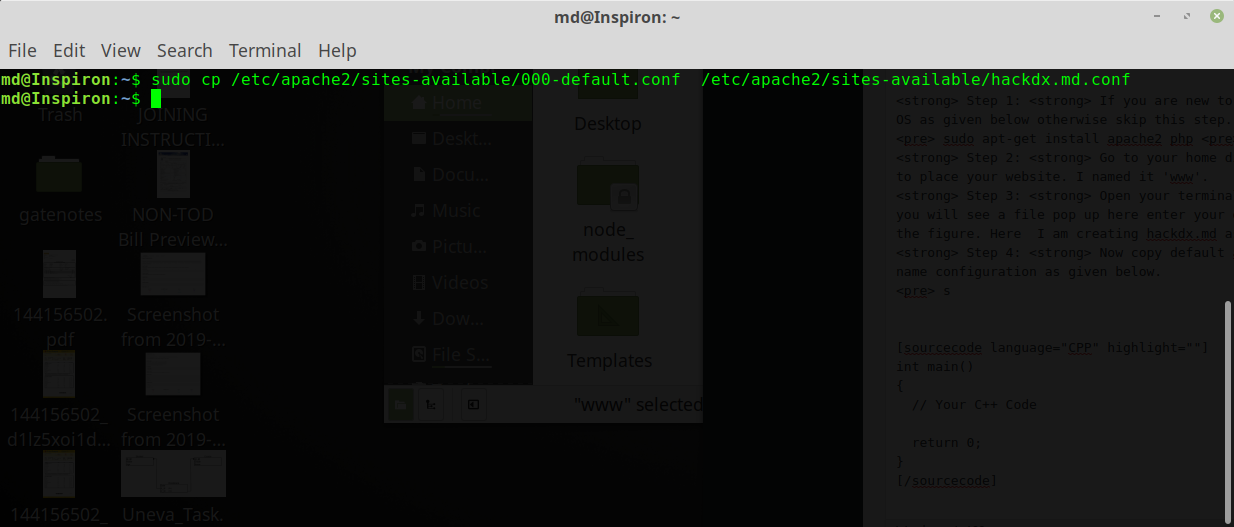
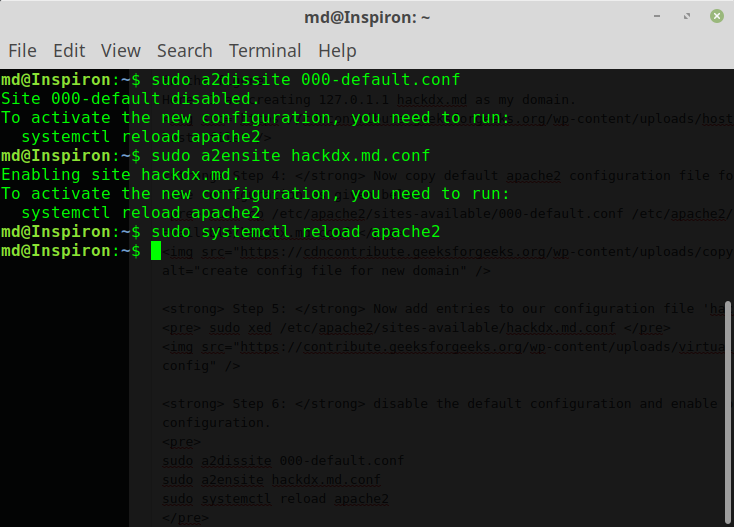
- Step 4: Now copy default apache2 configuration file for your new domain name configuration as given below. You can do for as many domain as you want. This step is required so that you can see your newly created domain at hachdx.md or your own domain. You can also add in default conf but creating new file is recommended as you may mess up with original default file. This can be done with the below command:
sudo cp /etc/apache2/sites-available/000-default.conf /etc/apache2/sites-available/hackdx.md.conf
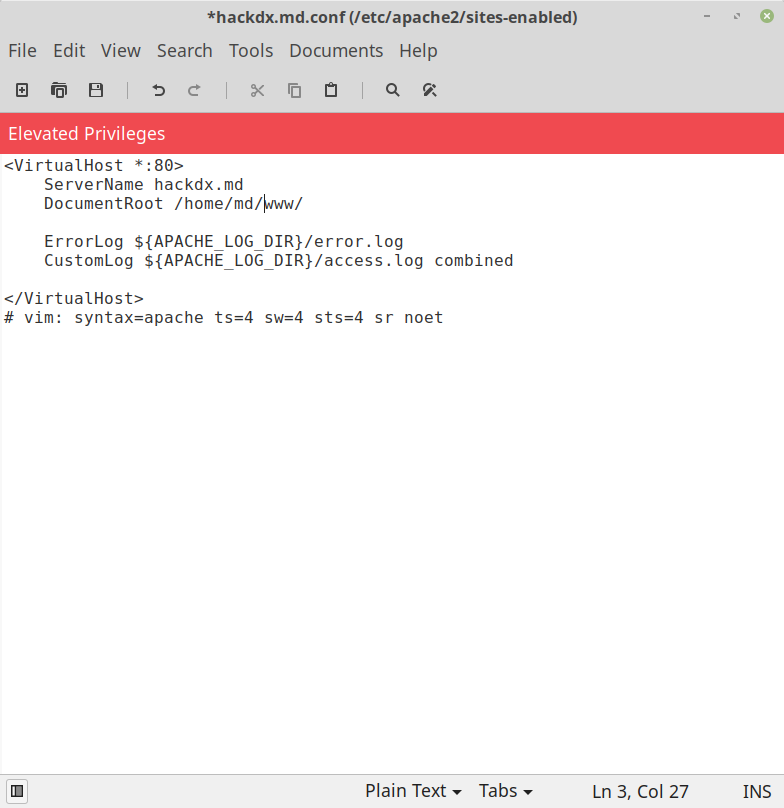
- Step 5: Now add entries to our configuration file ‘hackdx.md.conf’ as given in the figure. We are creating /home/md/www as root directory and giving hacdx.md as domain name or server name. All different domain can also be added to this file if you want to create at a different location. Like /home/md/sample etc, a corresponding entry must exist in the /etc/hosts file.
sudo xed /etc/apache2/sites-available/hackdx.md.conf
- Step 6: Disable the default configuration and enable our new configuration for newly created domain hackdx.md.conf.
sudo a2dissite 000-default.conf sudo a2ensite hackdx.md.conf sudo systemctl reload apache2
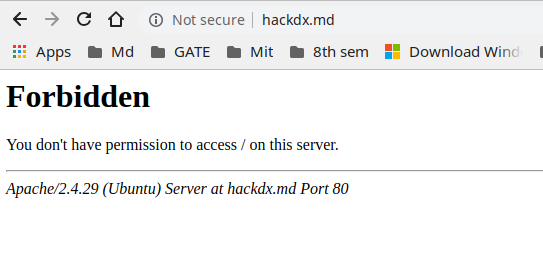
- Step 7: update apache2 config file also in case you get forbidden error. You may get this error because apache2 is not recognizing new root document location /home/md/www, by adding these lines apache know about the root location.
 Run this command to edit apache2.conf
sudo xed /etc/apache2/apache2.conf
Add these lines to your apache2.conf file as given in the figure. 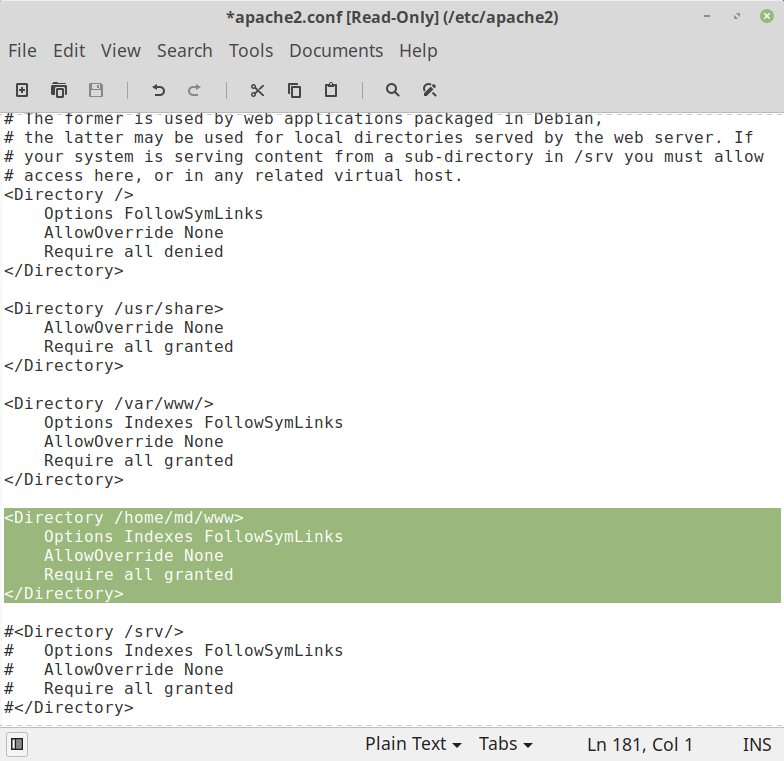
- Step 8: Finally, reload the apcahe2 service put this command in your terminal.
sudo systemctl reload apache2
- Step 9: You are ready now check by typing your URL to the browser. You can test by writing a simple PHP script in www folder.
 Now you can put your files in www directory and enjoy using the PHP server.
Share your thoughts in the comments
Please Login to comment...