How to Enable HTTPS for Localhost ?
Last Updated :
15 Mar, 2024
Enabling HTTPS on your localhost is important for building and testing secure web applications. HTTPS which stands for Hypertext Transfer Protocol Secure adds a layer of security to communication over the Internet. By running a HTTPS server on your local computer, you can replicate the protected environment. This means you can test how your application handles sensitive information and ensure it’s resilient against potential security threats before it goes live.
Secure Socket Layer (SSL) or Transport Layer Security (TLS) provides a way for secure communication over the internet.
In this article, I’ll show you how to configure HTTPS for local development using React for the frontend. This method also applies to Node.js and Express.
Why you should use HTTPS Locally?
Here are some common situations where using HTTPS in your local development environment is beneficial:
- Security Concerns: If your application deals with sensitive data or requires user authentication, it’s a good practice to use HTTPS even locally.
- Testing Secure Features: If your application includes features that rely on HTTPS, such as geolocation, accessing the camera or microphone, or any other browser APIs that require a secure context, it’s essential to use HTTPS locally for accurate testing.
- Enhancing Cookie Security: Utilizing cookies with the Secure attribute ensures they’re transmitted only over HTTPS, enhancing data security. Setting the SameSite attribute to None allows cross-origin requests, improving compatibility while maintaining security.
- API Requirements: If your application communicates with external APIs that require HTTPS, you should use HTTPS locally to replicate the production environment accurately. Some APIs like Google Maps API, Stripe API etc. only accept requests over HTTPS for security reasons.
- Browser Policies: Modern web browsers are increasingly enforcing stricter security policies, which may affect your application’s functionality when served over HTTP. For example, certain features like geolocation or access to device APIs may be restricted or disabled when served over non-secure connections.
Unlock the power of HTTPS for your React localhost with these essential setup steps.
Step 1: Create React app using this command.
npx create-react-app frontend
Step 2: Move to the project directory.
cd frontend
Step 3: Install the mkcert package as global.
- mkcert is an npm package that creates self-signed development certificates. It can be used to install and generate a local CA (Certificate Authority) certificate for a server.
npm install -g mkcert
Step 3: Generate an SSL Certificate.
- Run the command prompt as administrator.
- Run the below 2 commands one by one in the command prompt.
mkcert create-ca
mkcert create-cert
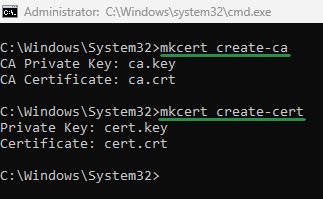
command prompt
Step 4: After successfully executing the above two commands, you should find the following four files generated in the directory where the commands were executed, with two files resulting from each command.
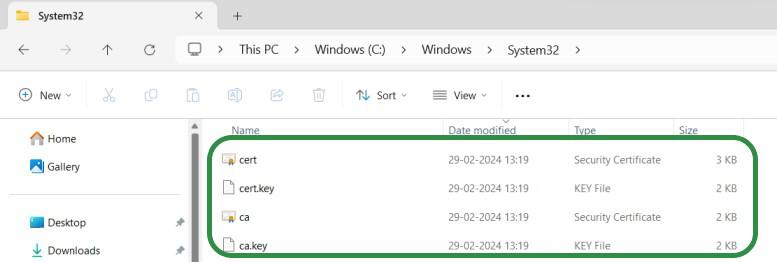
SSL_Certificate
Step 5: Double click on ca.cert file and click on Install Certificate.
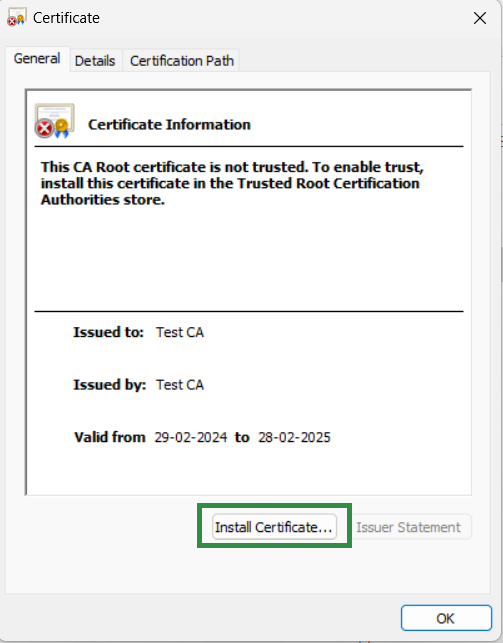
Certificate_Information
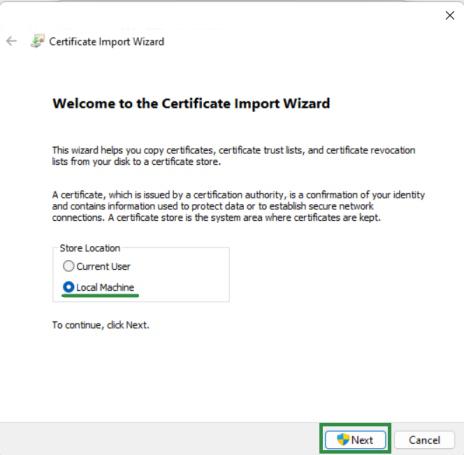
Step 6: Select the Local Machine option then click on Next button.
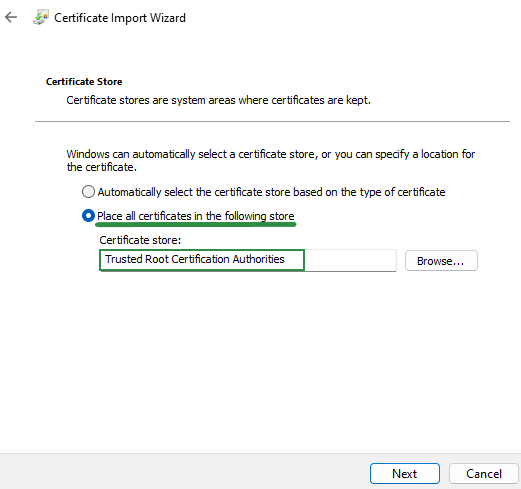
Step 7: Select the “Place all certificates in the following store” option, then browse the “Trusted Root Certification Authorities” option. Finally, click “Next” to proceed.
Certificate_import_wizard_2
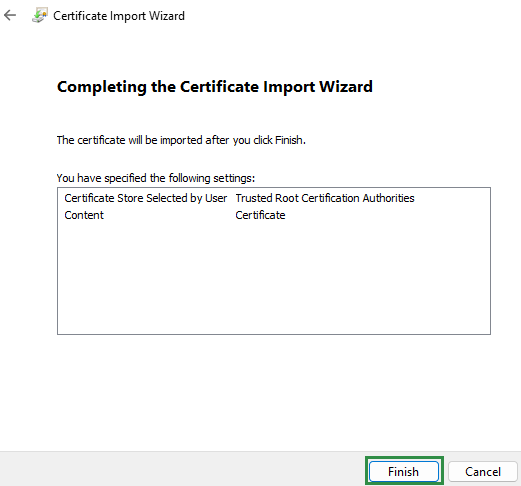
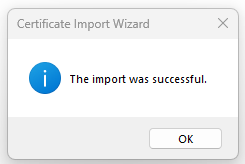
Step 8: Click on “Finish” and wait for the “Import successful” popup to be displayed. Once the popup appears, click “OK” to complete the import process.
Certificate_import_wizard_3
Step 9: Confirm that the certificate information matches the details provided below. Once verified, click “OK” to proceed.

SSL Certificate
Step 10: Update the start command in the scripts section of the package.json file as follows:
“start”: “set HTTPS=true&&set SSL_CRT_FILE=C:/Windows/System32/cert.crt&&set SSL_KEY_FILE=C:/Windows/System32/cert.key&&react-scripts start”,

Step 11: Start your React app using this command.
npm start
Output:
.gif)
Share your thoughts in the comments
Please Login to comment...