Create a ChatBot with OpenAI and Streamlit in Python
Last Updated :
13 Oct, 2023
ChatGPT is an advanced chatbot built on the powerful GPT-3.5 language model developed by OpenAI.There are numerous Python Modules and today we will be discussing Streamlit and OpenAI Python API to create a chatbot in Python streamlit. The user can input his/her query to the chatbot and it will send the response.

OpenAI and Streamlit
Required Modules
pip install openai
pip install streamlit
pip install streamlit-chat
Steps to create a ChatBot with OpenAI and Streamlit in Python
Here we are going to see the steps to use OpenAI in Python with Streamlit to create a chatbot.
Step 1: Log in to your OpenAI account after creating one.
Step 2: As shown in the figure below, after logging in, select Personal from the top-right menu, and then select “View API keys”.
Step 3: After completing step 2, a page containing API keys is displayed, and the button “Create new secret key” is visible. A secret key is generated when you click on that, copy it and save it somewhere else because it will be needed in further steps.
Step 4: Import the openai,streamlit, and streamlit_chat library, and then do as follows. Store the created key in the below-mentioned variable.
python3
import streamlit as st
import openai
from streamlit_chat import message
openai.api_key = 'API_KEY'
|
Step 5: Now we define a function to generate a response from ChatGPT using the “create” endpoint of OpenAI.
Python3
def api_calling(prompt):
completions = openai.Completion.create(
engine="text-davinci-003",
prompt=prompt,
max_tokens=1024,
n=1,
stop=None,
temperature=0.5,
)
message = completions.choices[0].text
return message
|
Step 6: Now we create the header for the streamlit application and we are defining the user_input and openai_response in the session_state.
Python3
st.title("ChatGPT ChatBot With Streamlit and OpenAI")
if 'user_input' not in st.session_state:
st.session_state['user_input'] = []
if 'openai_response' not in st.session_state:
st.session_state['openai_response'] = []
def get_text():
input_text = st.text_input("write here", key="input")
return input_text
user_input = get_text()
if user_input:
output = api_calling(user_input)
output = output.lstrip("\n")
st.session_state.openai_response.append(user_input)
st.session_state.user_input.append(output)
|
Step 7: Here we are using the message functions to show the previous chat of the user on the right side and the chatbot response on the left side. It shows the latest chat first. The query input by the user is shown with a different avatar.
Python3
message_history = st.empty()
if st.session_state['user_input']:
for i in range(len(st.session_state['user_input']) - 1, -1, -1):
message(st.session_state["user_input"][i],
key=str(i), avatar_style="icons")
message(st.session_state['openai_response'][i],
avatar_style="miniavs", is_user=True
, key=str(i) + 'data_by_user')
|
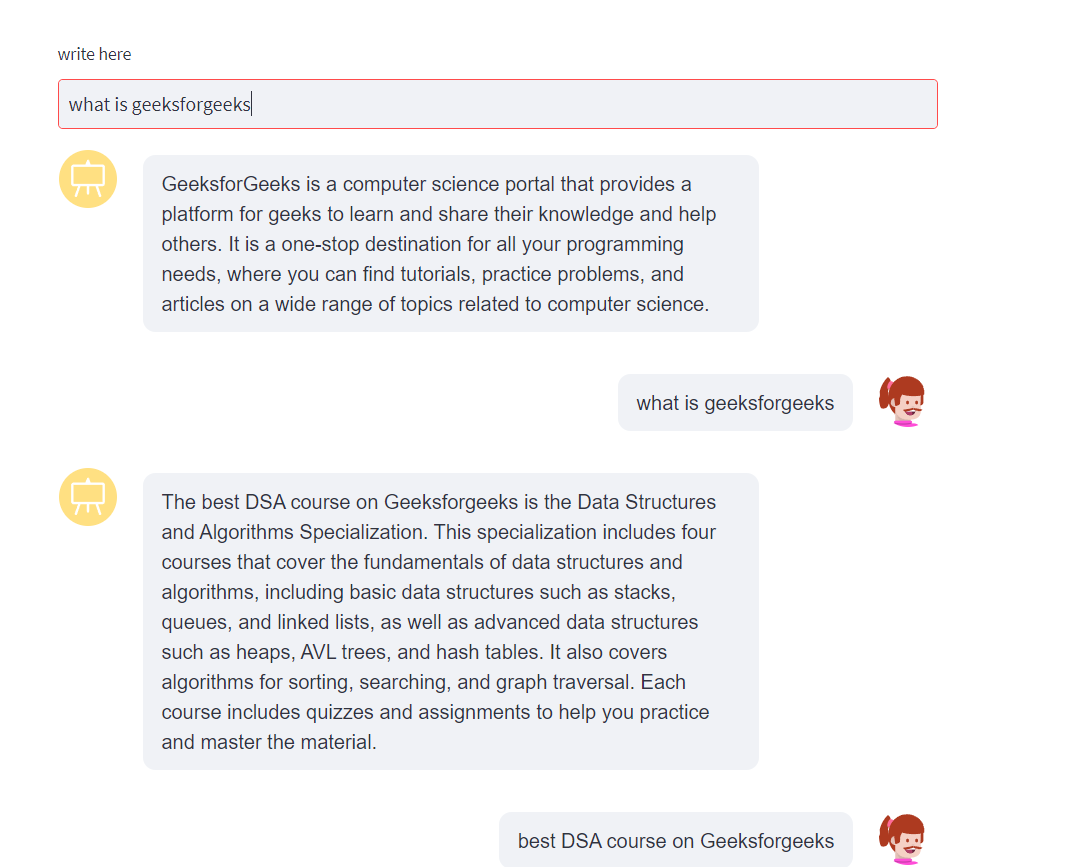
Chat History
Complete Code :
Python3
import streamlit as st
import openai
from streamlit_chat import message
openai.api_key = "YOUR_API_KEY"
def api_calling(prompt):
completions = openai.Completion.create(
engine="text-davinci-003",
prompt=prompt,
max_tokens=1024,
n=1,
stop=None,
temperature=0.5,
)
message = completions.choices[0].text
return message
st.title("ChatGPT ChatBot With Streamlit and OpenAI")
if 'user_input' not in st.session_state:
st.session_state['user_input'] = []
if 'openai_response' not in st.session_state:
st.session_state['openai_response'] = []
def get_text():
input_text = st.text_input("write here", key="input")
return input_text
user_input = get_text()
if user_input:
output = api_calling(user_input)
output = output.lstrip("\n")
st.session_state.openai_response.append(user_input)
st.session_state.user_input.append(output)
message_history = st.empty()
if st.session_state['user_input']:
for i in range(len(st.session_state['user_input']) - 1, -1, -1):
message(st.session_state["user_input"][i],
key=str(i),avatar_style="icons")
message(st.session_state['openai_response'][i],
avatar_style="miniavs",is_user=True,
key=str(i) + 'data_by_user')
|
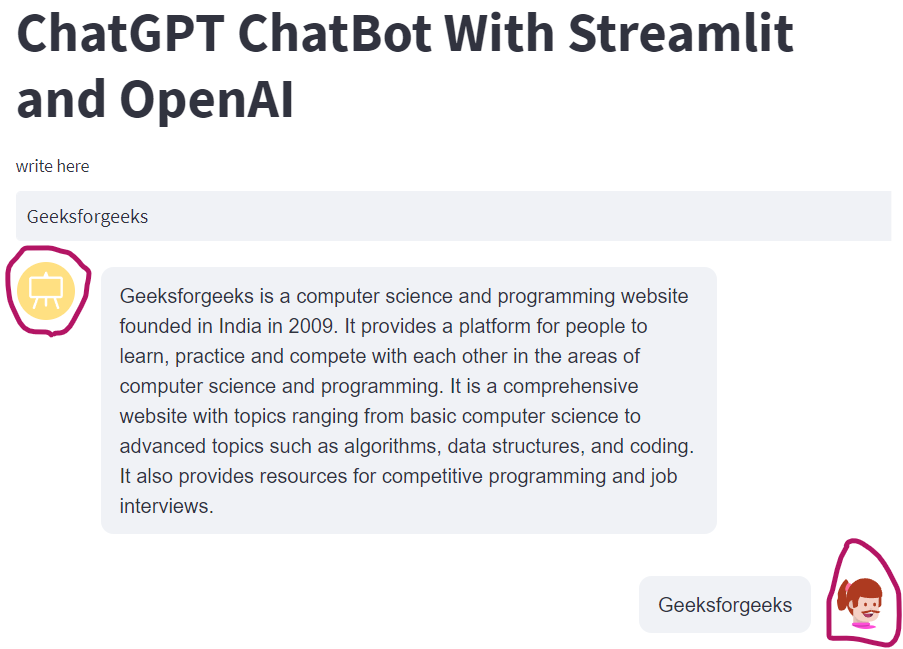
Output:
Streamlit OpenAI Output
Frequently Asked Questions on ChatGPT with Streamlit in Python
Q1: How to use the OpenAI library in Python?
First, we need to install the OpenAI package using pip install openai in the Python terminal. After this, we need to provide the secret key which can be found on the website itself OpenAI but for that as well you first need to create an account on their website.
Q 2: Can ChatGPT Chatbot generate images?
No, ChatGPT API was not designed to generate images instead it was designed as a ChatBot. It can give efficient answers and suggestions to problems but it can not create any visualization or images as per the requirements. ChatGPT is a transformer-based model which is well-suited for NLP-related tasks.
Q 3: How do I access OpenAI API in Python?
If you would like to access the OpenAI API then you need to first create your account on the OpenAI website. After this, you can get your API key unique for your account which you can use. After that, you can follow this article to create awesome images using Python scripts. But the OpenAI API is not free of cost for the commercial purpose but you can use it for some trial or educational purposes.
Q 4: How to use OpenAI API in Python?
After completing the above steps mentioned to use the OpenAI API in Python we just need to use the create function with some prompt in it to create the desired configuration for that query.
Conclusion
We covered several steps in the whole article for creating a chatbot with ChatGPT API using Python which would definitely help you in successfully achieving the chatbot creation in Streamlit. There are countless uses of Chat GPT of which some we are aware and some we aren’t.
To learn more about Chat GPT, you can refer to:
Generate Images With OpenAI in Python
How to Use ChatGPT API in Python?
7 Best AI Businesses to Start with ChatGPT
ChatGPT vs Google BARD – Top Differences That You Should Know
ChatGPT’s History Gone: Data Breach or AI Bug?
Like Article
Suggest improvement
Share your thoughts in the comments
Please Login to comment...