Spring Security Custom AuthenticationFailureHandler
Last Updated :
03 Mar, 2024
In Java, Spring Security is a very powerful framework that can provide comprehensive security services for Java enterprise software applications. One of the essential aspects of the security is authentication and it can be users are verified before granting access to the resource. Spring Security can allow for the customization of the authentication processes, and it can include handling authentication failures.
Implementation of Custom AuthenticationFailureHandler in Spring Security
We can develop the simple login management Spring application with the Custom Authentication failure handler mechanism.
Step 1: We can create the spring project including the below dependencies into the project.
Dependencies:
- Spring Web
- Spring Security
- Spring Data for MongoDB
- Spring Dev Tools
- Lombok
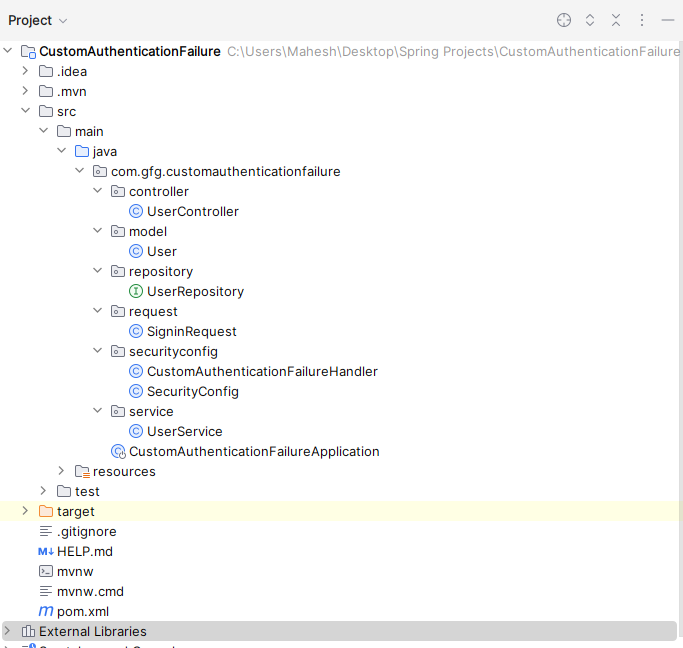
Once create the spring project with the above dependencies into the project then file structure looks like the below image.
File Structure:
Step 2: Open the application.properties file and put the below code for the database configuration.
spring.data.mongodb.uri=mongodb://localhost:27017/CustomData
Step 3: Create the new package named as the model and create the java class named as the User.
Go to src > com.gfg.customauthenticationfailure > model > User and put the below code.
Java
package com.gfg.customauthenticationfailure.model;
import lombok.AllArgsConstructor;
import lombok.Data;
import lombok.NoArgsConstructor;
import org.springframework.data.annotation.Id;
import org.springframework.data.mongodb.core.mapping.Document;
@Data
@AllArgsConstructor
@NoArgsConstructor
@Document(collection = "users")
public class User {
@Id
private String id;
private String username;
private String password;
}
|
Step 4: Create the new package named as the repository and create the java interface named as the UserRepository.
Go to src > com.gfg.customauthenticationfailure > repository > UserRepository and put the below code.
Java
package com.gfg.customauthenticationfailure.repository;
import com.gfg.customauthenticationfailure.model.User;
import org.springframework.data.mongodb.repository.MongoRepository;
import org.springframework.stereotype.Repository;
@Repository
public interface UserRepository extends MongoRepository<User, String> {
User findByUsername(String username);
}
|
Step 5: Create the new package named as the service and create the java interface named as the UserService.
Go to src > com.gfg.customauthenticationfailure > service > UserService and put the below code.
Java
package com.gfg.customauthenticationfailure.service;
import com.gfg.customauthenticationfailure.model.User;
import com.gfg.customauthenticationfailure.repository.UserRepository;
import org.springframework.beans.factory.annotation.Autowired;
import org.springframework.stereotype.Service;
import java.util.List;
@Service
public class UserService {
@Autowired
private UserRepository userRepository;
public User findByUsername(String username) {
return userRepository.findByUsername(username);
}
}
|
Step 6: Create the new package named as the securityconfig and create the java interface named as the CustomAuthenticationFailureHandler.
Go to src > com.gfg.customauthenticationfailure > securityconfig > CustomAuthenticationFailureHandler and put the below code.
Java
package com.gfg.customauthenticationfailure.securityconfig;
import jakarta.servlet.ServletException;
import jakarta.servlet.http.HttpServletRequest;
import jakarta.servlet.http.HttpServletResponse;
import org.springframework.security.core.AuthenticationException;
import org.springframework.security.web.authentication.AuthenticationFailureHandler;
import java.io.IOException;
public class CustomAuthenticationFailureHandler implements AuthenticationFailureHandler {
@Override
public void onAuthenticationFailure(HttpServletRequest request, HttpServletResponse response, AuthenticationException exception) throws IOException, ServletException {
response.sendRedirect("/login?error=true");
}
}
|
Step 7: Create the new package named as the securityconfig and create the java interface named as the SecurityConfig.
Go to src > com.gfg.customauthenticationfailure > securityconfig > SecurityConfig and put the below code.
Java
package com.gfg.customauthenticationfailure.securityconfig;
import com.gfg.customauthenticationfailure.repository.UserRepository;
import org.springframework.beans.factory.annotation.Autowired;
import org.springframework.context.annotation.Bean;
import org.springframework.context.annotation.Configuration;
import org.springframework.security.authentication.AuthenticationManager;
import org.springframework.security.config.annotation.authentication.builders.AuthenticationManagerBuilder;
import org.springframework.security.config.annotation.web.builders.HttpSecurity;
import org.springframework.security.config.annotation.web.configuration.EnableWebSecurity;
import org.springframework.security.core.userdetails.UserDetails;
import org.springframework.security.crypto.bcrypt.BCryptPasswordEncoder;
import org.springframework.security.crypto.password.PasswordEncoder;
@Configuration
@EnableWebSecurity
public class SecurityConfig {
@Autowired
private UserRepository userRepository;
protected void configure(HttpSecurity http) throws Exception {
http
.authorizeRequests()
.requestMatchers("/signup").permitAll()
.anyRequest().authenticated()
.and()
.formLogin()
.loginPage("/login")
.failureHandler(new CustomAuthenticationFailureHandler())
.permitAll()
.and()
.logout()
.permitAll();
}
@Bean
PasswordEncoder passwordEncoder() {
return new BCryptPasswordEncoder();
}
}
|
Step 8: Create the new package named as the request and create the java interface named as the SignRequest.
Go to src > com.gfg.customauthenticationfailure > request > SignRequest and put the below code.
Java
package com.gfg.customauthenticationfailure.request;
import lombok.AllArgsConstructor;
import lombok.Data;
import lombok.NoArgsConstructor;
@Data
@AllArgsConstructor
@NoArgsConstructor
public class SigninRequest {
String username;
String password;
}
|
Step 9: Create the new package named as the controller and create the java interface named as the UserController.
Go to src > com.gfg.customauthenticationfailure > controller > UserController and put the below code.
Java
package com.gfg.customauthenticationfailure.controller;
import com.gfg.customauthenticationfailure.model.User;
import com.gfg.customauthenticationfailure.repository.UserRepository;
import com.gfg.customauthenticationfailure.service.UserService;
import org.springframework.beans.factory.annotation.Autowired;
import org.springframework.security.authentication.UsernamePasswordAuthenticationToken;
import org.springframework.security.crypto.password.PasswordEncoder;
import org.springframework.web.bind.annotation.PostMapping;
import org.springframework.web.bind.annotation.RequestBody;
import org.springframework.web.bind.annotation.RestController;
import org.springframework.security.core.Authentication;
import org.springframework.security.core.context.SecurityContextHolder;
import com.gfg.customauthenticationfailure.request.SigninRequest;
@RestController
public class UserController {
@Autowired
private UserRepository userRepository;
@Autowired
private PasswordEncoder passwordEncoder;
@PostMapping("/signup")
public void signUp(@RequestBody User user) {
user.setPassword(passwordEncoder.encode(user.getPassword()));
userRepository.save(user);
}
@Autowired
private UserService userService;
@PostMapping("/signin")
public void signIn(@RequestBody SigninRequest signInRequest) throws Exception {
User user = userService.findByUsername(signInRequest.getUsername());
if (user != null && user.getPassword().equals(signInRequest.getPassword())) {
Authentication authentication = new UsernamePasswordAuthenticationToken(user.getUsername(), user.getPassword());
SecurityContextHolder.getContext().setAuthentication(authentication);
} else {
throw new Exception("Invalid username or password");
}
}
}
|
Step 10: Open the main class and put the below code.
Java
package com.gfg.customauthenticationfailure;
import org.springframework.boot.SpringApplication;
import org.springframework.boot.autoconfigure.SpringBootApplication;
@SpringBootApplication
public class CustomAuthenticationFailureApplication {
public static void main(String[] args) {
SpringApplication.run(CustomAuthenticationFailureApplication.class, args);
}
}
|
pom.xml File:
XML
<?xml version="1.0" encoding="UTF-8"?>
<modelVersion>4.0.0</modelVersion>
<parent>
<groupId>org.springframework.boot</groupId>
<artifactId>spring-boot-starter-parent</artifactId>
<version>3.2.3</version>
<relativePath/>
</parent>
<groupId>com.gfg</groupId>
<artifactId>CustomAuthenticationFailure</artifactId>
<version>0.0.1-SNAPSHOT</version>
<name>CustomAuthenticationFailure</name>
<description>CustomAuthenticationFailure</description>
<properties>
<java.version>17</java.version>
</properties>
<dependencies>
<dependency>
<groupId>org.springframework.boot</groupId>
<artifactId>spring-boot-starter-data-mongodb</artifactId>
</dependency>
<dependency>
<groupId>org.springframework.boot</groupId>
<artifactId>spring-boot-starter-security</artifactId>
</dependency>
<dependency>
<groupId>org.springframework.boot</groupId>
<artifactId>spring-boot-starter-web</artifactId>
</dependency>
<dependency>
<groupId>org.springframework.boot</groupId>
<artifactId>spring-boot-devtools</artifactId>
<scope>runtime</scope>
<optional>true</optional>
</dependency>
<dependency>
<groupId>org.projectlombok</groupId>
<artifactId>lombok</artifactId>
<optional>true</optional>
</dependency>
<dependency>
<groupId>org.springframework.boot</groupId>
<artifactId>spring-boot-starter-test</artifactId>
<scope>test</scope>
</dependency>
<dependency>
<groupId>org.springframework.security</groupId>
<artifactId>spring-security-test</artifactId>
<scope>test</scope>
</dependency>
</dependencies>
<build>
<plugins>
<plugin>
<groupId>org.springframework.boot</groupId>
<artifactId>spring-boot-maven-plugin</artifactId>
<configuration>
<excludes>
<exclude>
<groupId>org.projectlombok</groupId>
<artifactId>lombok</artifactId>
</exclude>
</excludes>
</configuration>
</plugin>
</plugins>
</build>
</project>
|
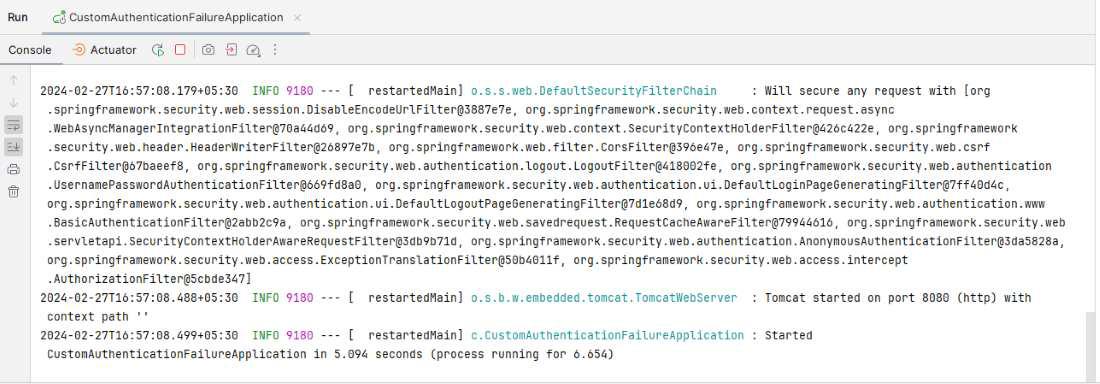
Step 11: Once completed the spring project and its run as the spring application then the application runs the port 8080.
Share your thoughts in the comments
Please Login to comment...