JPA – Criteria SELECT Clause
Last Updated :
05 Apr, 2024
In Java, JPA is defined as the Java Persistence API and the Criteria API provides a systematic way to create queries dynamically. It provides more flexibility and type safety compared to JPQL (Java Persistence Query Language).
Criteria SELECT Clause
The Criteria API in JPA allows developers to construct queries using various Java objects that represent parts of the query such as SELECT, FROM, WHERE, etc. The SELECT clause specifies the entity’s attributes that must be retrieved from the database.
Steps to Construct Criteria SELECT Clause:
Below are the steps to construct the JPA Criteria SELECT Clause.
Step 1: Create Criteria Builder
The CriteriaBuilder is obtained from EntityManager which can start the point for creating the CriteriaQuery objects.
CriteriaBuilder cb = entityManager.getCriteriaBuilder();
Step 2: Create Criteria Query
The CriteriaQuery is created, then the specifying result type. We are specifying the array of the objects, but we can also specify any desired result type such as the entity class itself.
CriteriaQuery<Object[]> query = cb.createQuery(Object[].class);
Step 3: Specify Root Entity
We define the root of the entity from which the query starts. In the example, we are using the User Entity as the root.
Root<User> root = query.from(User.class);
Step 4: Add SELECT Clause
The select() method of the CriteriaQuery can be used to the specify the attributes to the retrieve. We are selecting the id and name attributes of the User entity.
query.select(cb.array(root.get("id"), root.get("name")));Step 5: Execute Query
Finally, the query can be executed using the EntityManager and the results are the retrieved as the array of the objects.
List<Object[]> results = entityManager.createQuery(query).getResultList();
Step-by-Step Implementation to perform Criteria SELECT Clause in JPA
We can develop a simple JPA application by performing the Criteria SELECT Clause of the project.
Step 1: First, we will create the JPA project using the IntelliJ Idea named as jpa-select-clause of the project.
Step 2: Now, we will add the below dependencies into the JPA project.
Dependencies:
 <dependency>
            <groupId>org.hibernate.orm</groupId>
            <artifactId>hibernate-core</artifactId>
            <version>6.0.2.Final</version>
        </dependency>
        <dependency>
            <groupId>org.glassfish.jaxb</groupId>
            <artifactId>jaxb-runtime</artifactId>
            <version>3.0.2</version>
        </dependency>
        <dependency>
            <groupId>org.junit.jupiter</groupId>
            <artifactId>junit-jupiter-api</artifactId>
            <version>${junit.version}</version>
            <scope>test</scope>
        </dependency>
        <dependency>
            <groupId>org.junit.jupiter</groupId>
            <artifactId>junit-jupiter-engine</artifactId>
            <version>${junit.version}</version>
            <scope>test</scope>
        </dependency>
        <dependency>
            <groupId>mysql</groupId>
            <artifactId>mysql-connector-java</artifactId>
            <version>8.0.28</version>
        </dependency>
Once the project creation completed, then the file structure will look like the below image.

Step 3: Open persistance.xml and put the below code for the MYSQL database configuration of the database.
XML
<?xml version="1.0" encoding="UTF-8" standalone="yes"?>
<persistence xmlns="https://jakarta.ee/xml/ns/persistence"
             xmlns:xsi="http://www.w3.org/2001/XMLSchema-instance"
             xsi:schemaLocation="https://jakarta.ee/xml/ns/persistence https://jakarta.ee/xml/ns/persistence/persistence_3_0.xsd"
             version="3.0">
    <persistence-unit name="examplePU">
        <class>User</class>
        <class>JPAUtil</class>
        <properties>
            <property name="javax.persistence.jdbc.url" value="jdbc:mysql://localhost:3306/example"/>
            <property name="javax.persistence.jdbc.user" value="root"/>
            <property name="javax.persistence.jdbc.password" value=""/>
            <property name="javax.persistence.jdbc.driver" value="com.mysql.jdbc.Driver"/>
            <property name="hibernate.dialect" value="org.hibernate.dialect.MySQL5Dialect"/>
            <property name="hibernate.hbm2ddl.auto" value="update"/>
        </properties>


    </persistence-unit>
</persistence>
Step 4: Create the new Entity Java class named as the User.
Go to src > main > java > User and put the below code.
Java
import jakarta.persistence.Entity;
import jakarta.persistence.GeneratedValue;
import jakarta.persistence.GenerationType;
import jakarta.persistence.Id;

@Entity
public class User {
    @Id
    @GeneratedValue(strategy = GenerationType.IDENTITY)
    private Long id;
    private String name;
    private String email;

    // Constructors, getters, and setters
    public User() {}

    public User(String name, String email) {
        this.name = name;
        this.email = email;
    }

    public Long getId() {
        return id;
    }

    public void setId(Long id) {
        this.id = id;
    }

    public String getName() {
        return name;
    }

    public void setName(String name) {
        this.name = name;
    }

    public String getEmail() {
        return email;
    }

    public void setEmail(String email) {
        this.email = email;
    }
    @Override
    public String toString() {
        return "User{" +
                "id=" + id +
                ", username='" + name + '\'' +
                ", email='" + email + '\'' +
                '}';
    }
}
Step 5: Create the new Entity Java class named as JPAUtil.
Go to src > main > java > JPAUtil and put the below code.
Java
/*
 * JPAUtil.java
 * This class provides utility methods for managing the EntityManagerFactory in a Java Persistence API (JPA) application.
 */
import jakarta.persistence.EntityManagerFactory;
import jakarta.persistence.Persistence;

public class JPAUtil {
    // Define the persistence unit name
    private static final String PERSISTENCE_UNIT_NAME = "examplePU";

    // Declare the EntityManagerFactory variable
    private static EntityManagerFactory entityManagerFactory;

    // Static initialization block to create the EntityManagerFactory
    static {
        try {
            entityManagerFactory = Persistence.createEntityManagerFactory(PERSISTENCE_UNIT_NAME);
        } catch (Throwable ex) {
            // Print error message if initialization fails
            System.err.println("Initial EntityManagerFactory creation failed: " + ex);
            // Propagate the error using ExceptionInInitializerError
            throw new ExceptionInInitializerError(ex);
        }
    }

    // Getter method to retrieve the EntityManagerFactory instance
    public static EntityManagerFactory getEntityManagerFactory() {
        return entityManagerFactory;
    }

    // Method to shutdown the EntityManagerFactory
    public static void shutdown() {
        if (entityManagerFactory != null) {
            entityManagerFactory.close();
        }
    }
}
Step 6: Create the new Entity Java class named as the MainApplication.
Go to src > main > java > MainApplication and put the below code.
Java
import jakarta.persistence.EntityManager;
import jakarta.persistence.criteria.CriteriaBuilder;
import jakarta.persistence.criteria.CriteriaQuery;
import jakarta.persistence.criteria.Root;

import java.util.List;

public class MainApplication {
    public static void main(String[] args) {
        EntityManager entityManager = JPAUtil.getEntityManagerFactory().createEntityManager();

        // Add five user data entries
        entityManager.getTransaction().begin();
        entityManager.persist(new User("raju", "raju@example.com"));
        entityManager.persist(new User("eswar", "eswar@example.com"));
        entityManager.persist(new User("jagan", "jagan@example.com"));
        entityManager.persist(new User("Eva", "eva@example.com"));
        entityManager.persist(new User("Michael", "michael@example.com"));
        entityManager.getTransaction().commit();

        // Use the Criteria SELECT clause to retrieve a specific attribute
        CriteriaBuilder cb = entityManager.getCriteriaBuilder();
        CriteriaQuery<Object[]> query = cb.createQuery(Object[].class);
        Root<User> root = query.from(User.class);
        query.select(cb.array(root.get("id"), root.get("name")));

        entityManager.getTransaction().begin();
        List<Object[]> results = entityManager.createQuery(query).getResultList();
        entityManager.getTransaction().commit();

        // Display the retrieved attributes
        for (Object[] result : results) {
            Long userId = (Long) result[0];
            String userName = (String) result[1];
            System.out.println("User ID: " + userId + ", Name: " + userName);
        }

        entityManager.close();
        JPAUtil.shutdown();
    }
}
pom.xml:
XML
<?xml version="1.0" encoding="UTF-8"?>
<project xmlns="http://maven.apache.org/POM/4.0.0"
         xmlns:xsi="http://www.w3.org/2001/XMLSchema-instance"
         xsi:schemaLocation="http://maven.apache.org/POM/4.0.0 https://maven.apache.org/xsd/maven-4.0.0.xsd">
    <modelVersion>4.0.0</modelVersion>

    <groupId>org.example</groupId>
    <artifactId>jpa-select-cause</artifactId>
    <version>1.0-SNAPSHOT</version>
    <name>jpa-select-cause</name>

    <properties>
        <project.build.sourceEncoding>UTF-8</project.build.sourceEncoding>
        <maven.compiler.target>11</maven.compiler.target>
        <maven.compiler.source>11</maven.compiler.source>
        <junit.version>5.9.2</junit.version>
    </properties>

    <dependencies>
            <dependency>
                <groupId>org.hibernate.orm</groupId>
                <artifactId>hibernate-core</artifactId>
                <version>6.0.2.Final</version>
            </dependency>
            <dependency>
                <groupId>org.glassfish.jaxb</groupId>
                <artifactId>jaxb-runtime</artifactId>
                <version>3.0.2</version>
            </dependency>
            <dependency>
                <groupId>org.junit.jupiter</groupId>
                <artifactId>junit-jupiter-api</artifactId>
                <version>${junit.version}</version>
                <scope>test</scope>
            </dependency>
            <dependency>
                <groupId>org.junit.jupiter</groupId>
                <artifactId>junit-jupiter-engine</artifactId>
                <version>${junit.version}</version>
                <scope>test</scope>
            </dependency>
            <dependency>
                <groupId>mysql</groupId>
                <artifactId>mysql-connector-java</artifactId>
                <version>8.0.28</version>
            </dependency>
    </dependencies>

    <build>
        <plugins>
        </plugins>
    </build>
</project>
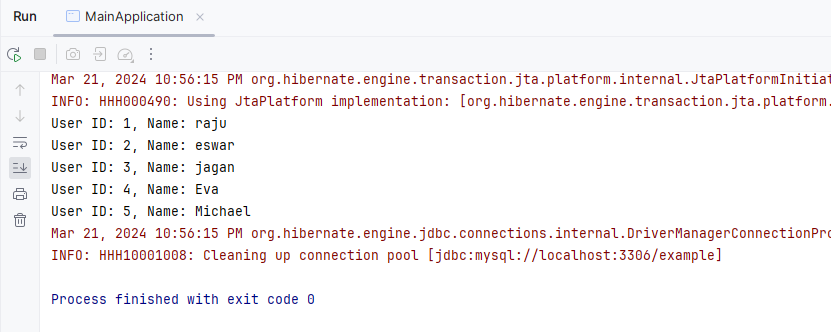
Step 7: Once the project is completed, run the application. It will then show the User ID, and name as output. Refer the below output image for the better understanding of the concept.
By the following the above steps of the article, developers can gain the solid understanding of the how to effectively use the Criteria SELECT clause in their JPA applications.
Share your thoughts in the comments
Please Login to comment...