Implement Stack Data Structure using ReactJS
Last Updated :
02 Nov, 2023
To implement Stack Data Structure using React JS and display it on the application. we will use the npm rooks package to create stack and its functionalities.
Prerequisites
Approach to Implement Stack in ReactJs
To implement the stack we will use a custom hook, i.e. the useStackState hook provided by the Rooks package for React. It manages the state in the form of a stack. It takes an array as an argument and returns array items containing list, listInReverse, and object with attributes push, pop, peek, and length.
Steps to create React Application
Step 1: Create a React application using the following command:
npx create-react-application demo
Step 2: After creating your project folder i.e. demo, move to it using the following command:
cd demo
Step 3: Install Rooks from npm.
npm i rooks
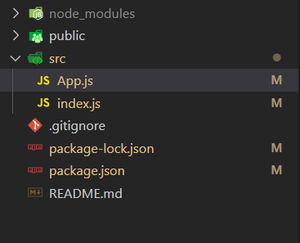
Project Structure:
The project should look like this.
The updated dependencies in package.json will look like:
{
    "dependencies": {
        "@testing-library/jest-dom": "^5.17.0",
        "@testing-library/react": "^13.4.0",
        "@testing-library/user-event": "^13.5.0",
        "react": "^18.2.0",
        "react-dom": "^18.2.0",
        "react-scripts": "5.0.1",
        "rooks": "^7.14.1",
        "web-vitals": "^2.1.4"
    }
}
Example: The below example will illustrate the Data structure stack implementation in the React JS.
Javascript
import React, { useRef } from "react";
import { useStackState } from "rooks";
export default function App() {
const numberToPushRef = useRef(3);
const [
list,
{ push, pop, peek, length },
listInReverse,
] = useStackState([1, 2, 3]);
function addToStack() {
numberToPushRef.current =
numberToPushRef.current + 1;
push(numberToPushRef.current);
}
return (
<>
<h1 style={{ color: "blue", margin: "20px" }}>
Stack
</h1>
<div
style={{
display: "block",
fontSize: "20px",
margin: "20px",
}}
>
{listInReverse.map((item) => {
return (
<div
style={{
width: "30px",
height: "30px",
background: "#a3fc9d",
borderRadius: "5px",
margin: "10px",
textAlign: "center",
}}
key={item}
>
{item}
</div>
);
})}
</div>
<button
style={{
margin: "20px",
background: "#f8e1ee",
width: "200px",
borderRadius: "5px",
padding: "10px",
}}
onClick={addToStack}
>
Push
</button>
<button
style={{
margin: "20px",
background: "#bbfdd8",
width: "200px",
borderRadius: "5px",
padding: "10px",
}}
onClick={pop}
warning
>
Pop
</button>
<p
style={{
color: "#e84917",
fontSize: "20px",
margin: "20px",
}}
>
Top Element : {peek()}
</p>
<p
style={{
color: "#175ce8",
fontSize: "20px",
margin: "20px",
}}
>
Stack Size : {length}
</p>
</>
);
}
|
Step to Run Application: Run the application using the following command from the root directory of the project:
npm start
Output: Now open your browser and go to http://localhost:3000/, you will see the following output:

Share your thoughts in the comments
Please Login to comment...