Image Warping and Morphing are two methods used in computer graphics and image processing. They are used for tasks like transformation which include rotation, scaling etc., and even manipulation which is used to give creative effects. These methods are mostly used in video games, movies, face filters, and even for medical purposes.
In this article, we will go through these topics. We will be using Python’s OpenCV package to implement these techniques. I have used PyCharm IDE to perform these techniques.
Key Words
Before we dive into image warping and morphing, let’s first understand a few basic terminologies:
Image Warping
The image warping process means that it is a process of distorting an image using various transformations like scaling, rotation, translation, and more. This is also known as geometric transformation. Using this method we can see the image from another angle.
Example: If you have an image of a rectangle, and you want to rotate it by 45 degrees. You would create a rotation matrix, apply it to the image, and obtain its rotated version. This is an example of simple warping.
Morphing
Image morphing is a special form of image warping which is a simple and smooth transition between two or more images. In simple words, its like a transformation of one image to another. This is mostly seen in movies and animations.
For example: Suppose we want to transform one face into another face. So, the first step would be to select the corresponding features like eyes, nose, and mouth in both images. Then, we would create a smooth transition between these features to create a morphing effect. This is similar to an age filter.
Pixel
Pixel is the smallest unit of an image. Each pixel is a single point in the image and has attributes like color and intensity.
Transformation Matrix
Transformation matrix is used to represent geometric transformations like rotation, scaling, and translation. This helps us to control the image warping.
Implementation of Image Processing Techniques
Firstly, open your Pycharm IDE. After that, we need to install the opencv library into our environment. For that we go to the terminal of the IDE and type the following:
pip install opencv-python
-min.png)
installing opencv in pycharm terminal
This will install the opencv library and we are ready to use this package now.
Image Warping Process
Let us first dive into the image warping process step-by-step:
Step 1: Importing libraries
Now as we have our library installed, we have to import the libraries we are going to use. We are going to import open-cv as we are doing these tasks in python programming language. We would also need numpy library for numerical purposes. The code is as follows:
import cv2
import numpy as np
Step 2: Image Loading
We have to then load the image into the programming environment to work with it. The function used here is ‘cv2.imread’ function. The argument passed must be the path of the image present on your desktop.
image = cv2.imread(“pathofimage”)
Step 3: Choose your source and destination points
Now that we have our image we need to choose the source points and destination points, which means the points of image and where they should be after the transformation.
src_points = np.float32([[0,0],[100,0],[0,100],[100,100]])
dst_points = np.float32([[60, 60],[40,60],[0,40],[40,40]])
Here, the points are defined in array of numpy package. The order is top-left, top-right, bottom-left, bottom-right for the points in array.
Step 4: Calculating Transformation Matrix
Based on the chosen transformation, we need to construct a transformation matrix. For that we would use a pre-defined function called ‘getPerspectiveTransform‘.
matrix = cv2.getPerspectiveTransform(src_points, dst_points)
Step 5: Apply Transformation
Now using this matrix, we can apply transformation to the image.
warped_image = cv2.warpPerspective(image, matrix, (image.shape[1], image.shape[0]))
The ‘cv2.warpPerspective‘ function is used to apply the perspective warp to the image using the transformation ‘matrix‘. The image.shape[1] and image.shape[0] are the width and height of the image respectively. These are nothing but the dimensions of the image.
Step 6: Display Result
Now display the original and warped image to see the effects of the transformation using ‘imshow‘ function.
cv2.imshow(‘Original Image’, image)
cv2.imshow(‘Warped Image’, warped_image)
Step 7: Closing windows
We can press ‘0’ and close the image windows, which is done by the two functions given below, where first, the script waits till we press ‘0’ key on keyboard, and then closes the window when pressed. The functions used are ‘waitKey()‘ and ‘destroyAllWindows()‘.
cv2.waitKey(0)
cv2.destroyAllWindows()
Code
Python3
import cv2
import numpy as np
image = cv2.imread("C:/Users/preet/Desktop/warp.png")
src_points = np.float32([[0, 0], [image.shape[1] - 1, 0], [0, image.shape[0] - 1], [image.shape[1] - 1, image.shape[0] - 1]])
dst_points = np.float32([[100, 100], [image.shape[1] - 100, 100], [0, image.shape[0] - 1], [image.shape[1] - 1, image.shape[0] - 1]])
matrix = cv2.getPerspectiveTransform(src_points, dst_points)
warped_image = cv2.warpPerspective(image, matrix, (image.shape[1], image.shape[0]))
cv2.imshow('Original Image', image)
cv2.imshow('Warped Image', warped_image)
cv2.waitKey(0)
cv2.destroyAllWindows()
|
Output

before warping
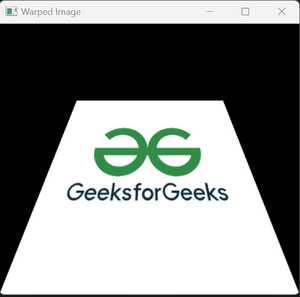
after warping
Image Morphing Process
Image morphing is an extension of image warping method, which is smooth transition between two images. Here we will see the steps needed for simple image morphing:
Step 1: Importing libraries
Similar to image warping, the first step is to import the libraries. We are going to import open-cv. The code is as follows:
import cv2
Step 2: Image Paths and Resizing
Now, we need to select two or more images we want to morph. These images need to have similar dimensions, so that the transition would appear smooth. Hence, we would resize the images. Here, ‘(x,x)‘ is the dimension of the image.
image_source = cv2.imread( “pathofimage1.jpg”)
image_source = cv2.resize(image_source, (x, x)
image_destination = cv2.imread(“pathofimage2.jpg”)
image_destination = cv2.resize(image_destination, (x, x))
Step 3: Image Blending
Now, we create a ‘for’ loop which will run for many steps, where each step is a step in the process of morphing. Now, we calculate the percentage to control the blending inside the for loop.
Here, ‘addWeighted‘ function helps in blending the source image and destination image using the percentage difference between the source image and destination image. In simple words, as the source images vanishes, the destination images becomes more clear. The morphed images gets displayed continuously until the for loop ends which is called the display of Morph Sequence.
for i in range(100):
percentage = float(i / 100)
imgAdd = cv2.addWeighted(image_source, 1 – percentage, image_destination, percentage, 0)
cv2.imshow(“Morphed”, imgAdd)
cv2.waitKey(100)
Step 4: Closing the window
This is final step to close the windows when 0 is pressed.
cv2.waitKey(0)
cv2.destroyAllWindows()
Now let’s see the how to do simple morphing using Python Open CV package:
Code
Python3
import cv2
source = "C:/Users/preet/Desktop/bird 1.png"
destination = "C:/Users/preet/Desktop/bird 2.png"
image_source = cv2.imread(source)
image_source = cv2.resize(image_source, (300, 300))
image_destination = cv2.imread(destination)
image_destination = cv2.resize(image_destination, (300, 300))
for i in range(100):
percentage = float(i / 100)
print(percentage)
imgAdd = cv2.addWeighted(image_source, 1 - percentage, image_destination, percentage, 0)
cv2.imshow("Morphed", imgAdd)
cv2.waitKey(100)
cv2.waitKey(0)
cv2.destroyAllWindows()
|
Output
bird morph
Conclusion
In conclusion, image warping and morphing are powerful techniques with many applications in computer graphics and image processing. Understanding these concepts and following the step-by-step processes will help us to apply these methods effectively in our projects and creative tasks.
FAQs on Image Warping and Morphing
1. What Is The Difference Between Image Warping and Morphing?
Image warping is a process of transforming an image using various methods like scaling, rotation, translation etc. Using this method we can see an image from another angle, whereas Morphing is special form of image warping that creates a smooth transition between images.
2. Can Image Warping Be Used For Image Enhancement?
Yes, image warping can be used for image enhancement like fixing the shape of image, changing the size etc.
3. What Software Or Libraries Can I Use For Image Warping And Morphing?
We can use OpenCV library, MATLAB software to do these image processing tasks. There are even more tools available which can be useful in performing these techniques.
4. Are There Any Real-World Applications Of Image Morphing?
Yes, image morphing is used in movies and animations for creating special effects. It is also sometimes used in medical imaging for visualizing some anatomical changes which we can’t see via naked eye. It can also be used to show how your face changes as you grow old.
5. Can Image Morphing Be Used For Video Sequences?
Yes, image morphing techniques can be even used to create video sequences by using morphing technique between frames, which creates smooth transitions in videos.
Share your thoughts in the comments
Please Login to comment...