How To Use Istio To Connect Microservices In Docker ?
Last Updated :
05 Feb, 2024
Istio is a service mesh that provides a way to control how different parts of an application share data with one another. It is designed to handle service-to-service communication in a microservices architecture, providing key features like:
- Traffic Management: Istio provides advanced routing capabilities, allowing you to control the flow of traffic and API calls between services. This includes A/B testing, canary rollouts, and more. Istio can route and load balance traffic across microservices. It also handles failovers, retries, circuit breakers, etc.
- Security: It enhances the security of microservices by enforcing policies for access control, encrypting communication between services, and providing authentication and authorization mechanisms. Istio’s security features provide a robust framework for securing communication.
- Observability: Istio offers monitoring and logging functionalities, giving insights into the behavior of services. It enables tracing and reporting capabilities across services. It integrates with tools like Prometheus, Grafana, and Jaeger for metrics, monitoring, and tracing.
- Platform independence: It’s designed to work with various orchestration platforms like Kubernetes, Mesosphere, and Cloud Foundry, providing flexibility in deployment environments.
How To Use Istio To Connect Microservices In Docker?
Istio is primarily designed to work with Kubernetes as its native orchestration platform, but it’s also possible to use Istio to connect microservices without Kubernetes. However, Istio’s functionality might be limited compared to its capabilities within a Kubernetes environment.
Steps To Use Istio To Connect Microservices in Docker
To use Istio to connect microservices in Docker, you’ll need to follow a series of steps. Here, I’ll explain each step in detail and provide commands for a basic setup. Note that this assumes you already have Docker and a Kubernetes cluster available.
Step 1: Install Docker and Kubernetes: Ensure that Docker is installed on your system. You’ll also need a Kubernetes cluster. You can set up a local Kubernetes cluster using Minikube or kind.


Step 2: Installation of Istio: Visit the official Istio website and download the latest release of Istio.


- Add the ‘istioctl’ client to your PATH
export PATH=$PWD/bin:$PATH
- Install Istio with the default profile
istioctl install --set profile=demo
Step 3: Deploy sample microservices: Create Docker containers for your microservices and deploy them in your Kubernetes cluster. Here’s an example using a simple web application.
- Clone the Istio GitHub repository, which includes the samples folder containing the Bookinfo application:
git clone https://github.com/istio/istio.git
cd istio
Navigate to the Istio directory to access the samples.
- The Bookinfo application consists of multiple microservices. Deploy them using the provided YAML files:

apiVersion: networking.istio.io/v1alpha3
kind: Gateway
metadata:
  name: bookinfo-gateway
spec:
  selector:
    istio: ingressgateway
  servers:
  - port:
      number: 80
      name: http
      protocol: HTTP
    hosts:
    - "*"
---
apiVersion: networking.istio.io/v1alpha3
kind: VirtualService
metadata:
  name: bookinfo
spec:
  hosts:
  - "*"
  gateways:
  - bookinfo-gateway
  http:
  - match:
    - uri:
        exact: /productpage
    - uri:
        prefix: /static
    - uri:
        exact: /login
    - uri:
        exact: /logout
    - uri:
        prefix: /api/v1/products
    route:
    - destination:
        host: productpage
        port:
          number: 9080
---
apiVersion: networking.istio.io/v1alpha3
kind: DestinationRule
metadata:
  name: productpage
spec:
  host: productpage
  subsets:
  - name: v1
    labels:
      version: v1
---
apiVersion: networking.istio.io/v1alpha3
kind: DestinationRule
metadata:
  name: reviews
spec:
  host: reviews
  subsets:
  - name: v1
    labels:
      version: v1
  - name: v2
    labels:
      version: v2
  - name: v3
    labels:
      version: v3
---
apiVersion: networking.istio.io/v1alpha3
kind: DestinationRule
metadata:
  name: ratings
spec:
  host: ratings
  subsets:
  - name: v1
    labels:
      version: v1
  - name: v2
    labels:
      version: v2
---
apiVersion: networking.istio.io/v1alpha3
kind: DestinationRule
metadata:
  name: details
spec:
  host: details
  subsets:
  - name: v1
    labels:
      version: v1
  - name: v2
    labels:
      version: v2
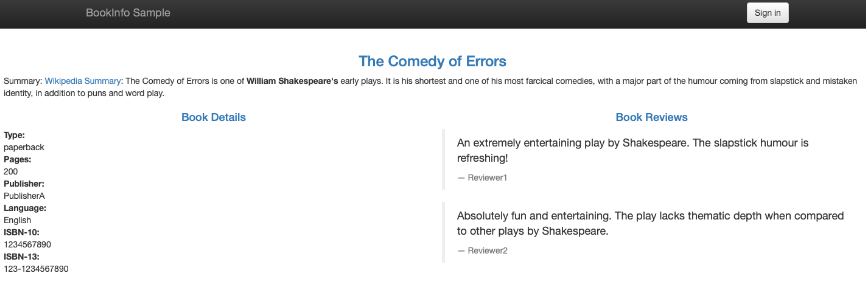
This command deploys the Bookinfo microservices, including productpage, details, ratings, and reviews services.
- Expose the microservices via a gateway.

Step 4: Verify The Deployment: Check the status of the deployed pods to ensure that the Bookinfo microservices are running:
kubectl get pods

The ‘READY’ column should show that each pod has 2/2 containers running.
Step 5: Access the Application: The Bookinfo application can be accessed through the productpage service.
export GATEWAY_URL=$(kubectl -n istio-system get service istio-ingressgateway -o jsonpath='{.status.loadBalancer.ingress[0].ip}')
curl -o /dev/null -s -w "%{http_code}\n" http://$GATEWAY_URL/productpage
That’s it! You’ve successfully deployed and accessed microservices using Istio in your Kubernetes cluster. Remember that the specifics of accessing your application may vary based on your Kubernetes setup (e.g., Minikube, kind, or a cloud-based Kubernetes cluster). Adjust the steps accordingly.
Benefits of Using Istio
- Improved visibility and monitoring of microservices.
- Easier troubleshooting and analysis when issues arise.
- More flexibility in traffic control and stability testing.
- Standardized security and policy enforcement.
- Reduced coupling between services.
- Easier integration and deployment of new services.
In conclusion, Istio is a powerful and flexible tool for managing the complexity of modern microservice architectures. Its modular and extensible design, along with its extensive ecosystem of tools and integrations, make it a compelling choice for organizations looking to adopt service mesh technology.
Conclusion
In conclusion, Istio provides a powerful platform for managing and securing microservices deployed in Docker containers. By using Istio’s advanced service mesh capabilities, you can enhance the communication, observability, and security of your microservices. Remember, start by defining your service mesh, configuring routing, implementing fault tolerance, and incorporating security measures. Lastly, continuously monitor and refine your setup to optimize performance and ensure seamless communication between your microservices. With Istio and Docker, you can foster a more resilient, scalable, and manageable microservices ecosystem.
By following this tutorial, you should now have a strong understanding of how to use Istio to connect microservices in Docker and manage their communication, observability, and security.
How to use Istio to connect microservices in docker – FAQ’s
How does Istio work with Docker?
Istio can be deployed alongside Docker containers to control and secure communication between microservices running in these containers.
What benefits does Istio offer for microservices in Docker?
Istio simplifies service-to-service communication, improves security with features like mutual TLS, enables traffic control, and offers powerful monitoring and tracing capabilities.
What’s the key advantage of using Istio in a Dockerized environment?
Istio’s main advantage lies in its ability to streamline communication, enhance security, and provide visibility into microservices interactions within Docker containers, boosting overall system reliability.
Does using Istio add complexity to my Docker setup?
Initially, setting up Istio might require some learning, but once configured, it streamlines and enhances communication between microservices without significantly increasing complexity.
Any potential challenges when using Istio with Docker?
Configuring Istio to suit specific microservices needs understanding and might pose challenges during initial setup, but the benefits outweigh the learning curve.
Share your thoughts in the comments
Please Login to comment...