How to Install Jekyll Theme?
Last Updated :
26 Oct, 2023
Jekyll is a static website that provides some cool inbuilt themes for the website. We can use this kind of theme for blog websites and here we don’t need to concentrate much on HTML and CSS part. Jekyll is written in Ruby by Tom Preston-Werner and it was first released in 2008 later it was taken over by Parker Moore who works in GitHub and released the Jekyll1. It supports loading content from JSON, YAML, and CSV files. Also, it is an engine used behind GitHub Pages can be combined with different front-end frameworks like Bootstrap.
Steps to Install Jekyll
1. Install Jekyll in your operating system if you don’t have Jekyll in your operating system.
2. To check if your device is pre-installed with Jekyll open your terminal and run the following command:
gem -v
If your system has Jekyll installed successfully will get the version of it as shown in the below picture:
3. After installing the Jekyll successfully create a website by following the steps in the link and after creating open it in the code editor as you wish. It is recommended to use VS code and after opening extend the folder it should look like as below:
Here instead of ‘blogapp’ you should the name you have given to your website.
4. Run the following command in the terminal to open the website:
bundle exec jekyll serve
5. Copy the Server address and paste it into your browser you should be able to see the default website as shown below:
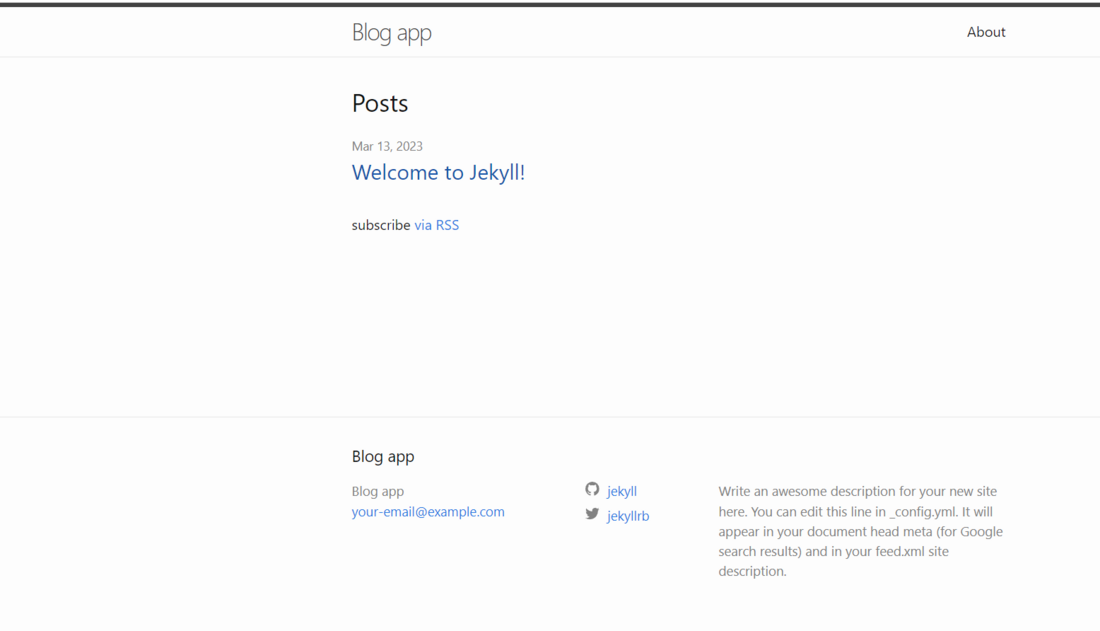
This the default template with the theme minima
Steps to Install Jekyll Themes
1. Open the link to find the themes.
2. Type Jekyll-theme in the search bar to find Jekyll themes and select one as you wish and click on it to open.
3. Click on the theme and open it. By opening that you will be landed on that particular theme page as shown below. Here I have chosen Cayman theme.
4. Click on the Homepage as shown in the above figure. You will be navigated to the GitHub page where you can view its documentation and you can also preview how it looks like by clicking on preview the theme to see what it looks like which is in Readme.md file.
5. If you are okay with that theme head back to the previous page and copy the GEMFILE and open the code editor and open the Gemfile as shown in the picture below.
6. Observe the Line 12 it is the by default minima theme below that line paste the line you have copied from the browser should like the below picture.
7. Open the terminal in the code editor and run the below command to install the new theme files. Make sure that you are in the app directory.
bundle install
8. After running the above command the new theme will be installed and you can see in the terminal the new theme is installed as shown below.
9. After successfully installing all the files. Open _config.yml and in 33 line change the theme name to the theme you have chosen as shown in below picture.
10. Again head back to the website and open the homepage again as motioned in the previous steps in the GitHub page click on _layouts and open the folder as shown in the image below.
11. Notedown the layout name here in my case it is default there may be multiple like default, post, etc.
12. Head to your editor and you need to make changes in three files about. markdown, index. markdown and in the welcome-to-jekyll.markdown as shown below.
13. Now open the individual file and observe the layout in Welcome-to-Jekyll. Markdown it will be posted and in about. Markdown it will be page and in index. Markdown it will be home but here in our case, it is default replace all the layouts in three files with default and do it according to your selected theme. If it has all three layouts let it be the same. After changing in it should look like as shown below.
14. After changing the files open your terminal and stop the previous running website by pressing CTRL+C and enter Y in both cases and run the below command again to preview the newly installed theme.
.jpg)
Comparison of before and after installing Jekyll theme
Share your thoughts in the comments
Please Login to comment...