How to Install dlib Library for python in windows 10
Last Updated :
17 Jul, 2022
In this article, We are going to know how to install dlib library for Python in windows 10.
Dlib is one of the most powerful and easy-to-go open-source library consisting of machine learning library/algorithms and various tools for creating software. It was initially released in 2002. It has been used widely in many big industries, companies and for various big projects, etc. It also has many more types of algorithms that have a greater role in the real world.
Dlib is mostly used for face recognition purposes. They analyzed the object/face using the functions called HOG (Histogram of oriented gradients) and CNN (Convolutional Neural Networks). Face recognition nowadays are been used widely in many applications.
How to install dlib library.
First of all we have to set up the environment for the installation of dlib library. There are a few things that should be pre-installed before installing the dlib library. If these things aren’t properly installed or set up the dlib will not get installed properly. Let us see how we can do it.
Step 1: Install Python
Install Python on Windows. and after that to check whether Python is properly installed or not check the python version using the below command.

Python Installed Successfully
Step 2: Install CMake
Install CMake from its official website https://cmake.org/download/ and make sure choose the right version according to your system configuration.
While installing CMake select Add CMake to the system PATH to avoid any error in the next steps.
Step 3: Install visual studio.
Install the c++ compiler of the visual studio code community version. For that go to the visual studio code official website https://visualstudio.microsoft.com/visual-cpp-build-tools/ and download the visual studio code community version after that as you can see in the below image, select Desktop development with c++ while installing VS code.
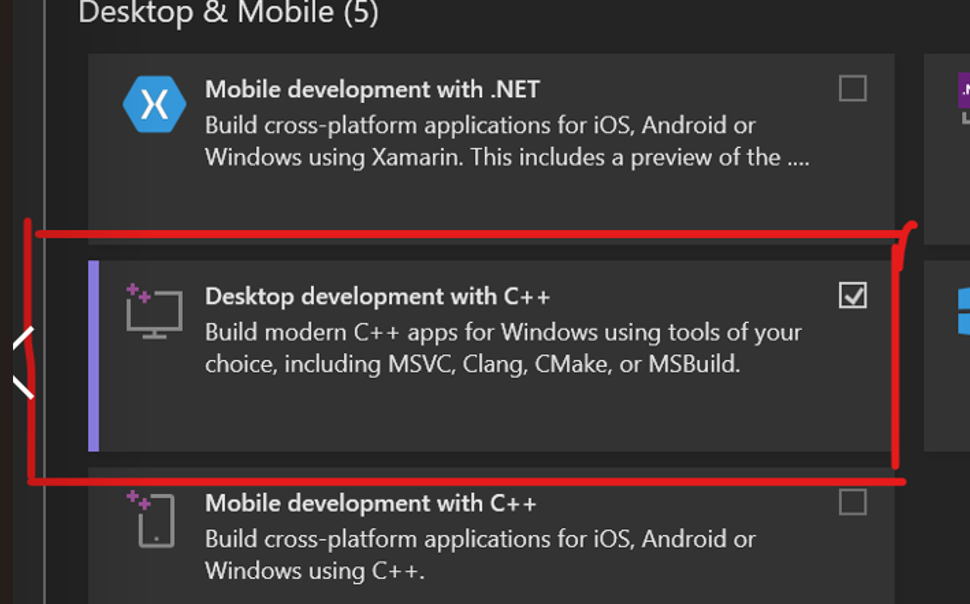
Installing Desktop development with c++
Step 4: Install cmake module.
After you have installed visual studio [Desktop development with c++] successfully, now go to your command prompt and type “pip install cmake”
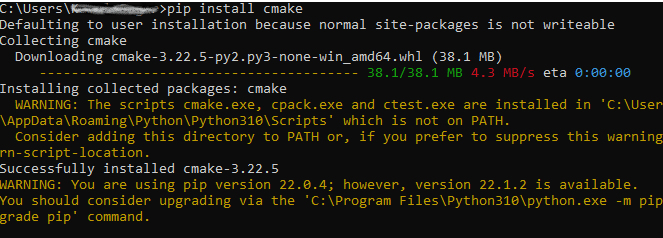
install cmake
Step 5: Install dlib library.
After you have installed cmake module successfully, go ahead and install the dlib library as shown in below image.
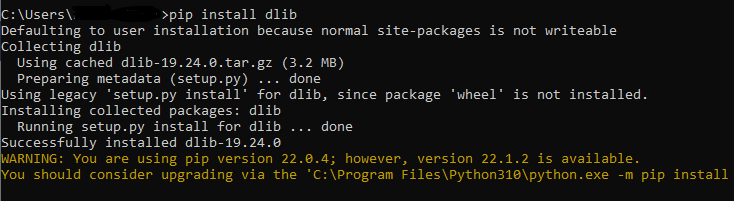
install dlib
Now, the dlib library is installed successfully and to verify the installation of dlib library open command prompt and type the command as shown in the below image.
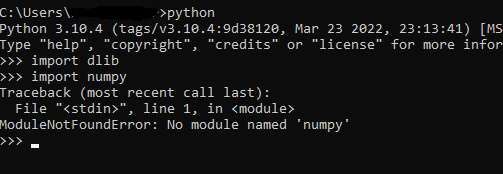
Verify dlib installation.
In the above code, we are importing dlib library and it is successfully imported without giving any error on the other hand “import numpy” gives an error because NumPy is not installed on the system.
Share your thoughts in the comments
Please Login to comment...