How to Install Angularjs on MacOS?
Last Updated :
26 Sep, 2022
AngularJS as the name suggests is a JavaScript-based framework. Being more precise AngularJS is an open-source front-end framework for the web. It is backed and maintained by Google. It has been in the market for a long time now, its initial release dated back to Oct 2010, and its last stable release was 12 months back in Oct 2020. AngularJS aims to be a simple framework for developing mainly single-page web applications by employing MVC & MVVM architecture. Its most popular use cause was to be used as the frontend of the application built with MERM stack.
As of now, everything is well with this framework but there is an announcement made by Google declaring that they will no longer be working on AngularJS to update the framework after December 2021 So after this, all the responsibility of maintaining this framework will entirely be shifted to the opensource community. They also suggested developers to migrate to Angular (v2) which was released in the year 2021 itself. All in all, it is one of the most used frameworks which served its intended purpose well.
Below we will see all the steps related to the installation of AngularJS on the macOS operating system.
Step 1: Downloading NodeJS
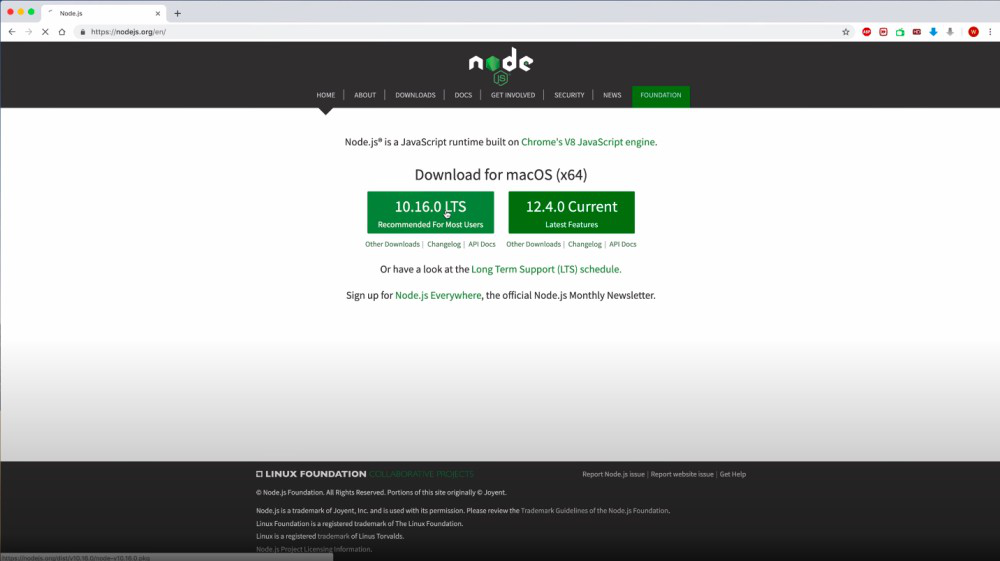
Node JS is a dependency that we require in order to install Angular JS. Node JS is a cross-platform JavaScript-based runtime environment for the backend. With this developers can write command-line tools and that is exactly what it will be used for in the further steps. First, go to the nodejs.org/en/ . This website will automatically detect your operating system and show two options to download. The first option will be the LTS version and the second option will be the latest version. We will download the LTS version since it will reduce the chances of a breakdown in the future.
Step 2: Install Angular CLI
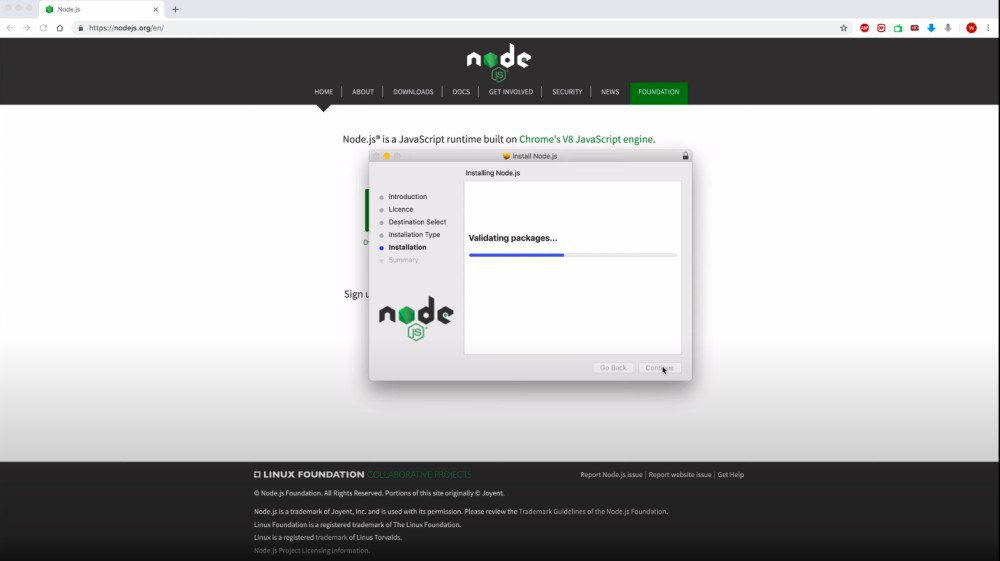
Now that we have downloaded the Node JS it is time to install it. So first, we need to click the downloaded file which will in turn open the installer. The installer will run through five different screens and we simply need to keep clicking the continue button. At the end of this process, we would have node js installed in our system.
In order to check if node js is actually installed in the system without any error, we can open the terminal and run the command npm. This should show the installed version and some other information.
Step 3: Use Node Package Manager (NPM) To Install Angular CLI
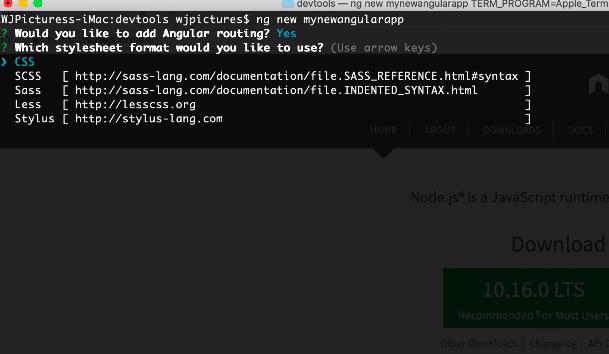
In this step, we are going to install the Angular CLI which is basically a command-line tool to interact with AngularJS and create apps. In order to install the Angular CLI, we need to open the terminal app and run any of the commands given below.
npm install -g @angular/cli
or
npm install -g @angular/cli@latest

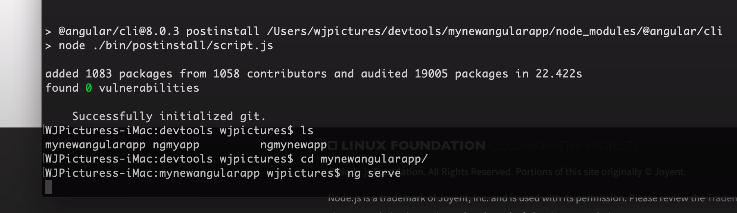
Once you have run the command to install Angular CLI you can actually check it but creating a sample Angular app and to do so you need to run the three commands given below.
1. Create a new Angular app.
ng new mynewangularapp
2. Move to the directory in which the new Angular app has been created.
cd mynewangularapp
3. Run the app on the local server.
ng serve
So this concluded all the steps in order to install AngularJS on macOS and create a sample app. In order to get more information on this topic consider visiting the official website of AngularJS.
Share your thoughts in the comments
Please Login to comment...