How to Import External JAR Files in Android Studio?
Last Updated :
18 Feb, 2021
A JAR (Java Archive) is a package file format typically used to aggregate many Java class files and associated metadata and resources (text, images, etc.) into one file to distribute application software or libraries on the Java platform. In simple words, a JAR file is a file that contains a compressed version of .class files, audio files, image files, or directories. We can imagine .jar files as a zipped file(.zip) that is created by using WinZip software. Even, WinZip software can be used to extract the contents of a .jar. So you can use them for tasks such as lossless data compression, archiving, decompression, and archive unpacking. Let us see how to create a .jar file:
To create a .jar file, use the jar cf command in the following way:
jar cf jarfilename inputfiles
Here, cf represents to create the file. For example, assuming our package pack is available in C:\directory, to convert it into a jar file into the pack.jar, we can give the command as:
C:\> jar cf pack.jar pack
Now, the pack.jar file is created. Let’s see the steps involved in importing or adding a JAR file in Android Studio:
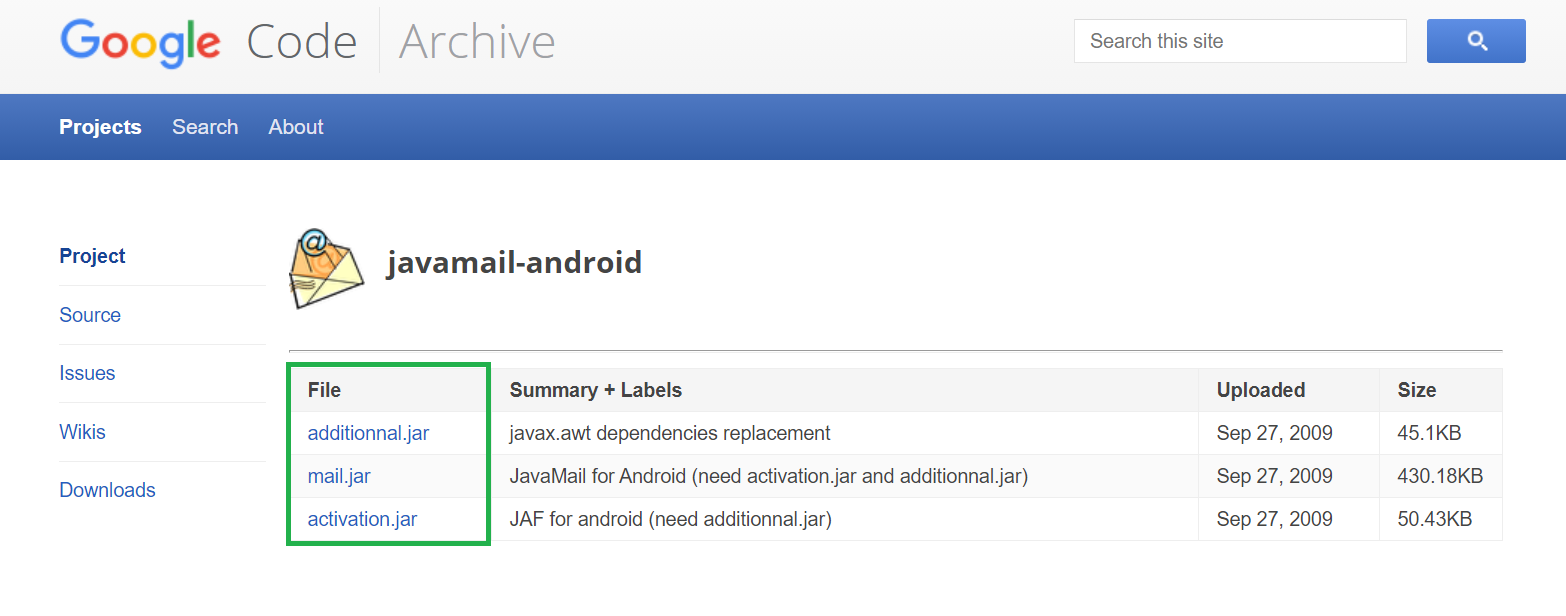
Step 1: Download any jar file as your requirement. For example, download the following three mail dependency JAR files for Android Studio. Please refer to this link to download those JAR files. Download all the three JAR files somewhere in the system.
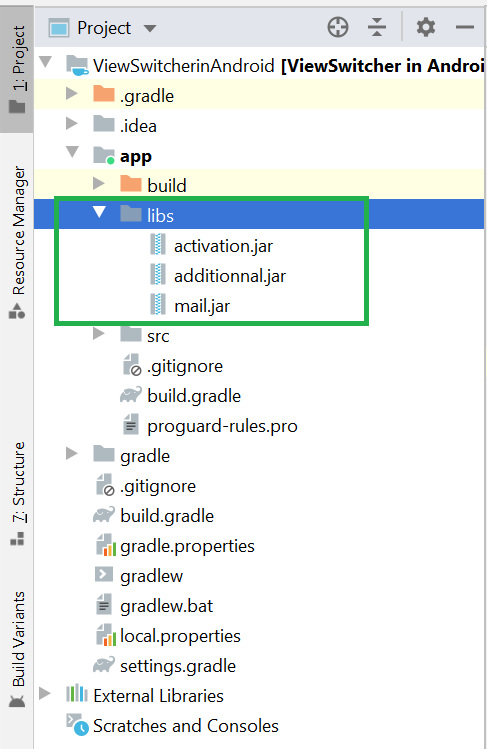
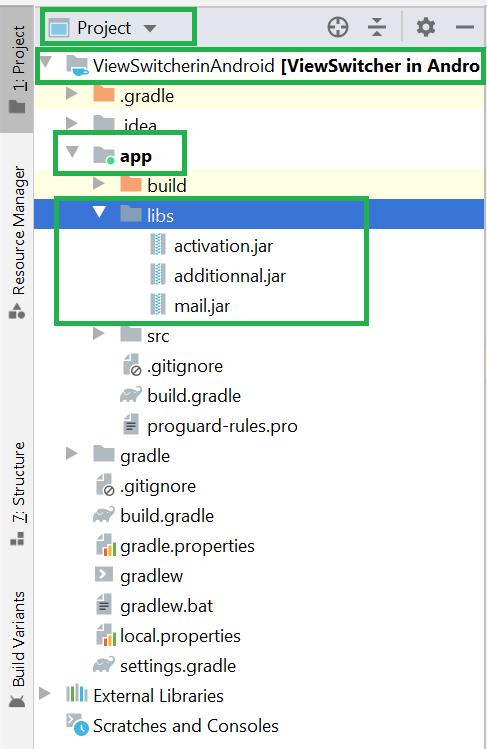
Step 2: Copy these three files and paste it into the libs folder as shown in the below image.
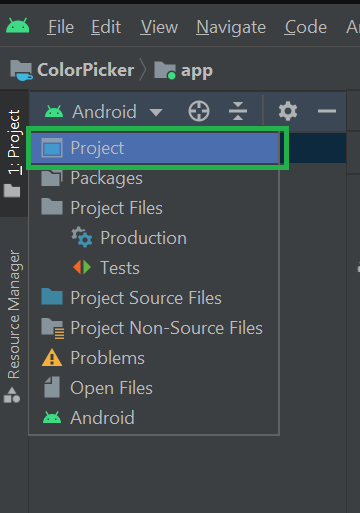
How to find the libs folder in Android Studio?
If you are unable to find the libs folder in Android studio then open your android project in “Project” mode If the project is already opened in the “Android” mode.
Then go to Your Project Name > app > libs and right-click on it and paste the downloaded JAR files. You may also refer to the below image.
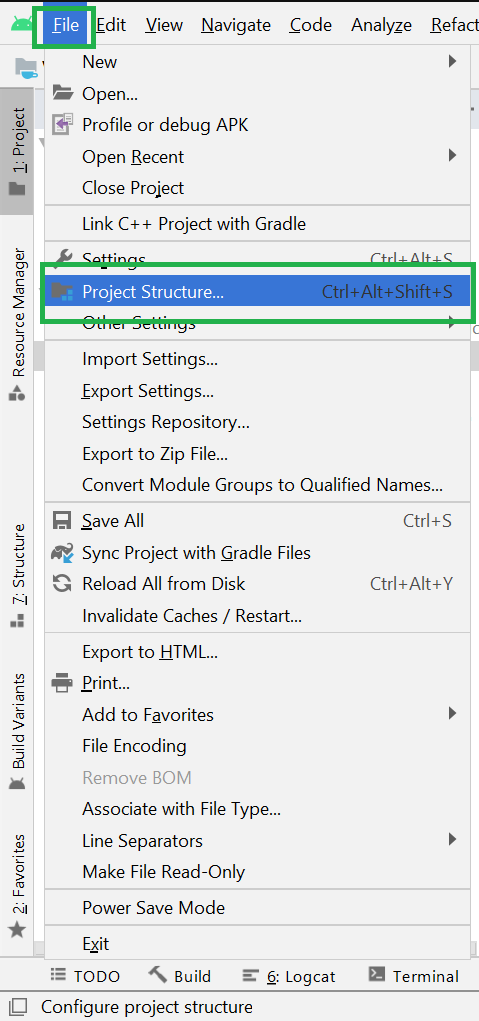
Step 3: Once the JAR files are successfully copied to the libs folder we will add them as dependency files. To do so first go to File > Project Structure as shown in the below image.
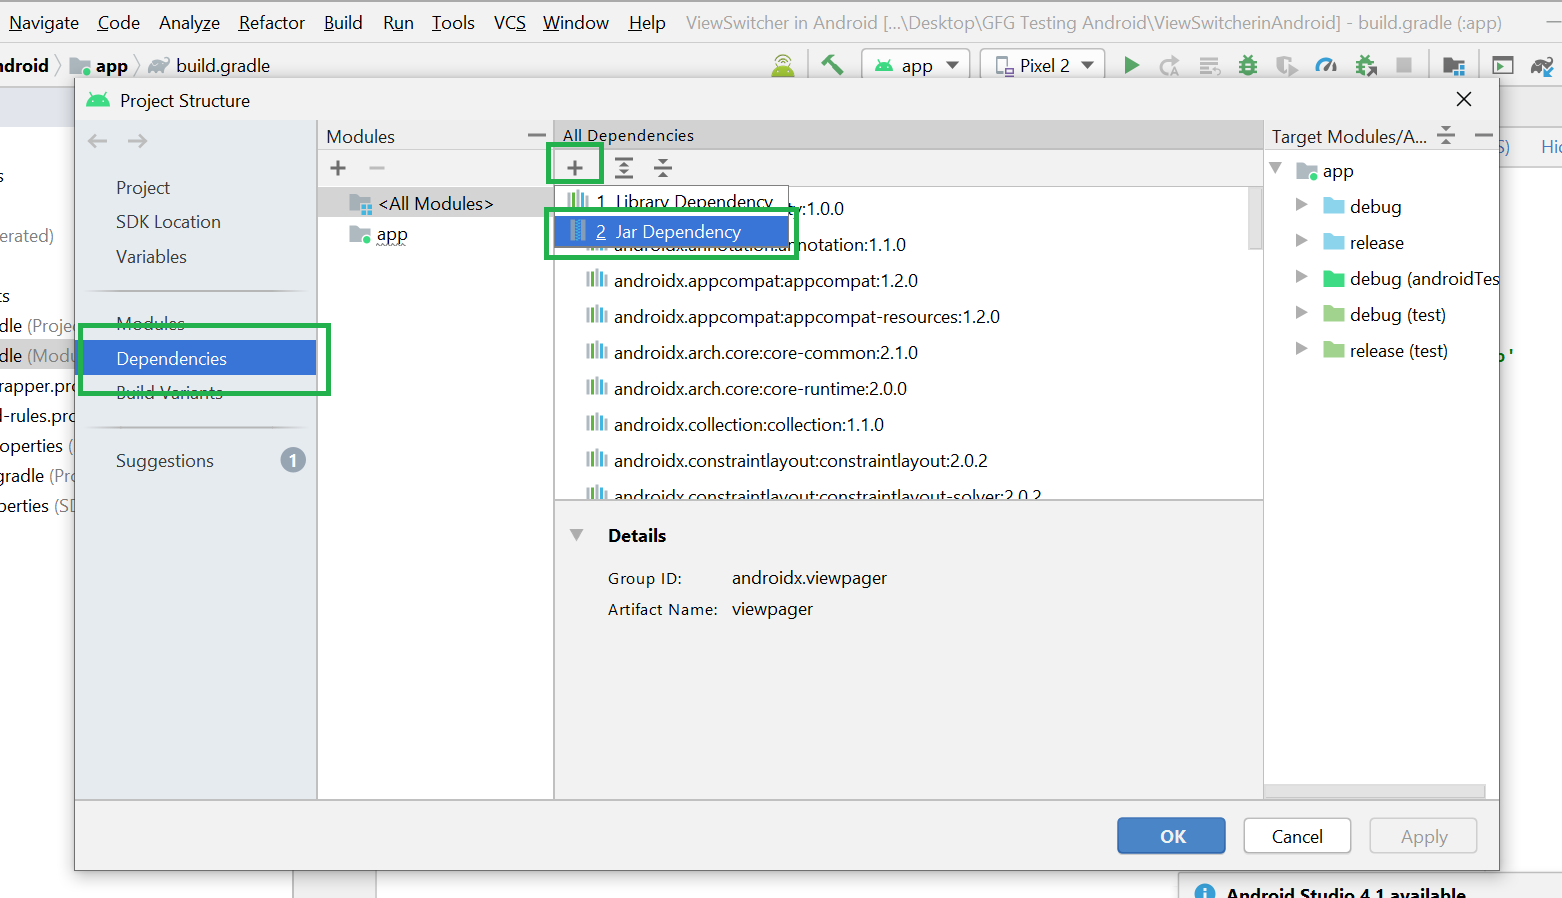
Step 4: A pop-up screen will arise like in the following image. Now click on the Dependencies then click on the ‘+‘ icon and select Jar Dependency as shown in the below image.
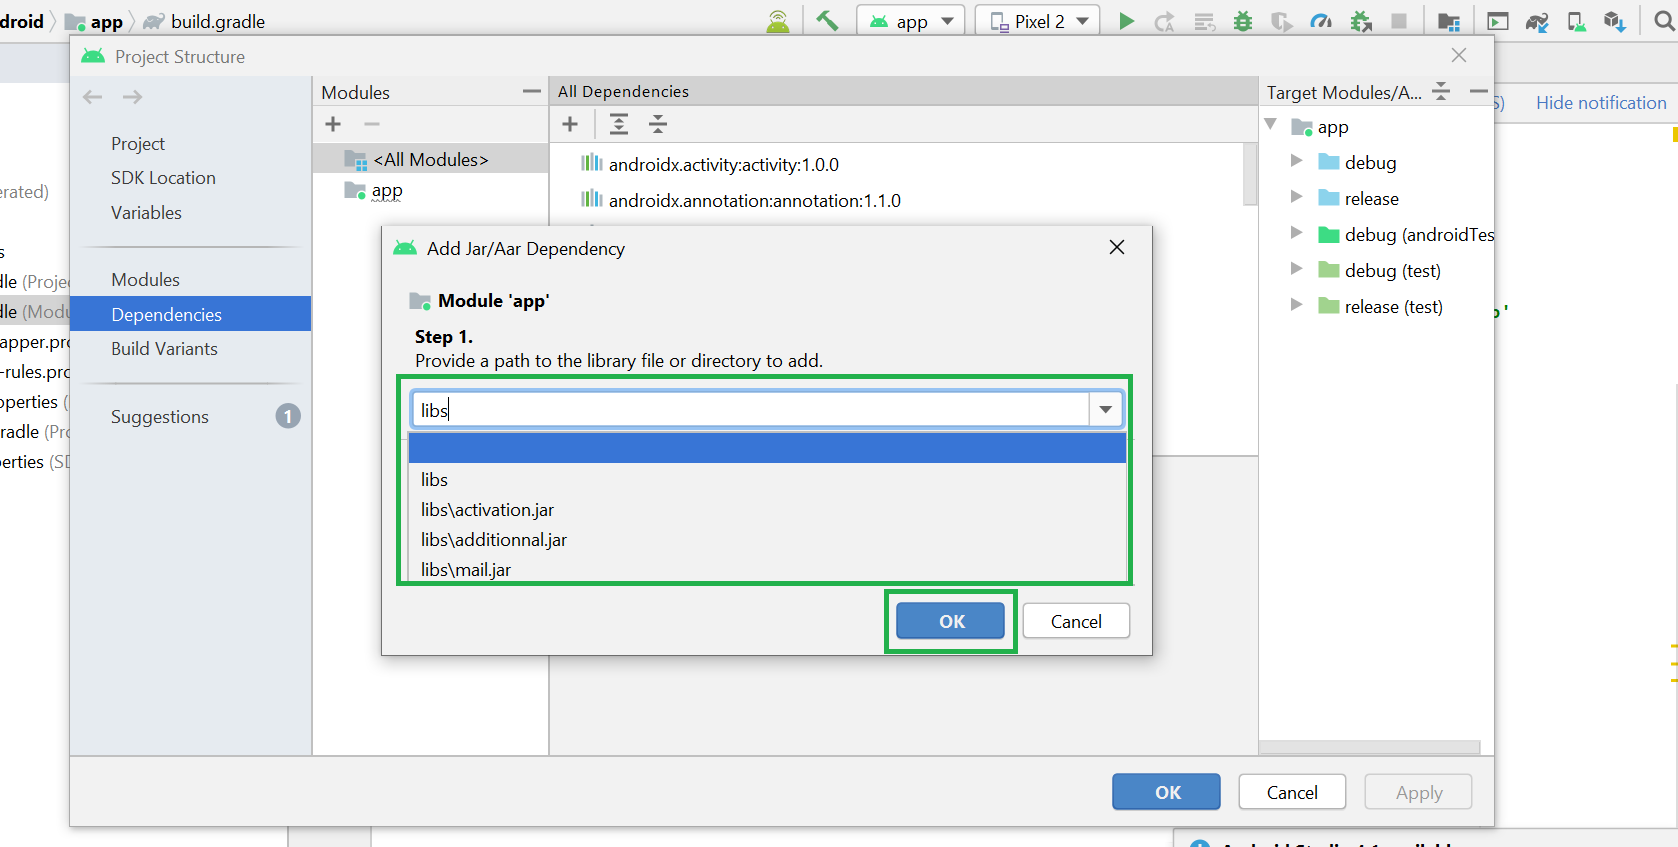
Step 5: After clicking on the Jar Dependency another small pop-up screen will arise like the following image and select the JAR file one by one and click on OK.
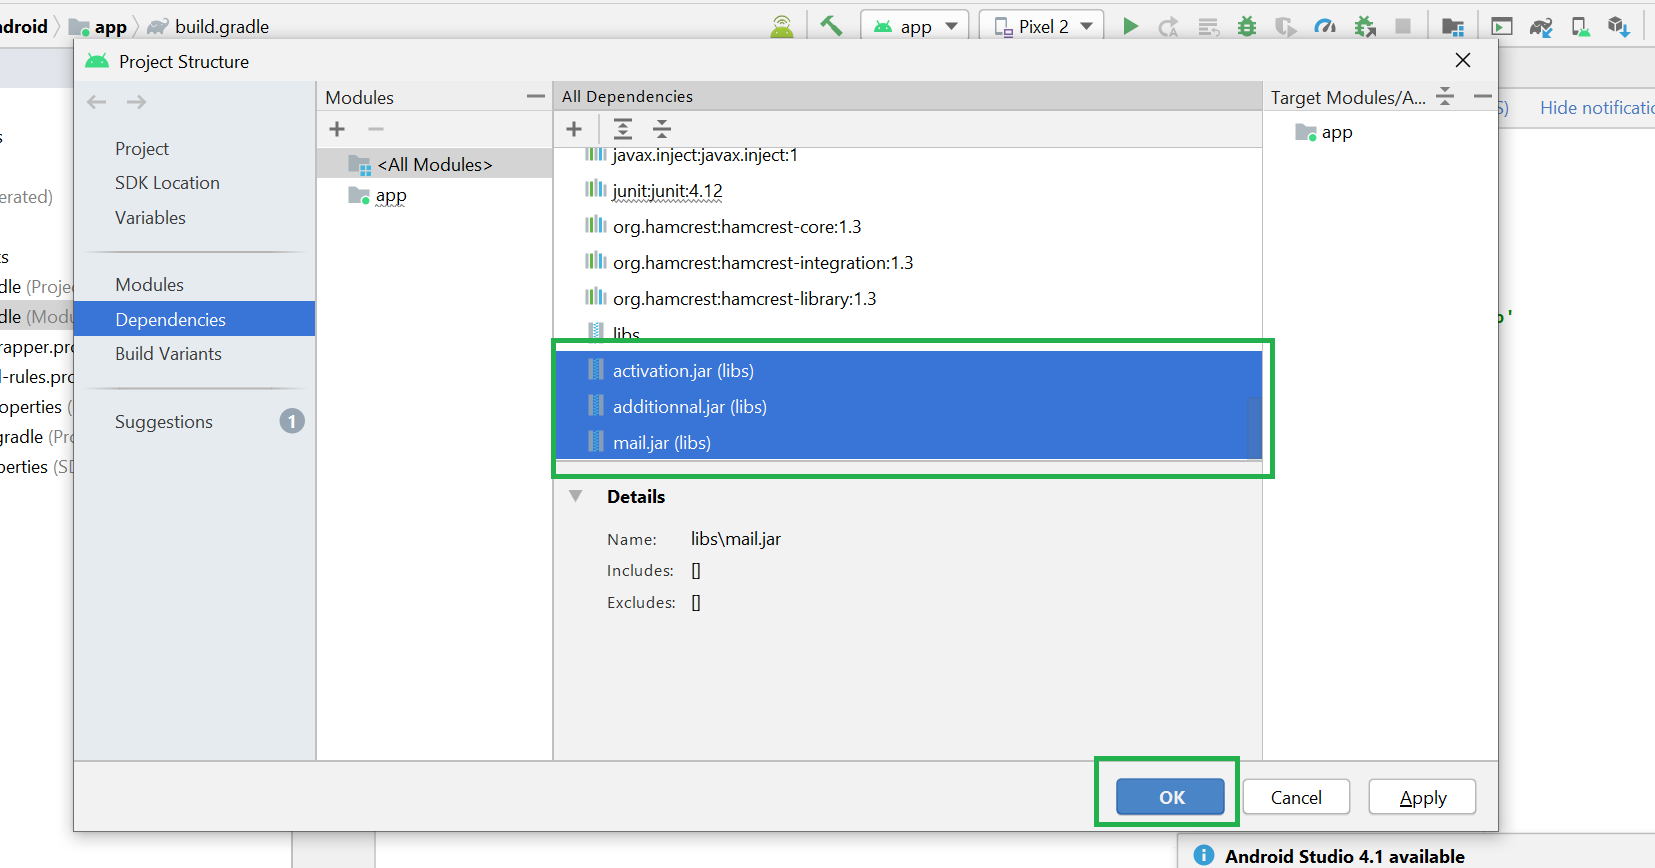
Step 6: Now select all jar files and click on the OK button and the Gradle will Start building.
This way you need to manually add anything in build.gradle file. After completion of the Gradle building, everything will be done and you are ready to use your External JAR Library.
Share your thoughts in the comments
Please Login to comment...