How to Import Data From One Page to Another in Flutter?
Last Updated :
13 Jun, 2022
Flutter is Google’s Mobile SDK to build native iOS and Android, Desktop (Windows, Linux, macOS), Web apps from a single codebase. When building applications with Flutter everything towards Widgets – the blocks with which the flutter apps are built. They are structural elements that ship with a bunch of material design-specific functionalities and new widgets can be composed out of existing ones too. In this article, we are going to find the solution for the problem statement “How to import/send data from one page to another in flutter”. Before going into the topic, there are some pre-requisites.
Pre-requisites:
Let us dive into the article by creating a simple app with two pages. We have used VS Code IDE for the development.
Terminologies we are going to use in this app:
Step by Step Implementation
Step 1:
Creating a new Flutter app:
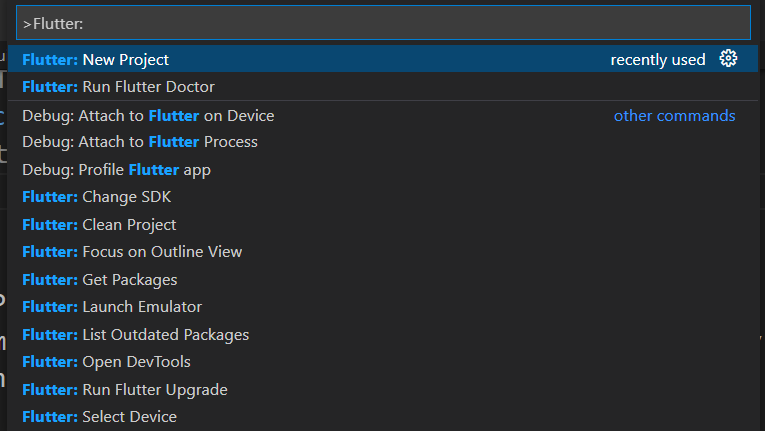
- Use the command ctrl+shift+p to open Command Palette.
- Type Flutter: New Project in the palette.
Note: If you are using Android Studio IDE, then use the path File-> New-> New Flutter Project.
Step 2:
Adding Textfield to get data from users:
- Create Textfields to get input from the user.
- Create TextEditingController classes for the appropriate TextField.
Syntax:
TextEditingController object_name = TextEditingController();
Mention the object name of the Controller inside the TextField class using the controller attribute. Refer to below code,
child: TextField(
            // controller attribute.
               controller: controller_object_name,
               decoration: InputDecoration(
                  border: OutlineInputBorder(),
                  labelText: "Enter your Phone Number"
               ),
       ),
Step 3:
Sending data and Navigating to the next page:
- To navigate to the next page we use Navigator with the main.dart’s context.
- To send the data as arguments while navigating to the next page, we use MaterialPageRoute class with the builder for the nextpage class’s constructor.
- We should create a Button to perform the above functions in the onPressed: () function by clicking it. For this, we are going to use ElevatedButton class for the creation of buttons.
ElevatedButton(
                onPressed: () {
                  // Navigator for next page.
                  Navigator.of(context).push(
                    MaterialPageRoute(
                        // Builder for the nextpage
                        // class's constructor.
                        builder: (context) => nextpage(
                              name: _name.text,
                              email: _email.text,
                              phoneno: _phoneno.text,
                            )),
                          );
                    },
                child: Text("SEND")
                ),
main.dart file:
Dart
import 'package:flutter/material.dart';
import 'package:geeksforgeeks/nextpage.dart';
void main() {
runApp(const MyApp());
}
class MyApp extends StatelessWidget {
const MyApp({Key? key}) : super(key: key);
@override
Widget build(BuildContext context) {
return MaterialApp(
title: 'Flutter Demo',
theme: ThemeData(
primarySwatch: Colors.green,
),
home: const MyHomePage(title: 'GeeksForGeeks'),
);
}
}
class MyHomePage extends StatefulWidget {
const MyHomePage({Key? key, required this.title}) : super(key: key);
final String title;
@override
State<MyHomePage> createState() => _MyHomePageState();
}
class _MyHomePageState extends State<MyHomePage> {
TextEditingController _name = TextEditingController();
TextEditingController _email = TextEditingController();
TextEditingController _phoneno = TextEditingController();
@override
Widget build(BuildContext context) {
return Scaffold(
appBar: AppBar(
title: Text(widget.title),
),
body: Center(
child: Column(
mainAxisAlignment: MainAxisAlignment.center,
children: [
Padding(
padding: const EdgeInsets.all(25),
child: TextField(
controller: _name,
decoration: InputDecoration(
border: OutlineInputBorder(), labelText: "Enter your Name"),
),
),
Padding(
padding: const EdgeInsets.all(25),
child: TextField(
controller: _email,
decoration: InputDecoration(
border: OutlineInputBorder(),
labelText: "Enter your Email"),
),
),
Padding(
padding: const EdgeInsets.all(25),
child: TextField(
controller: _phoneno,
decoration: InputDecoration(
border: OutlineInputBorder(),
labelText: "Enter your Phone Number"),
),
),
ElevatedButton(
onPressed: () {
Navigator.of(context).push(
MaterialPageRoute(
builder: (context) => nextpage(
name: _name.text,
email: _email.text,
phoneno: _phoneno.text,
)),
);
},
child: Text("SEND"))
],
),
),
);
}
}
|
Step 4:
Create a new dart File:
- Using the path File-> New File creates a new dart file with name nextpage.dart inside the lib folder.
- Import the package ‘package:flutter/material.dart’. This package is used to implement the material design of the app.
- Create class nextpage() which extends StatelessWidget.
- Create a constructor for the class to receive the arguments from the previous page’s class and save the arguments as variables.
String name, email, phoneno;
nextpage({required this.name, required this.email, required this.phoneno});
Create Textfields and its appropriate TextEditingController and set the data from the previous page in the respective text fields using the text attribute. Refer to the below code,
TextEditingController object_name = TextEditingController(text: data);
nextpage.dart file:
Dart
import 'package:flutter/material.dart';
class nextpage extends StatelessWidget {
String name, email, phoneno;
nextpage({required this.name, required this.email, required this.phoneno});
@override
Widget build(BuildContext context) {
TextEditingController _name = TextEditingController(text: name);
TextEditingController _email = TextEditingController(text: email);
TextEditingController _phoneno = TextEditingController(text: phoneno);
return Scaffold(
appBar: AppBar(
title: Text('Next Page'),
),
body: Center(
child: Column(
mainAxisAlignment: MainAxisAlignment.center,
children: [
Padding(
padding: const EdgeInsets.all(25),
child: TextField(
controller: _name,
decoration: InputDecoration(
border: OutlineInputBorder(),
labelText: "Name",
),
),
),
Padding(
padding: const EdgeInsets.all(25),
child: TextField(
controller: _email,
decoration: InputDecoration(
border: OutlineInputBorder(),
labelText: "Email",
),
),
),
Padding(
padding: const EdgeInsets.all(25),
child: TextField(
controller: _phoneno,
decoration: InputDecoration(
border: OutlineInputBorder(),
labelText: "Number",
),
),
),
],
),
),
);
}
}
|
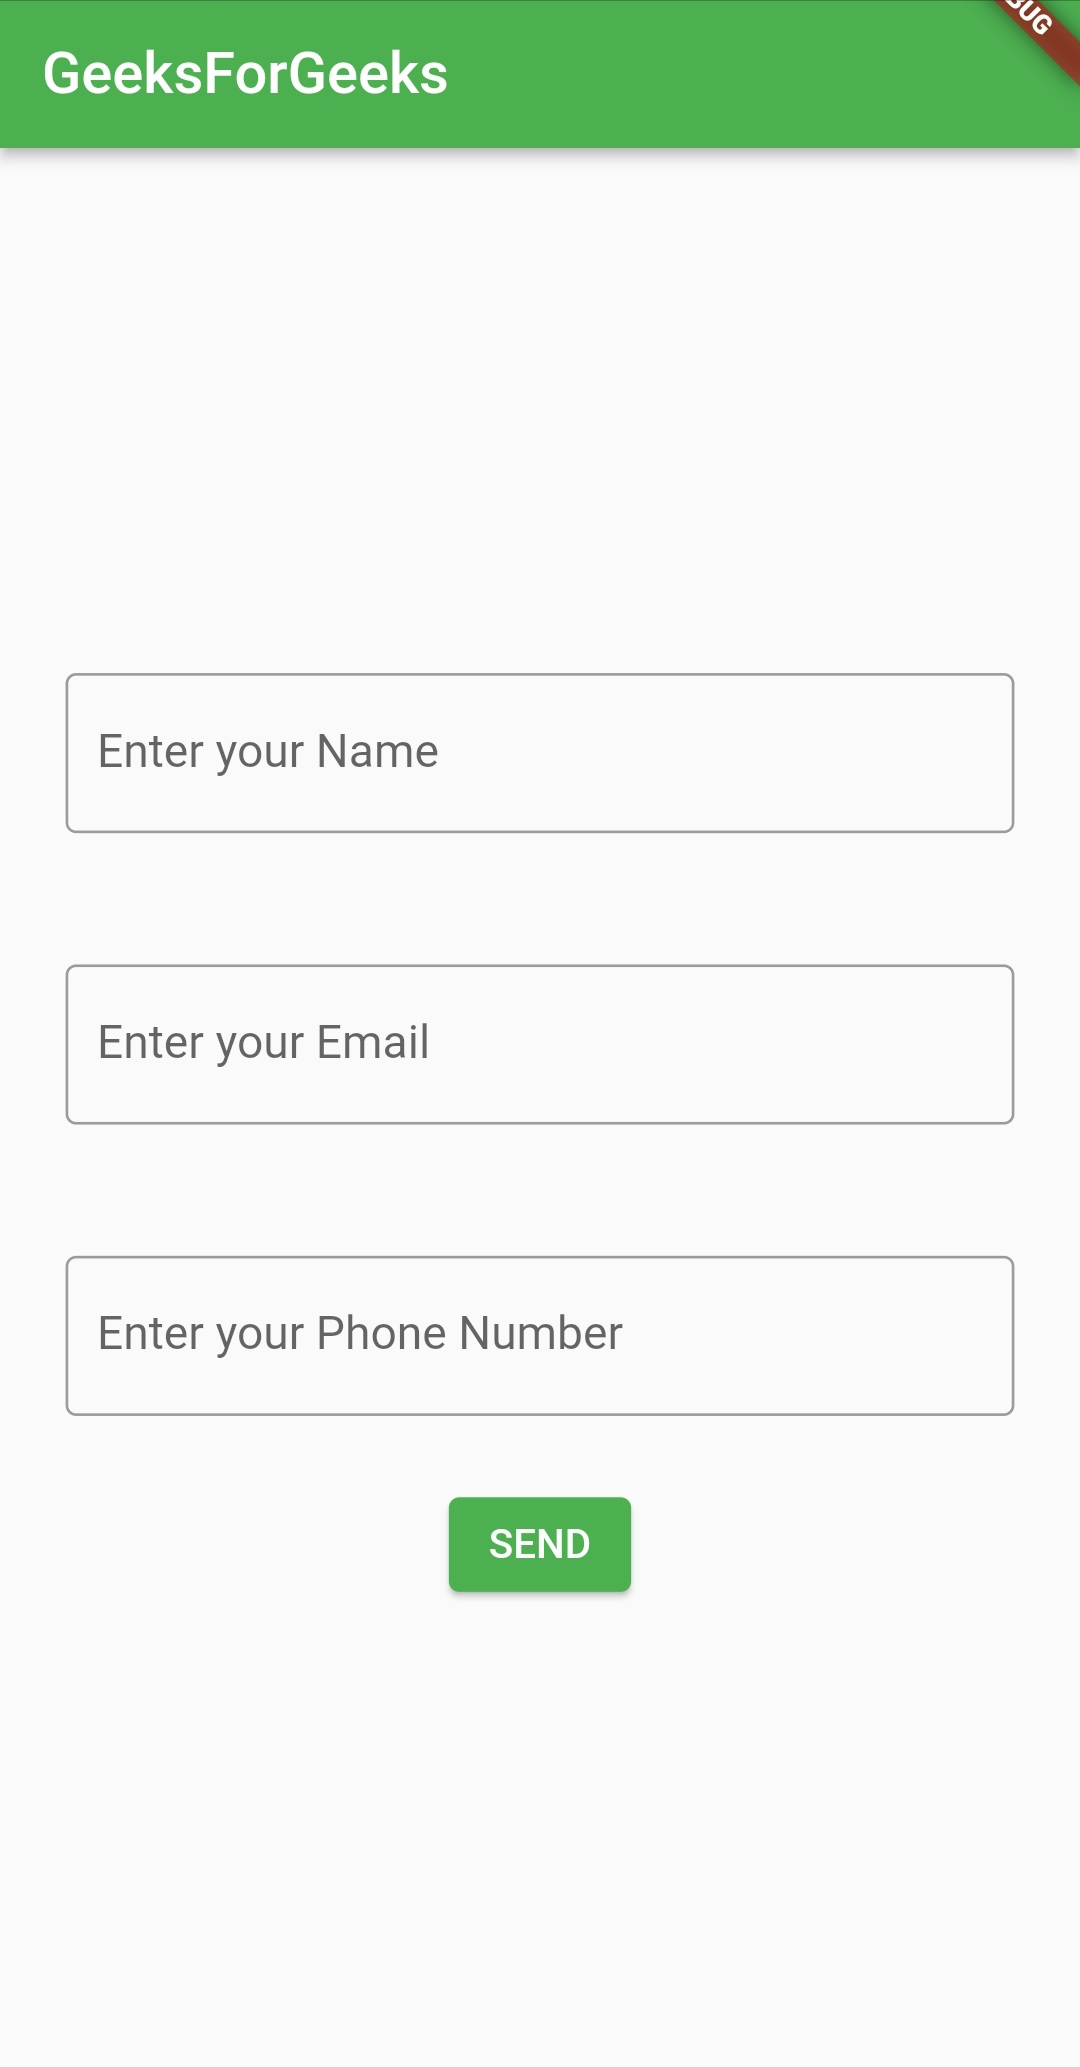
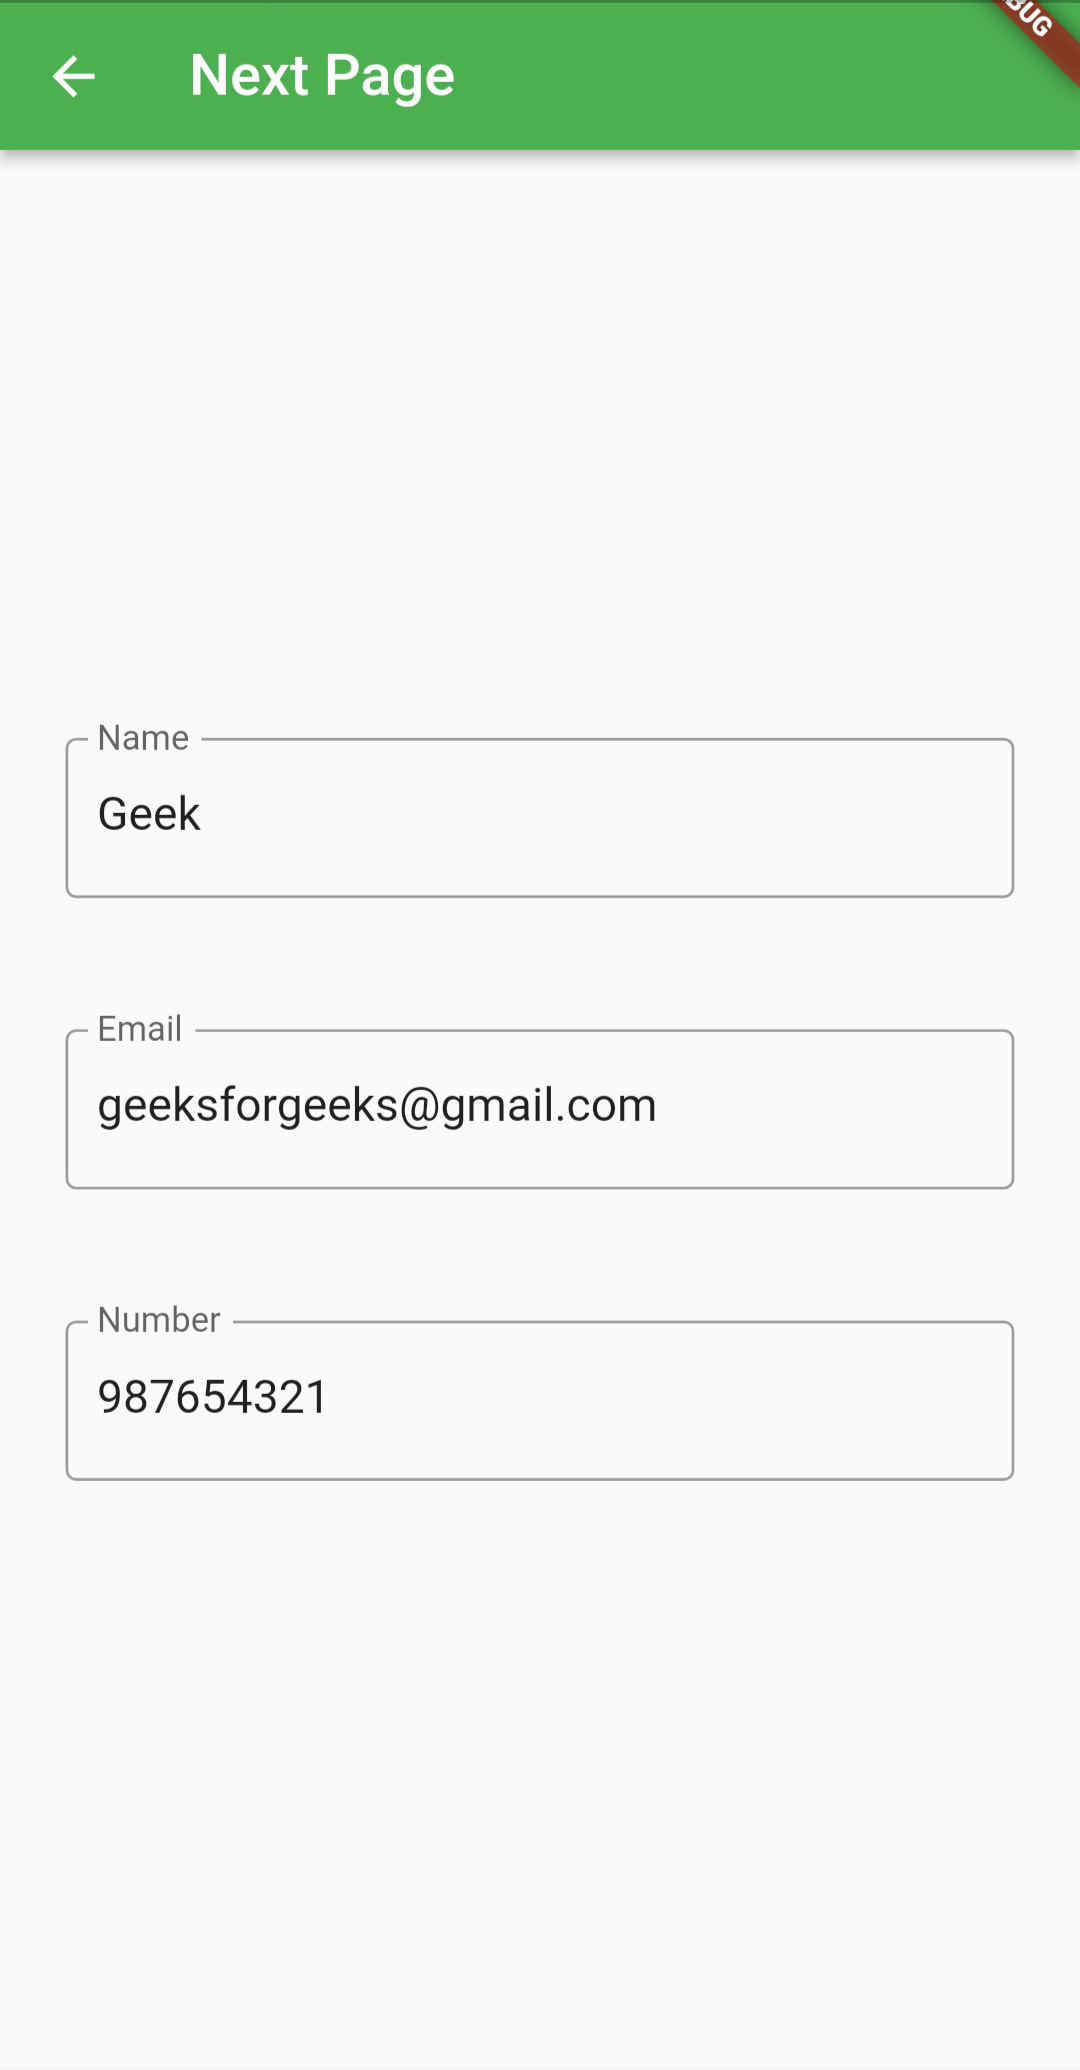
Output:
Share your thoughts in the comments
Please Login to comment...