Docker is an open-source platform that helps developers pack their applications, along with all necessary program files and dependencies, into a single file called a container. The dockerizing application makes it easier to ship it and run it on another operating system with docker installed on it without depending on the operating system. In this article, we will learn how to dockerize maven projects and multiple ways of dockerizing.
What is Docker?
Docker is an open-sourced platform designed for developers to simplify the process of developing, shipping, and running applications using containerization. Docker allows developers to pack their applications and all necessary files and dependencies into a standardized unit called a container. Containers are lightweight and portable, helping to ship the application to other platforms.
Create a Maven Project
Before we move on to dockerizing the maven project, let’s create a maven project and run it to check the output before dockerizing. After dockerizing, we will again check the output for verification. Here we are going to use the Spring Boot framework to create the Maven project.
Step 1: Configure the project:
On your web browser, navigate to start.spring.io, which will open the spring initialize’s homepage. Now do the following configurations to create a new Maven project:
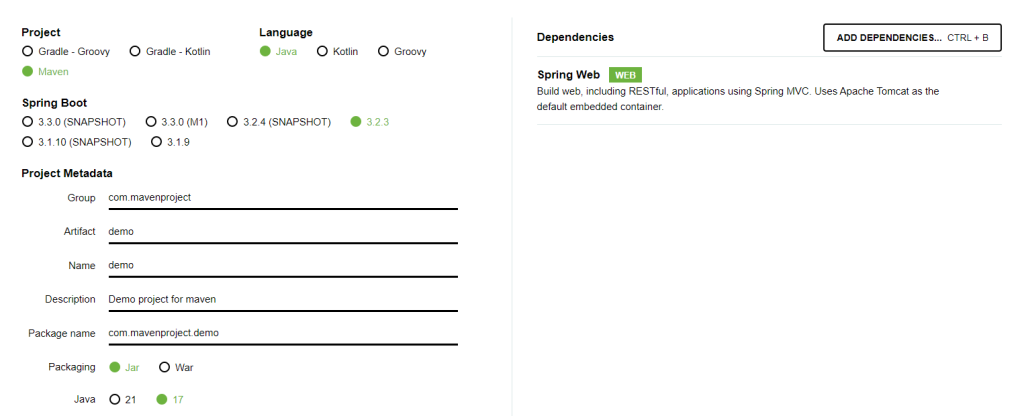
- Project: Maven
- Language: Java
- Spring Boot: 3.2.3
- Packaging: Jar
- Java: 17
- Dependency: Spring web
Now click on Generate and download the setup in your computer.
Step 2: Open the project
Once downloaded, Right click on the .zip file and unzip it. Now open the folder in any of your favorite IDE. Here we are going to use IntelliJ IDEA IDE. It will take sometime for indexing the project. Once done, you can explore and make changes into the project.
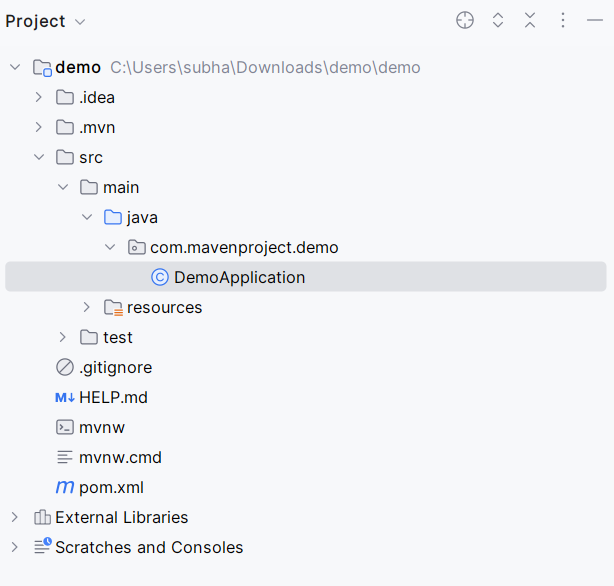
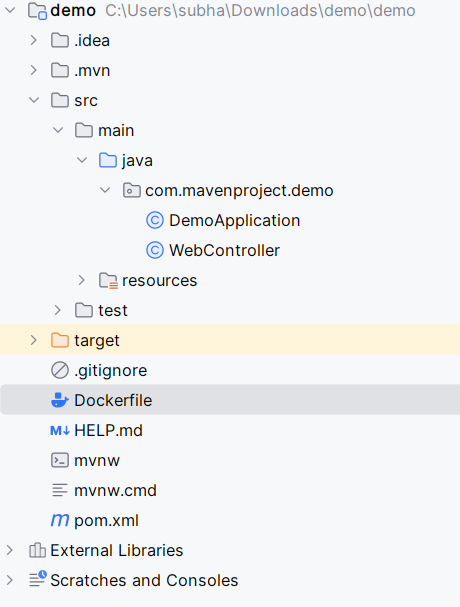
Folder Structure
Step 3: Create Controller
In our maven project, we are going to create a controller to view our output in webpage, let’s configure it. Let’s create a separate java file for that, here we will write the controller inside the WebController.java file.
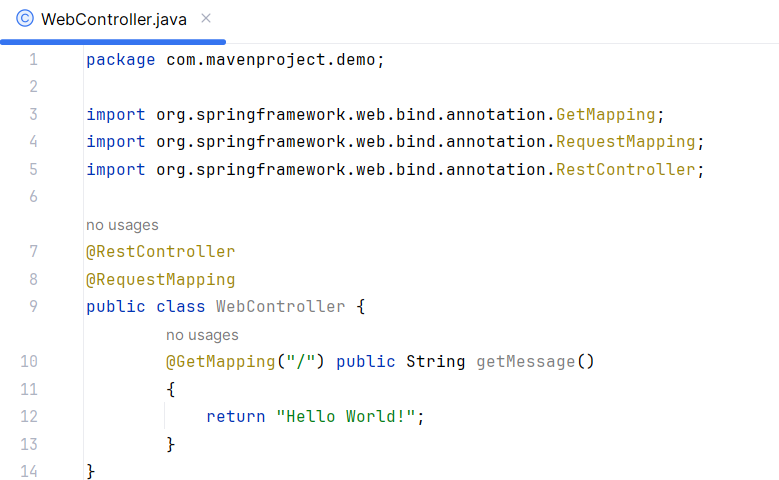
WebController.java
package com.mavenproject.demo;

import org.springframework.web.bind.annotation.GetMapping;
import org.springframework.web.bind.annotation.RequestMapping;
import org.springframework.web.bind.annotation.RestController;

@RestController
@RequestMapping
public class WebController {
        @GetMapping("/") public String getMessage()
        {
            return "Hello World!";
        }
}
Step 4: Run the maven application
Let’s quickly run our application and check what output we are getting.
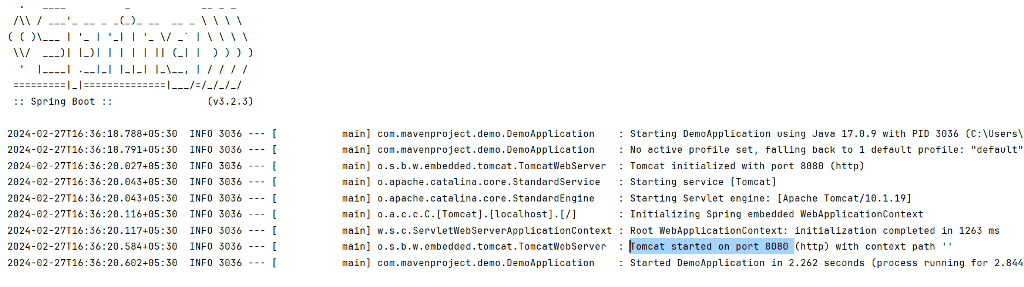
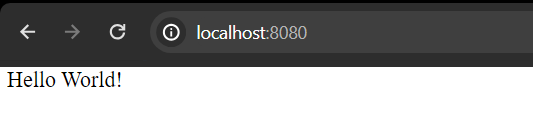
As you can observe that our maven application is running successfully on port number 8080. Now to verify the same let’s access localhost:8080 on web browser and check the output.
Steps to Dockerize the maven project
Step 1. Create Dockerfile
On your project, right click on the project name and create a new file and name it as “Dockerfile”. This is the file where we will write our docker configurations.
Folder Structure
Inside the Dockerfile write the following,
FROM openjdk:17
WORKDIR /app
COPY ${JAR_FILE} app.jar
EXPOSE 8080
CMD ["java", "-jar", "demo-0.0.1-SNAPSHOT.jar"]
- FROM: It used for fetching the Java version which is 17 in this case.
- WORKDIR /app: It used for setting up work directory.
- COPY: Copy the jar file into our app
- EXPOSE: Exposing port 8080
- CMD [“java”, “-jar”, “spring-0.0.1-SNAPSHOT.jar”]: Starting the application using this jar file.
Step 2. Build the jar file using maven
Open terminal in the project directory and run the following command to build the .jar file
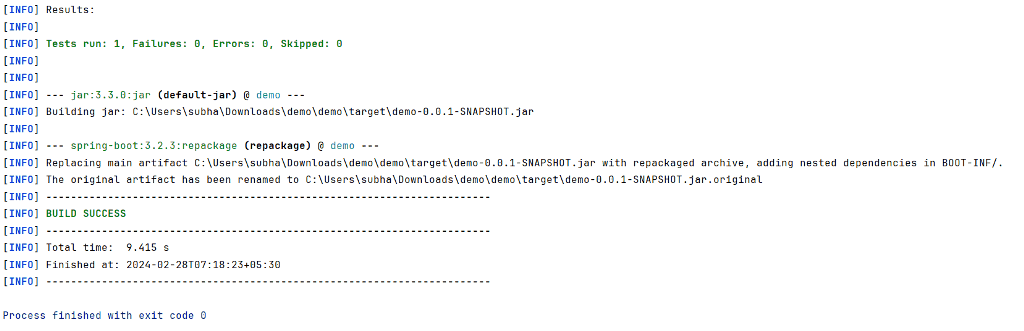
$ ./mvnw clean package
Output:
Step 3. Build Docker Image
Now let’s create a docker image for our application. If you don’t have docker installed on your computer, install it by visiting https://www.docker.com/products/docker-desktop. Run the following command in terminal to build the image.
docker image build -t [application name].
This command will initiate the docker image build. The -t flag allows you to specify a name and optionally a tag for the image. The dot at the end specifies the context for the build process. replace the application name with your application name.
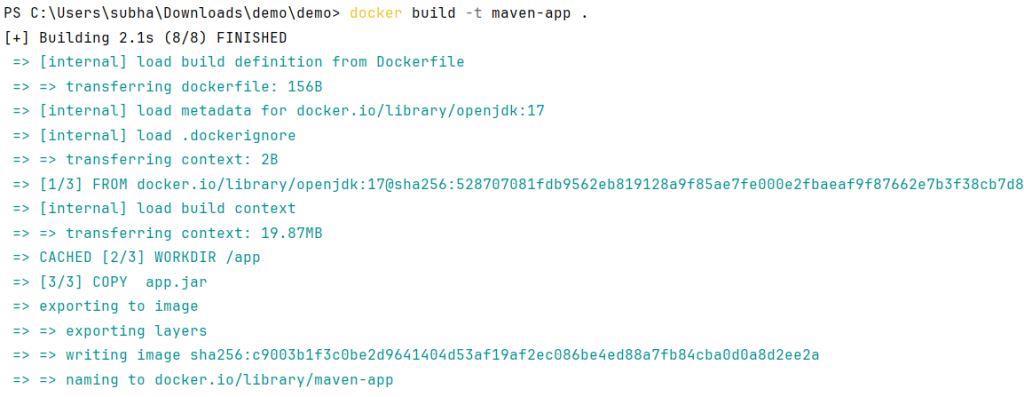
Now check the docker image by running the following command
docker images

Step 4: Create the Docker Container
Once we have successfully created the docker image, it’s time create the docker container and then run and check for output in the specified port.
docker run -d -p [host_port]:[container_port] --name [container_name] [image_id/image_tag]
- -d: Run the container while printing the container ID.
- -p: Mapping port for our container
- –name: Assign a name to the container

Step 5: Run Docker and Check output
You and run the docker container using command line argument or by using the Docker desktop application. To run using CLI, run the following
docker run ps
Else, Go to the Docker Desktop app and click on the run button available near to your docker container. The GUI Application gives better insights than Command promopt.

Let’s check the logs
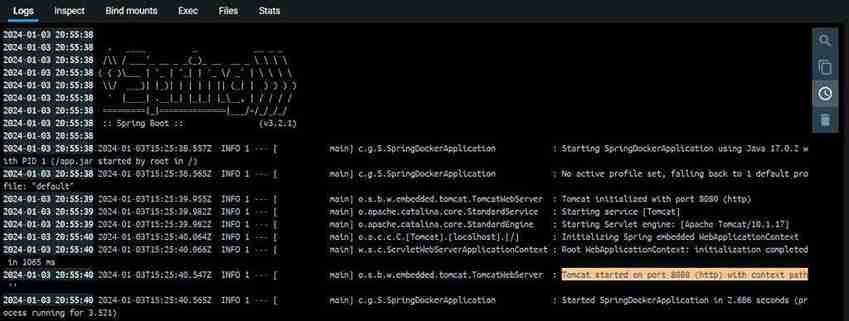
As we can see, this is running on port no 8080. Let’s check the output.
We have successfully dockerize our maven project.
Alternative ways to dockerize maven project
1. Docker Compose
To work on a common network of an application, then the container management becomes slower. To overcome this issue, Docker provides a tool caller Docker Compose. This tool is in it’s own YAML build file format. We can combine the configuration of multiple services in one file called docker-compose.yml.
- Create a ‘docker-compose.yml’ file to define the services for your maven application and any other required services like databases.
- Specify the Dockerfile and build context for the Maven service.
- Define any necessary environment variables, or network configurations within the ‘docker-compose.yml’ file.
Command to build docker compose file
docker-compose config
Command to create docker container and run
docker-compose up --build
2. Docker Maven Plugin
One can use the dockerfile-maven-plugin in the configuration file of Maven project, which is known as pom.xml to generate the Docker image during the Maven build process.
<!-- https://mvnrepository.com/artifact/com.spotify/dockerfile-maven-plugin -->
<dependency>
    <groupId>com.spotify</groupId>
    <artifactId>dockerfile-maven-plugin</artifactId>
    <version>1.4.11</version>
</dependency>
3. Spring Boot Docker Plugin
If you have built your maven application using Spring Boot framework then, there is something called the spring-boot-maven-plugin which can package the application as a Docker image directly from Maven without the need of separate Docker file.
Add to the following dependency in pom.xml to achieve this
<build>
      <plugins>
              <plugin>
                      <groupId>org.springframework.boot</groupId>
                      <artifactId>spring-boot-maven-plugin</artifactId>
              </plugin>
       </plugins>
</build>
How to dockerize maven project – FAQ’s
How can I dockerize my Maven application
To dockerize a maven application you can follow the steps
Install Docker
Create a Docker file
Build a docker image
create a docker container using the image
Run the container
Can I use Docker Compose to dockerize a Maven Project?
Yes, Docker compose can be used to dockerize a maven project by defining necessary details in a ‘docker-compose.yml’ file.
Are there any Plugins available to help dockerize Maven projects?
Yes, there are plugins to dockerize maven project which creates docker image on the time of maven build, eliminating manual build process. you can use ‘docker-maven-plugin’ and ‘spring-boot-maven-plugin’ for such cases.
What are the best practices for dockerizing maven projects?
Some best practices for dockerizing includes,
Keeping docker instructions optimized.
Start with an appropriate base image.
Use multistage builds.
For multiple image, create a custom base image.
Share your thoughts in the comments
Please Login to comment...