How to add Underline and Justify text buttons in WordPress ?
Last Updated :
17 Apr, 2023
WordPress is an open-source Content Management System that is totally based on PHP and MySQL and is used to create a dynamic website. It was developed by Matt Mullenweg and Written in PHP. WordPress is one of the most popular that allows customizing and managing the website from its back-end content management system.
In the Visual editor of WordPress by default, there is no option for the Underline and Justify text buttons. To add this editing option in the visual editor of WordPress, we have to add a new plugin to add this option.
Why add the Underline and Justify text button: Some editing of the post and content of your website has some links, to show these links it is a better idea to show them by underlining them. which makes your visitor that it is a link and gives a better user experience.
By default justify text button is also not available in the visual editor. the need for the justify and alignment button makes your content more structured and system to read by users.
Therefore, having the underline and justify button helps you in editing your posts and the content of the website.
Adding Underline and Justify text button: Adding the underline and justify text button is very simple on the WordPress website. Now let’s see how to add the underline and justify text button to your visual editor or Gutenberg Block editor step by step:
Step 1: First login to the WordPress dashboard of your WordPress website. The dashboard will seem like this after logging in:
Step 2: Now you have to install the plugin “Gutenberg Block Editor Toolkit – Editorskit” to your WordPress website. For installing the plugin go to the “Plugins” section and then click on “Add New”.
Step 3: Now search for the “Gutenberg Block Editor Toolkit – Editorskit” in the search box, and then click on the “Install Now” button to install the plugin.
Step 4: After installing the plugin click on the “Activate” button to activate the plugin.
Step 5: Now after activating the plugin it will start appearing in the “Settings” section of the WordPress dashboard.
Step 6: For editing the post or adding the post you should hover over the “Posts” and then click the edit to edit the post.
Choose the post and then click on the edit to edit the post.
Step 7: Now when you hover over the particular block to edit, click on the drop-down arrow the justify and underline option start appearing.
After clicking on the arrow all other editing options appear on the screen.
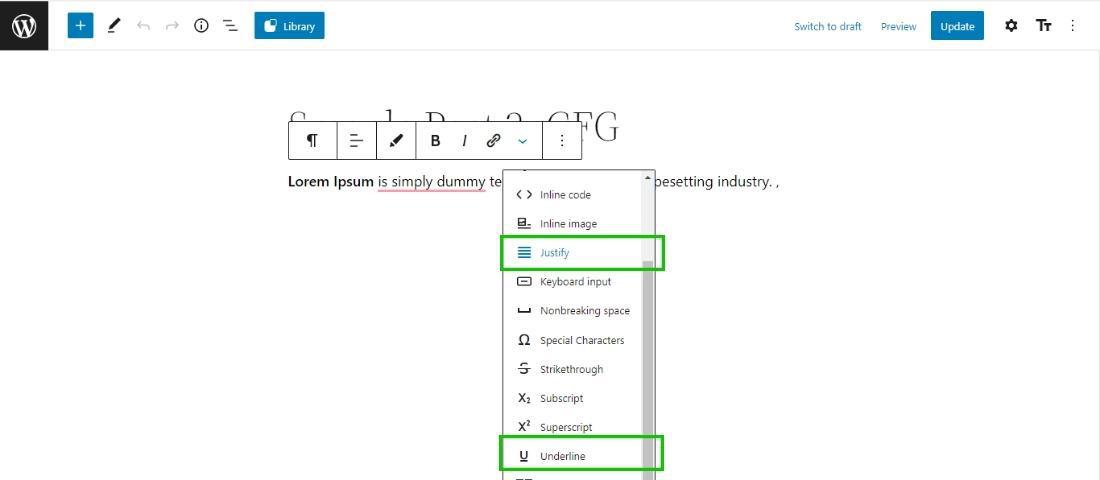
After Adding the Gutenberg Block Editor Plugin
This is how you can easily add the justify and underline text buttons in your block editor.
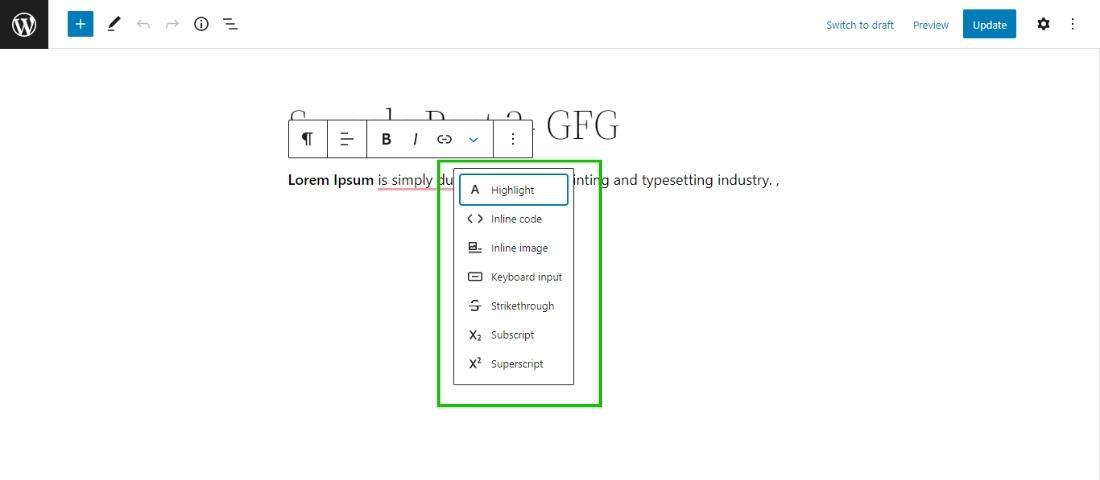
Before Adding the Gutenberg Block Editor Plugin
Before adding the plugin there is no option of Justify and Underline options in the block editor. So by following this method you can easily add the justify and underline option in your Block editor.
Hope this article helps you in solving your problem.
Share your thoughts in the comments
Please Login to comment...