How Proxy Backend Server using React.js ?
Last Updated :
06 Dec, 2023
When building a web application with React.js, you may need to request a backend server. However, if the backend server does not allow Cross-Origin Resource Sharing (CORS), you may encounter an error when requesting from the frontend application. In this case, you can use the proxy server to forward requests from the front-end application to the back-end server. This can be done in React using a package called “HTTP-proxy-middleware”.
Prerequisites:
Follow this step-by-step guide to using a Proxy Backend Server using React JS
Steps to Create ReactJS Application and Installing Modules:
Step 1: Create a new React.js application using the following command
npx create-react-app my-app
Step 2: Install the “HTTP-proxy-middleware” package using the following command
npm i http-proxy-middleware --save
Step 3: Create a new file named “setupProxy.js” in the “src” directory of the React.js application. This information will be used to configure the name server.
Step 4: Add the following code to the “setupProxy.js” file
const { createProxyMiddleware } = require('http-proxy-middleware');
module.exports = function (app) {
    app.use(
        '/api',
        createProxyMiddleware({
            target: 'http://localhost:5000',
            changeOrigin: true,
        })
    );
};
In this code, we set the proxy server to send requests to the “/api” path to the backend server running at http://localhost:5000. The “changeOrigin” option set to true allows the backend server to receive requests with the original host header.
Step 5: Update your React.js app to use the server name. For example, if you want to use the “fetch” API to make a request to the backend server, you can use the following code
fetch('/api/data')
    .then(response => response.json())
    .then(data => console.log(data));
In this code, we request the path “/api/data” which will be sent from the proxy server to the backend server. The response from the backend server is then converted to JSON and saved to the console.
Project Structure:
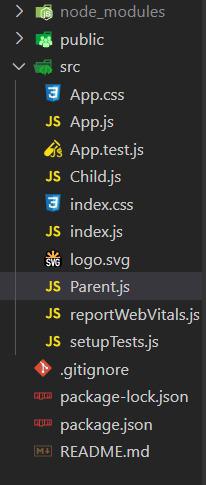
React Js Project Structure
Example: This example demonstrates how to use the proxy server in a React.js application.
Javascript
import React, { useEffect, useState } from 'react';
function App() {
const [data, setData] = useState(null);
useEffect(() => {
fetch('/api/data')
.then(response => response.json())
.then(data => setData(data));
}, []);
return (
<div>
{data ? (
<ul>
{data.map(item => (
<li key={item.id}>{item.name}</li>
))}
</ul>
) : (
<p>Loading...</p>
)}
</div>
);
}
export default App;
|
Javascript
const { createProxyMiddleware } = require('http-proxy-middleware');
module.exports = function (app) {
app.use(
'/api',
createProxyMiddleware({
changeOrigin: true,
})
);
};
|
In this code, we use the hooks “useState” and “useEffect” to make a request to the backend server and update the content of the state with the response. Then we present the information in the list. When the component is loaded for the first time, the “Loading… ” message will appear until the data is returned from the backend server.
Share your thoughts in the comments
Please Login to comment...