HASHDEEP: A Digital Forensics tool in kali linux
Last Updated :
12 Mar, 2024
In today’s digital world, where most people are connected with digital assets directly or indirectly. Now securing these digital assets and maintaining the security of data is especially important to maintain our privacy and integrity. In this article, we are going to learn about the HASHDEEP tool, which is an open-source digital forensics tool.
Digital forensics is a branch of forensic science that focuses on the identification, seizure, acquisition, and analysis of data stored digitally or electronically. It has three main branches: computer forensics, mobile device forensics, and network forensics.
HASHDEEP:
Hashdeep is a flexible tool for computing, comparing, and auditing file hashes. It is intended for report and list hash-based evaluation. It is important to retain the authenticity and integrity of information when engaging in virtual investigations. It has a collection of numerous hash algorithms, such as Tiger, Whirlpool, MD5, SHA-1, and SHA-256.
Because hashdeep can analyze directories recursively, it is perfect for performing high-quality data integrity tests. Multi-Hash support and recursive processing are the key features of Hashdeep. It is pre-installed in Kali Linux. You can also install it with the following command running it simply on the terminal.
sudo apt-get install hashdeep
Working with Hashdeep:
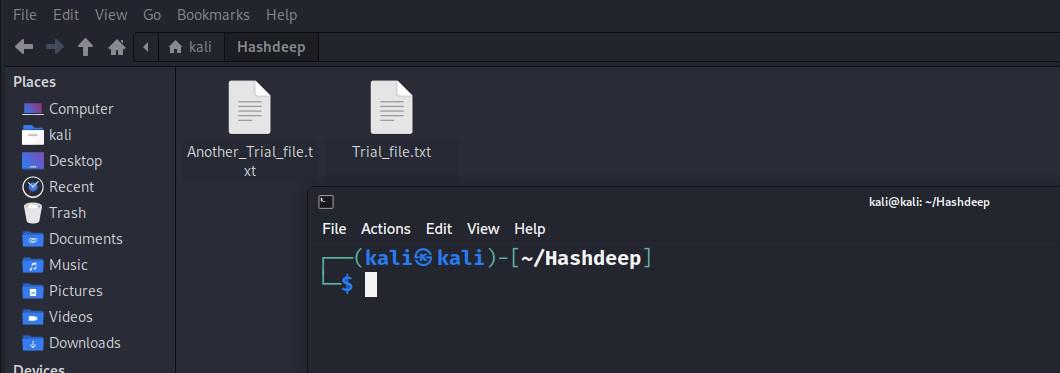
Step 1: Go to your home directory, create one folder, and name it as you wish. For example, name it Hashdeep.
home->right click->create folder->Hashdeep


Step 2: Create two new text files in the created folder.
- Trial_file.txt
- Another_Trial_file.txt

Step 3: Write some different text in both files.
Step 4: Open the terminal in the Hashdeep folder.
Step 5: To run and see the functions and flags of hashdeep, type hashdeep -h in the terminal.
hashdeep -h

Step 6: For computing the hash of the Trial_file.txt file, type hashdeep Trial_file.txt
hashdeep Trial_file.txt
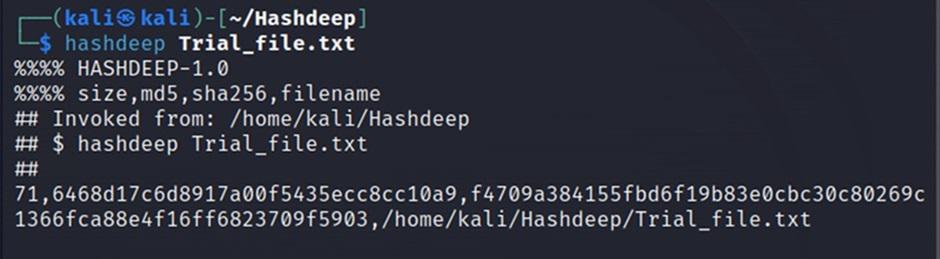
The output of this command will be in segments.
- The first segment is the size of bytes in file.
- The second segment is the MD5 hash value of the file.
- The third part is the SHA256 hash value.
- And the last part is the file name, along with the location of the file.
In output you can see
- The size of bytes in file:71
- MD5 hash value of file:9498d17c6d8917a00f5435ecc8cc109
- SHA256 hash value of file:f4709a384155fbd6f19b83e0c80269c1366fca88e4f16ff6823709f5903
- Location of file:/home/kali/Hashdeep?Trial_file.txt
Step 7: Save the output in a file. For doing this, run this command:
hashdeep Trial_file.txt>Hash_value.txt
This command will create a file named as Hash_value.txt and save the previous command output in Hash_value.txt.


Step 8: Perform an audit.
An audit is performed by checking the hash of the file with the given hash value. If the values do not match, we can conclude that the file has been modified. By doing so, we can check the integrity of the data.
For this, use this command:
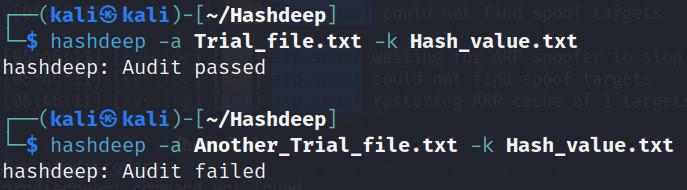
hashdeep -a Trial_file.txt -k Hash_value.txt
In the above command:
- -k <file> – add a file of known hashes
- -a – audit mode. Validates files against known hashes. Requires -k
In this command, what happens is that at first the hash will be calculated from Trial_file.txt, and then this value will be compared with the Hash_value.txt. If the value is matched, the command will give output as Audit passed; otherwise, Audit failed.

Command:
hashdeep –a Another_Trial_file.txt –k Hash_value.txt
In this command, the hash value of Another_Trial_file.txt file will be matched with the stored value of Hash_value.txt, in which the hash of Trial_file.txt file is stored. So, the output will become Audit failed.
Conclusion:
In this article, we have understood the workings of the Hashdeep tool. We had done one task where we created two .txt files named Trial_File.txt and Another_Trial_file.txt. We have written different text in both files. then, with the help of the Hashdeep tool, computed the hash of the Trial_file.txt file and saved this hash in the Hash_value.txt file. In the auditing phase, we had compared the hash value of the Trial_file.txt file with the Hash_value.txt file data and got the result that the audit passed, but when we compared the hash of the Another_Trial_file.txt file with the Hash_value.txt file, in which the hash of the Trial_file.txt is saved, we got the result that the audit failed. This is a simple demonstration of the tool; we can use it according to our need for checking the integrity of the data. If we want to use only a single hash function, not all that are set by default, we can do this by replacing the hashdeep with hashAlgoNamedeep in each command.For example, if we want to use only the MD5 hash function, we have to simply replace hashdeep with md5deep, and the whole process remains the same.
Share your thoughts in the comments
Please Login to comment...