Learn expert Google Drive organization tips to boost business productivity. From naming conventions to advanced search, streamline your workflow efficiently.
Being productive in today’s fast-paced world feels like juggling chainsaws. Deadlines bury professionals, students are drowning in schoolwork, and even managing personal belongings may feel like an Olympic achievement. At that point, Google Drive enters the picture like a productivity superhero!
Google Drive is more than just a cloud locker; it’s a potent toolkit that can fundamentally change how you work and communicate with others. This post will share 12 tried-and-tested Google Drive tips to increase your productivity.

Google Drive Organization Tips for Enhanced Productivity
Top tips for organizing Google Drive
Organizing Google Drive: Best Tips for Your Business
Each file should reside in a designated subdirectory arranged correctly within an enormous folder directory. However, setting up this directory structure takes work. Below are some of the best tips to optimize your Google Drive productivity.
Tip #1: Use Consistent Naming Conventions
Have you ever opened your computer only to be met with a confusing list of file names? Yes, that includes us. You may give your files any name you like using Google Drive, but keeping things organized can significantly help.
You may maintain consistency in your file names in the following ways:
- Make them succinct yet impactful for both you and your associates.
- Think about including the month, day, and year of the date.
- Instead of using the popular alphabetical style, organize files and folders using hashtags or numbers. Keep it brief, direct, and easy to understand. Superfluous words such as “and” and “the” are superfluous.
Example:
- Result Copy of 1 Standard
- Result Copy of 2 Standard
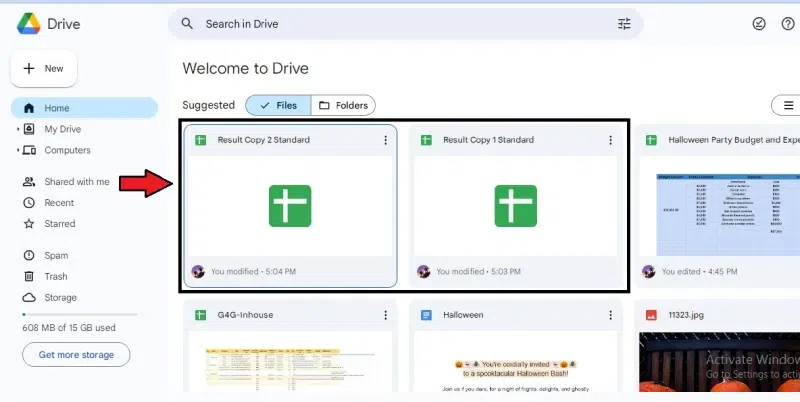
The files are named as Result Copy of 1 standard and Result Copy of 2 standard
How to Use Consistent Naming Conventions?
Step 1: Open Drive from Google Workspace applications
Turn on your default web browser and open the Google Search engine. Click on the nine dots menu bar in the top right corner and select Drive from the workspace applications.
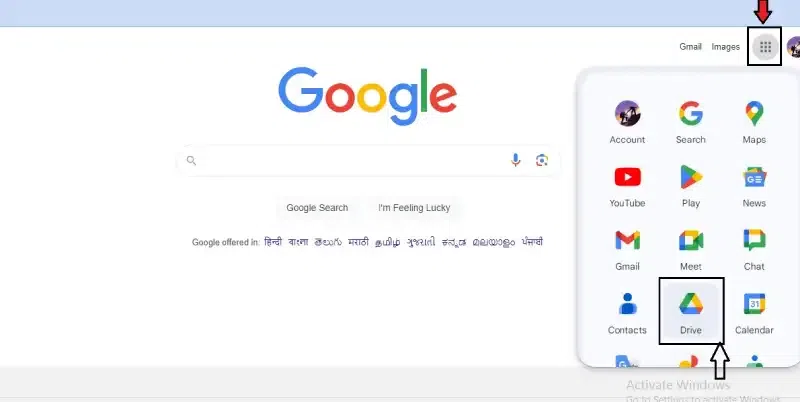
Open Drive from Google Workspace applications
Step 2: Select a File and click on the three dots
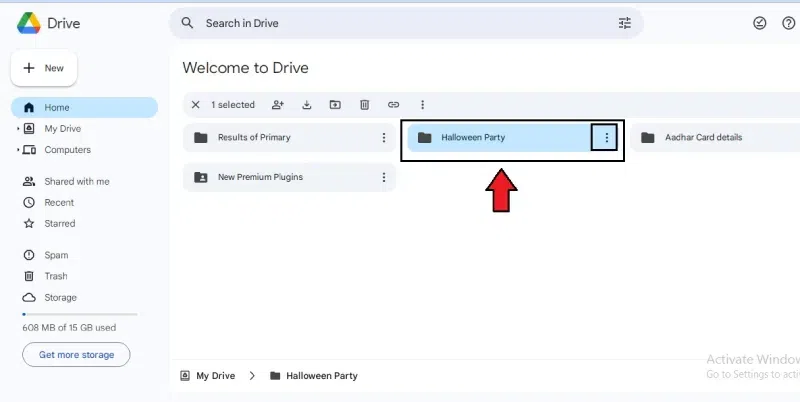
Select a file you want to name and click on the three dots representing “More options.”
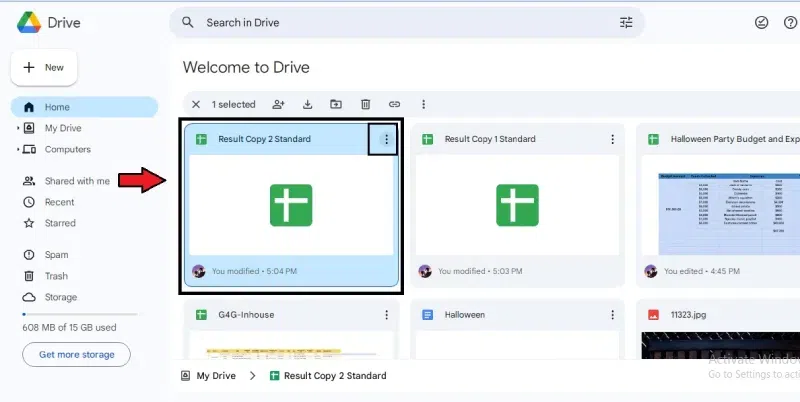
Select a File and click on the three dots
Step 3: Rename your file
Select “Rename” from the dropdown menu and provide a suitable title for the file as required.

Rename your file
Tip #2: Create folders and subfolders
It would help to have quality folders and sub-folders to keep things organized.
Consider creating a large folder with the subject “Marketing” for your business. Inside that Folder, you may make smaller, more focused folders for each project, such as “Email Marketing.” Nothing is hidden, and everything is accessible.
- Use this area to include more information to make your file more searchable and structured.
- A thorough description, a personal message, or anything else you think might be helpful for your team.
Example:
Results of Primary School
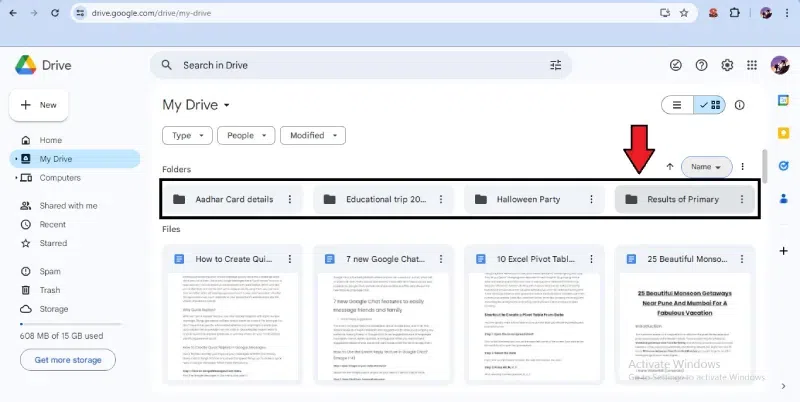
Results of Primary School
How to Create Folders and Sub Folders?
Step 1: Open Drive from Google Workspace applications
Turn on your default web browser and open the Google Search engine. Click on the nine dots menu bar in the top right corner and select Drive from the workspace applications.
Open Drive from Google Workspace applications
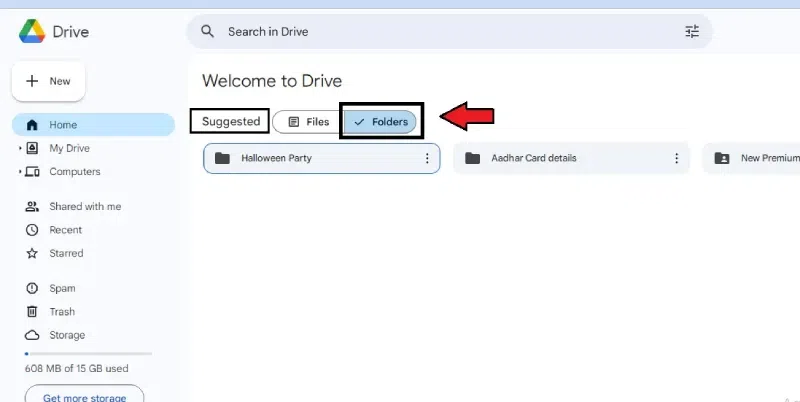
Step 2: Open the Folder list
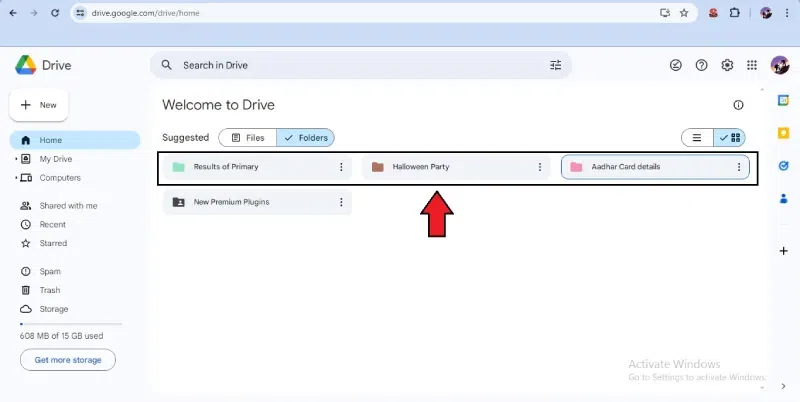
Click on the Folder at the top of the “Suggested” menu bar.
Open the Folder list
Step 3: Create a New folder
Click on “New,” indicated by the “+” symbol at the top left corner of the screen. Select “New Folder” from the dropdown menu.
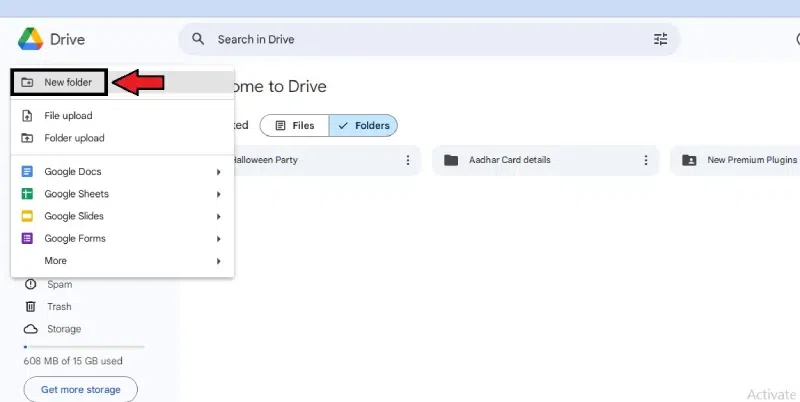
Select “New Folder” from the dropdown menu
Step 4: Name the Folder
Give a suitable title to the Folder and click on “Create.”

Give a suitable title to the Folder and click on “Create.”
Tip #3: Create “Priority” docs and files
We have been stuck searching for the most critical file in Google Drive. “Priority” is a secret tool in Google Drive that can help you remain organized and locate items more quickly.
Within Drive, Priority may be thought of as your assistant. It recommends files you require based on your recent work using brilliant technologies. It may display files that you have recently updated, files that have comments from your team, or even items that are associated with scheduled meetings.
How to create Priority & Doc files?
Step 1: Open Drive from Google Workspace applications
Turn on your default web browser and open the Google Search engine. Click on the nine dots menu bar in the top right corner and select Drive from the workspace applications.
Open Drive from Google Workspace applications
Step 2: Click on “Priority”
From the left pane of the menu, select “Priority”.
Step 3: Create a new Workspace
In the Workspace section, select “Create workspace” and give it a suitable name. Then click “Create.”
Note:
You can add files to the workspace and keep them organized. To do this, use the “Add Files” feature.
Tip #4: Use file/folder descriptions
Google Drive has a neat trick to facilitate even better file organization. You may give your files and directories more information!
- Choose a file or Folder, then press the “View Details” button in the upper right corner.
- It creates a spot where you may add a note, a description, or anything else that clarifies the file’s purpose for you and your team.
- It becomes simpler to locate items later on the more data you provide!
How to add a description to the file or a folder?
Step 1: Open Drive from Google Workspace applications
Turn on your default web browser and open the Google Search engine. Click on the nine dots menu bar in the top right corner and select Drive from the workspace applications.
Open Drive from Google Workspace applications
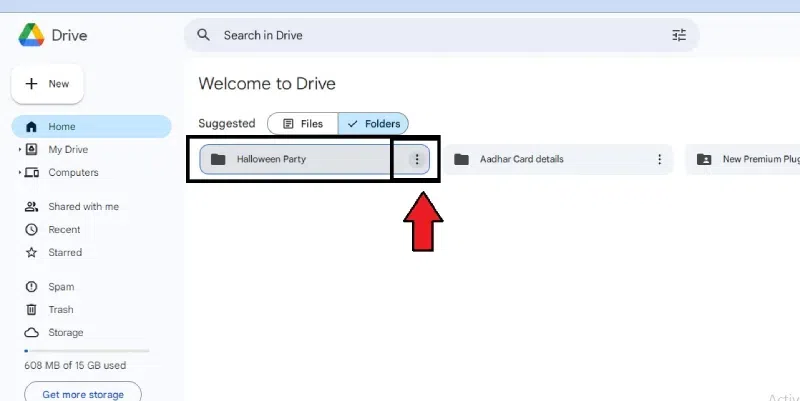
Step 2: Select a File or Folder to add a description
Select a File or Folder, click “More actions” (3 dots), and select Folder/File information. Now choose Details from the sub-menu.
Select a File or Folder to add a description
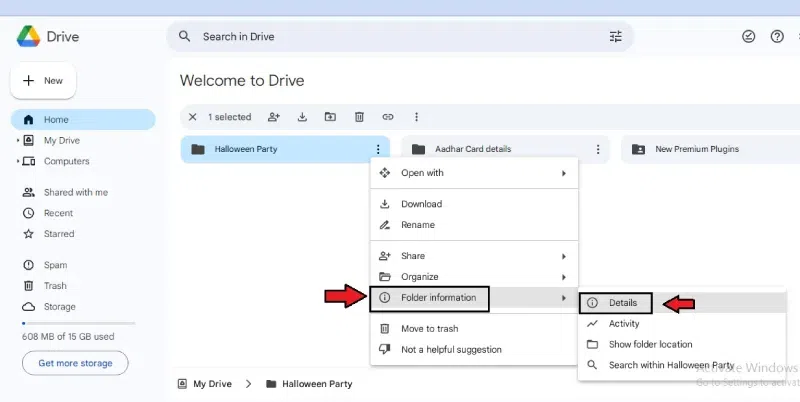
click “More actions” (3 dots), and select Folder/File information
Step 3: Add description
From the info dialogue box that appears in the right corner, click on Details. Now scroll to the Description bar and add a suitable description to the Folder.
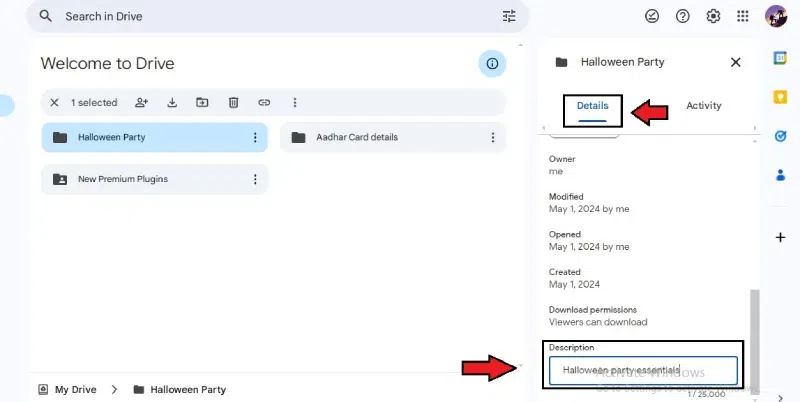
Click on Details amd add Description
Tip #5: Color code your folders
Show creativity by colouring your Google Drive files for better identification. Consider using coloured folder labels! Use various colours for different projects or teams, much like you would when colour-coding your highlighters in school. Everything stands out and is relatively easy to find as a result.
Consider assigning your “Marketing” team a vibrant yellow folder and your “Finance” projects a serene blue one.
- To apply colour, right-click on a folder and select “Change Color.”
- Explore and choose the most effective approach for you.
- Your vibrant Google Drive is waiting for you!
Example:
- Brown shade, represents Halloween.
- Pink shade represents Aadhar card details
How to Colour Code Your Folders
Step 1: Open Drive from Google Workspace applications
Turn on your default web browser and open the Google Search engine. Click on the nine dots menu bar in the top right corner and select Drive from the workspace applications.
Open Drive from Google Workspace applications
Step 2: Select a Folder to colour
Choose a File or a Folder, click “More actions” (three dots), and select” Organization.” Now, choose colours from the submenu.
Select a Folder to colour
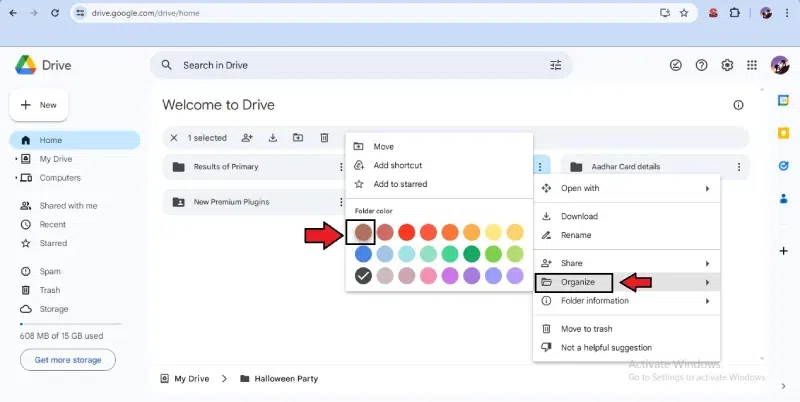
Click “More actions” (three dots), and select” Organization.” Choose your preferred color
Tip #6: Add docs to multiple folders
If you’ve ever been unsure which Folder to use for a file, like a draft blog post, Google Drive can help. You can put files in multiple folders, like your campaign folder and “Blog” folder, making Organization easy!
How to add docs to multiple folders?
You must add a file to more than one Folder. The quick shortcut is as follows:
Step 1: Open Drive from Google Workspace applications
Turn on your default web browser and open the Google Search engine. Click on the nine dots menu bar in the top right corner and select Drive from the workspace applications.
Open Drive from Google Workspace applications
Step 2: Select a Doc file to add to the Folder
Choose a doc file to add to a folder. Use the shortcut keys “Shift+Z”. A dialogue box appears. Select a folder to add the Doc file.
Open Drive from Google Workspace applications
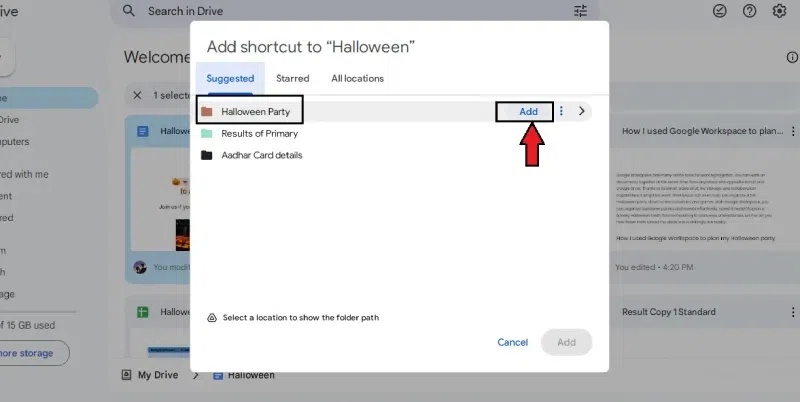
Use the shortcut keys “Shift+Z”.Select a folder to add the Doc file
Tip #7: Don’t optimize the “Shared with me” section
Although it may appear disorganized, Google Drive’s “Shared with Me” feature is useful! It is a unique feed that displays all the files users have shared with you.
- Files in “Shared with Me” shouldn’t be deleted!
- It’s a list of files you can access, thanks to others.
- You and the individual who shared them might have issues if you delete them.
- Consider it an organized list rather than a disorganized area.
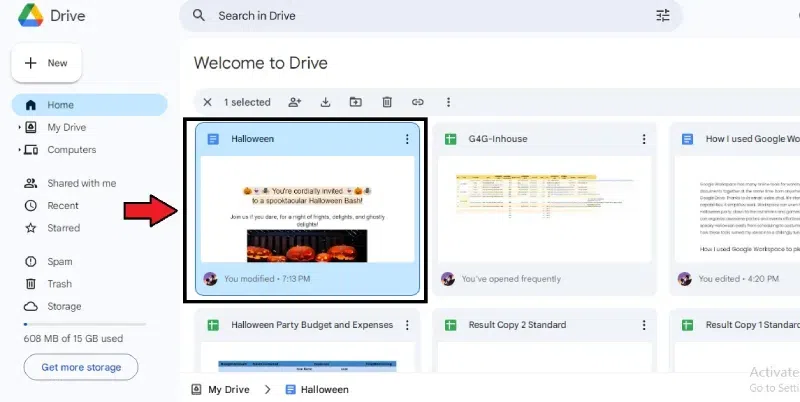
Preference is usually given to the files that you have utilized recently. Thus, the Recent button on the left sidebar will teach you how to manage Google Drive swiftly. You can view the files in your storage here and access the documents that other users have shared with you. They will be organized by the time they were last edited to make them easier to find.
Example:
The document Halloween is displayed in the recent section.
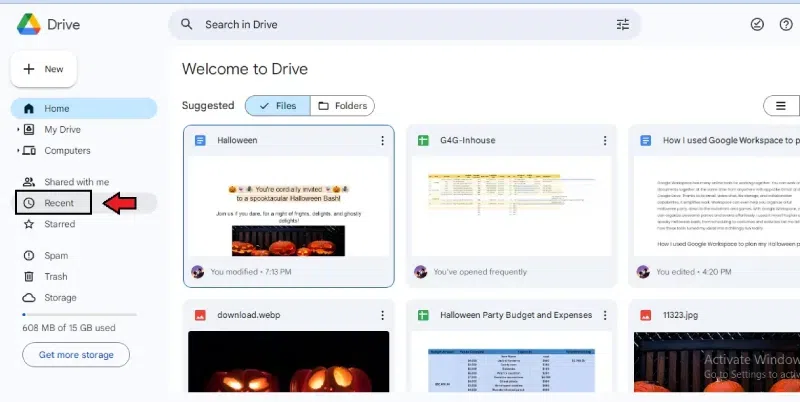
The document Halloween is displayed in the recent section.
Tip #9: Use the Star feature for quick access to essential files and folders
Save time searching your massive Google Drive folders for crucial documents. Starring your files is a straightforward approach to saving time!
- Mark crucial files in Google Drive to facilitate quick access.
- It functions similarly to a file “Favorites” list.
Example:
The Halloween file is Starred and visible in the Starred folder.
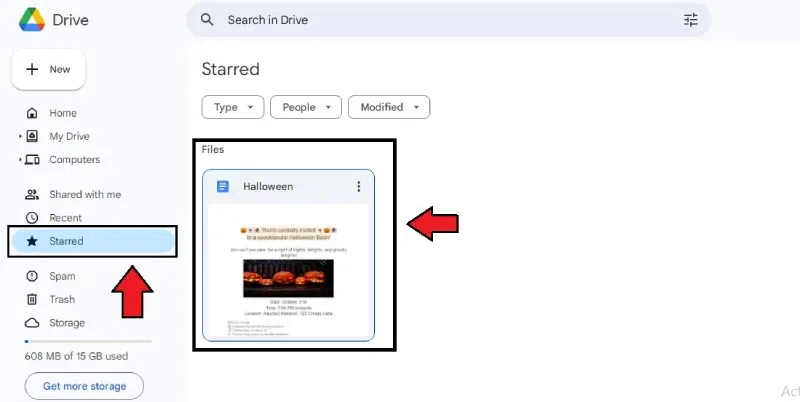
The Halloween file is Starred and visible in the Starred folder.
How to Star the Files and Folders in Drive?
Step 1: Open Drive from Google Workspace applications
Turn on your default web browser and open the Google Search engine. Click on the nine dots menu bar in the top right corner and select Drive from the workspace applications.
Open Drive from Google Workspace applications
Step 2: Select a File or Folder to star
Select a File or Folder, click “More actions” (3 dots), and select” Organize.” Now, choose “Add to Starred” from the submenu.
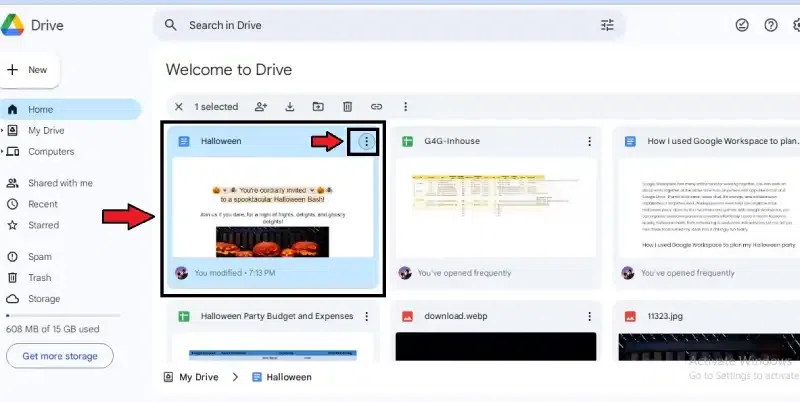
Select a File or Folder, click “More actions” (3 dots)
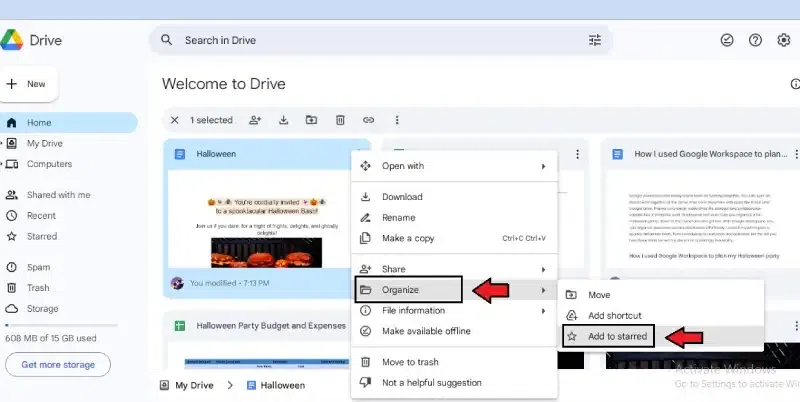
select” Organize.” and choose “Add to Starred” from the submenu
Note:
The starred file will be visible in the Starred folder on the left pane menu bar.
Tip #10: Select Files Faster with the Ctrl and Shift function
Here are three ways to cut down on your time and energy:
- Hold Ctrl to select all relevant files simultaneously; click on them while holding down the Ctrl key.
- Hold Shift to pick each item in between; click the first file and then the last file while holding Shift.
- Drag-and-choose, click and drag inside a range to easily choose multiple files.
Moreover, you may choose between list and grid views to better suit your tastes by clicking the “Change View” button next to the sorting choices and info icon in the top-right corner.
Tip #11: Clear storage to declutter and make space for new files
If you want to find the digital files you need quickly, get rid of anything that might distract you from your work. Organizing folders in Google Drive often entails locating and removing similar files, such as duplicates or outdated versions of papers. It will take a long time to do this manually.
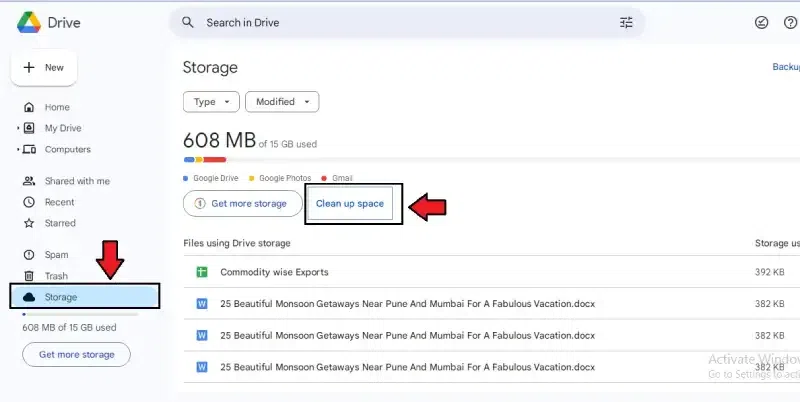
Clear storage to declutter and make space for new files
Look at the Recent section to arrange files in a Google Drive folder that others can access. All recent actions will be shown. You can see that the relevant people have examined, edited, and approved the documents you’re working on.
How do you view recent Activity?
Step 1: Open Drive from Google Workspace applications
Turn on your default web browser and open the Google Search engine. Click on the nine dots menu bar in the top right corner and select Drive from the workspace applications.
Open Drive from Google Workspace applications
Step 2: Click on the “View Details” icon
On the top right corner of the My Drive page, select the “View Details” icon to open the Activity window.
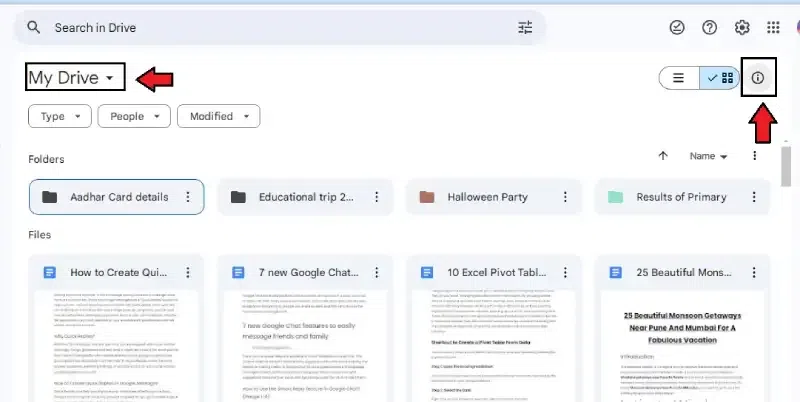
Click on the “View Details” icon
Note:
You can view your recent Activity on the “My Activity” panel.
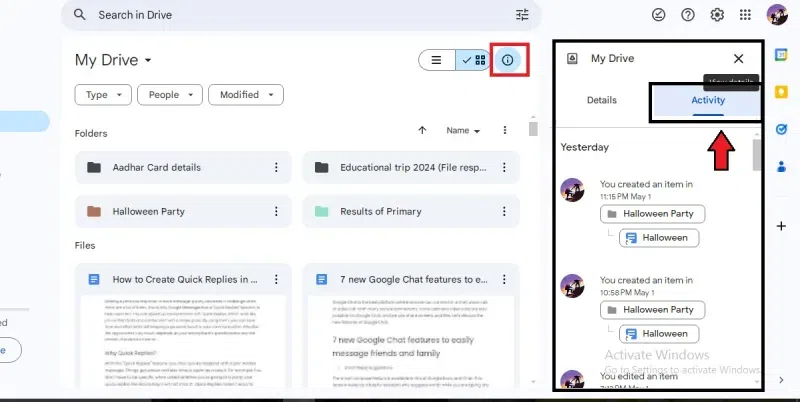
You can view your recent Activity on the “My Activity” panel
Tip #13: Harness the Power of the Advanced Search Feature
Regular search in Google Drive is handy, but there’s a way to search like a pro! The secret weapon is called “Advanced Search.” It might sound scary, but it’s super easy to use.
If you’re looking for a spreadsheet with your “new projects 2024,” Here’s how to search for it:
Type “new projects 2024t” in the search bar.
Then, add “type:xls” to find only spreadsheets (“.xls” is a standard spreadsheet format).
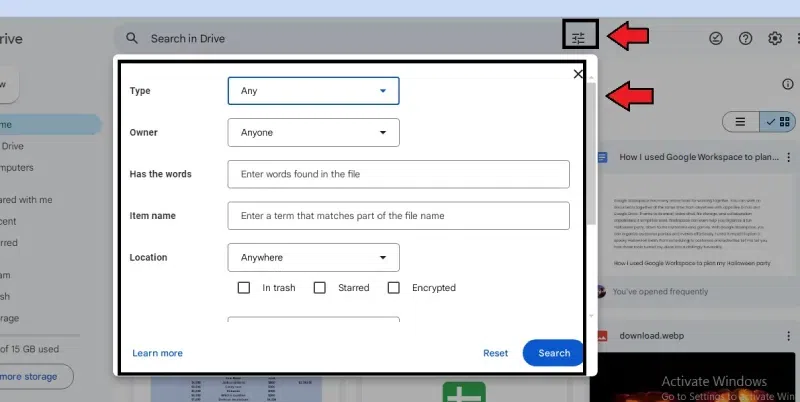
Harness the Power of the Advanced Search Feature
Conclusion
To summarize, Google Drive is an effective tool for maintaining productivity and Organization. By paying attention to these 12-pointers, you can maximize the utilization of Google Drive and increase your productivity. There are several ways to customize Google Drive to suit your needs, from utilizing sophisticated search tools to organizing your files logically.
FAQs on Google Drive
How can users search a drive with lots of data more quickly?
The search box at the top of Google Drive allows users to find files by name. To identify solely Word documents, it even permits the use of unique instructions like “type:docx” (“.docx” being a standard format).
If the “Shared with me” Folder looks cluttered, should users clear it up?
In response, this Folder is a unique feed highlighting files users have shared with others. Deleting items from this list might lead to problems, so it’s better to consider it a handy list that the user needs help with modifying.
How can a file that should be in two project directories be stored by users?
Google Drive provides an answer! Users can attach identical files to many directories. It implies a file may exist in the “Marketing” and a particular campaign folder. You may select a different folder for the file by clicking on it and then using the keyboard shortcut “Shift + Z.”
Share your thoughts in the comments
Please Login to comment...