Git internals refer to the underlying mechanisms and data structures that power Git’s version control system. This includes concepts like objects (commits, trees, blobs), branches, commits, and the staging area. Understanding Git internals is crucial for mastering Git workflows and troubleshooting issues effectively.
Git Objects
Git objects are fundamental units of storage in Git, representing various elements like commits, trees (directories), and blobs (file contents), each identified by a unique SHA-1 hash. These objects are immutable and form the backbone of Git’s version control system.
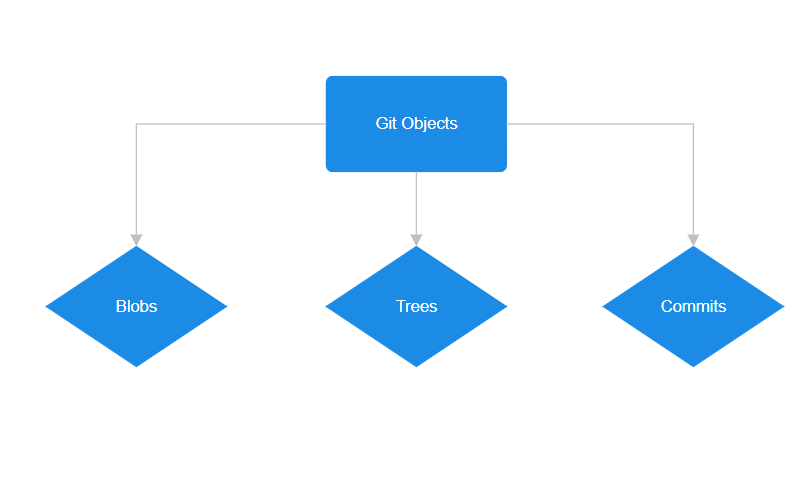
Blob (Binary Large Object)
A Git blob is a snapshot of a file’s content without metadata, identified by a unique SHA-1 hash.
- It captures the file’s state at a specific time and remains immutable once created. Blobs are the fundamental units in Git’s version control system, stored in the repository based on their content hashes.
- Modifying a file creates a new blob, maintaining the integrity of the version history within Git.
Tree
A Git tree is like a folder in a file system, organizing blobs (files) and sub-trees (subdirectories).
- It stores references to blobs and sub-trees along with metadata like file names and permissions.
- The SHA-1 hash of a tree considers both its content and structure, ensuring integrity and hierarchy.
- Trees maintain the repository’s structure, aiding in the organized storage and retrieval of files and directories.
Commit:
A Git commit captures a snapshot of the project’s state at a specific time. It includes metadata such as author details, timestamp, and a descriptive message.
- Each commit references the root tree, representing the project’s files and directories at that moment.
- Commit objects also link to parent commits, forming a chronological history of changes.
- Commits are checkpoints in the project’s history, enabling change tracking, version control, and collaboration.
- They are essential for branching, merging, and maintaining the project’s integrity and history.
Git Data Model
Git stores data in a directed acyclic graph (DAG) structure, where commits form the nodes and parent-child relationships represent the history of changes. Each commit points to a tree object that represents the snapshot of files at that particular moment.
The Process of Creating a Git Repository
Step 1: This step involves creating the .git directory in your working directory. When you run git init, Git creates several subdirectories within the .git directory, each serving a specific purpose.
git init
Step 2: Create a New File. After initializing the repository, you can start creating new files in your working directory. These files are considered untracked until you add them to the Git index.
touch filename.txt
Step 3: Stage the File. Staging is the process of adding untracked or modified files in your working directory to the Git index. This step prepares the files to be included in the next commit.
git add <filename>
Step 4: Commit the Changes. The final step is to commit the staged changes. This creates a new commit object in the Git repository, storing a snapshot of your project.
git commit -m "Your commit message"
Git Workflow:
New Repository: Initialize a new Git repository using git init to start tracking changes in your project directory.
git init
Or, clone an existing repository from a remote source using git clone <repository_url>.
git clone <repository_url>
Stage the Changes: Use git add <file_name> to stage specific changes for commit.
git add <file_name>
Or, use git add . to stage all changes in the current directory.
git add .
Commit Changes: Commit staged changes using git commit -m “Your commit message”.
git commit -m "Your commit message"
Branching
- Create a new branch using git branch <branch_name>.
git branch <branch_name>
- Switch to a different branch using git checkout <branch_name>.
git checkout <branch_name>
- Or, combine branch creation and checkout using git checkout -b <branch_name>.
git checkout -b <branch_name>
- Merge changes from one branch into another using git merge <branch_name>.
git merge <branch_name>
- Review History: View commit history using git log.
git log
- Push Changes: Push local commits to a remote repository using git push <remote_name> <branch_name>.
git push <remote_name> <branch_name>
- Pull Changes: Pull changes from a remote repository to update your local repository using git pull <remote_name> <branch_name>.
git pull <remote_name> <branch_name>
Plumbing and Porcelain Commands in Git
- Plumbing Commands: These are low-level commands that directly manipulate Git’s internal data structures. They are designed for scripting and automation and are less user-friendly.
- Porcelain Commands: These are high-level commands that provide a more user-friendly interface for common Git operations. They abstract away the complexities of Git’s internals and are easier to use for everyday tasks.
Creating a Repository from Scratch Using Plumbing Commands
By using plumbing commands, we can create a Git repository from scratch, without relying on commands like git init, git add, or git commit. This exercise will help us deepen our understanding of Git’s internals.
Create the .git Directory
Use the mkdir command to create a .git directory, which will store all the Git-specific files and data.
mkdir .git
Create the Object Storage Structure
Inside the .git directory, create the objects directory, which will store all the objects (commits, trees, blobs).
mkdir .git/objects
Create the HEAD File
Create a file named HEAD inside the .git directory. This file contains a reference to the current branch.
touch .git/HEAD
Create the Refs Directory
Inside the .git directory, create the refs directory, which will store references to commits.
mkdir .git/refs
Create the Heads Directory
Inside the refs directory, create the heads directory, which will store references to branch heads.
mkdir .git/refs/heads
Create Initial Commit
Create the initial content for your repository. This might involve creating files, writing code, etc.
Hash and Store Objects
Use the git hash-object command to hash the content of each file and store it as a blob object in the object database.
echo "Initial commit" | git hash-object -w --stdin
Create a Tree Object
Use the git mktree command to create a tree object representing the directory structure and file paths in your repository.
git mktree <tree_content>
Create a Commit Object
Use the git commit-tree command to create a commit object that points to the root tree object and includes metadata such as author, committer, and commit message.
git commit-tree <tree_hash> -p <parent_commit> -m "Initial commit"
Update HEAD Reference
Update the HEAD file to point to the newly created commit object.
echo "ref: refs/heads/main" > .git/HEAD
Create Branch Reference
Create a branch reference file (e.g., main) inside the refs/heads directory.
echo "<commit_hash>" > .git/refs/heads/main
Finalize Repository Setup
Your repository setup is now complete.
Working with Branches Using Plumbing Commands
Using plumbing commands in Git, you can create branches by manually creating files under .git/refs/heads with commit hashes, and switch between branches by modifying the HEAD file to point to the desired branch.
Create a Branch:
To create a branch, all you need to do is create a file under the .git\refs\heads directory. The name of the file is the name of the branch, and its contents should be the hash of the commit it points to.
- Navigate to the ‘.git/refs/heads’ directory within your Git repository.
- Create a new file with the name of your desired branch. For example, if you want to create a branch named “feature”, create a file named feature.
- Write the hash of the commit that you want the branch to point to into this file. This hash represents the latest commit on the branch.
echo "<commit-hash>" > .git/refs/heads/feature
Switch to the New Branch:
To switch to the new branch, you need to modify the HEAD file to point to your new branch.
- Open the ‘HEAD’ file located in the .git directory.
- Modify the contents of this file to point to the new branch. Replace the existing branch name with the name of your new branch.
echo "ref: refs/heads/feature" > .git/HEAD
By following these steps, you can create and switch between branches without using git branch or git checkout.
Conclusion
Understanding the internals of Git enables you to utilize its features more effectively and troubleshoot problems with ease. This guide has provided a deep dive into Git’s internals, explaining the core concepts and illustrating how you can use plumbing commands to create a repository and work with branches.
Share your thoughts in the comments
Please Login to comment...