Getting Started With Google Colab
Last Updated :
26 Oct, 2023
Google Colab is the short form for “Google Colabortory“. It is an executable document that lets you write, run, and share code or you can think as an improved version of “Jupyter Notebook” stored in Google Drive. You might be wondering about the word “Notebook“, in simple words it is just a document that includes executable lines of code along with text, images, figures, tables, graphs, equations, and much more that even a layman can able to get insights about the concepts behind it not just developers/programmers out there. It is widely used by data scientists, analysts, and machine learning enthusiasts due to its unique features and advantages.
Getting Started With Google Colab
What makes it different? We might be thinking why colab, why not Jupiter Notebook or any other IDE out there?
A simple and Precise answer would be its active features which make it different.
Here are the highlighted features one should be aware of:
- Cloud-based notebook interface: Users can access Colab from a web browser, eliminating the need for complex installations or setting up local development environments.
- Pre-installed Libraries: Certainly! Google Colab comes with several pre-installed libraries and packages such as NumPy, Pandas, Matplotlib, and much more that are commonly used in data science, machine learning, and deep learning tasks.
- Real-time CollaborationGoogle Drive: It offers a collaborative environment for individuals and teams to work on projects, data analysis, machine learning tasks, and more.
Colab real-time collaboration
- Free Computing Resources : It provides access to powerful resources such as GPUs and TPUs. So you can work on projects hassle free irrespective of your local storage configurations.
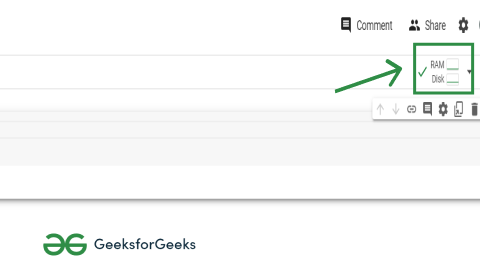
Colab resource computation
- Integration with Google Drive and Github : It allow users to save, share, and store their Colab notebooks directly in the cloud. User can access the notebooks from anywhere with an internet connection, and there’s no risk of data loss due to local storage issues or hardware failures.
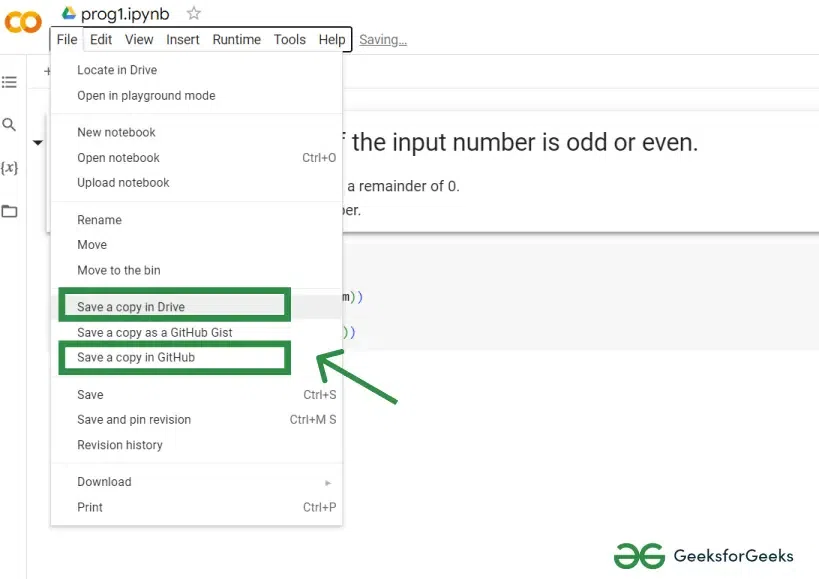
Colab gitHub & drive integration
How to Use Google Colab
It is a cloud based interface as specified earlier, you can simply get started by the following:
1. Accessing Google Colab
Open your web browser and search for google colab and then simply click the first link provided which will redirect you to the Google Colab’s welcome page.

Colab web browsing
2. Creating a Google Account (if needed) and Sign In
If you don’t have one, simply create a Google account its absolutely free else sign in to your account.
Colab account sign-in
3. Create a new file / notebook
You can simply click on the new notebook redirecting you to a new page to get started.
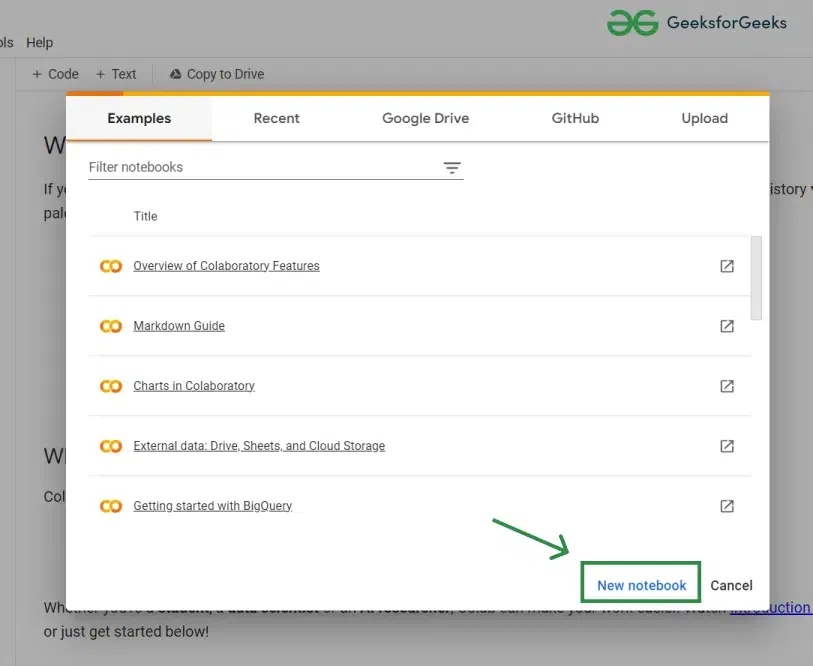
Colab new notebook creation
OR simply you can select the New notebook in the File menu.
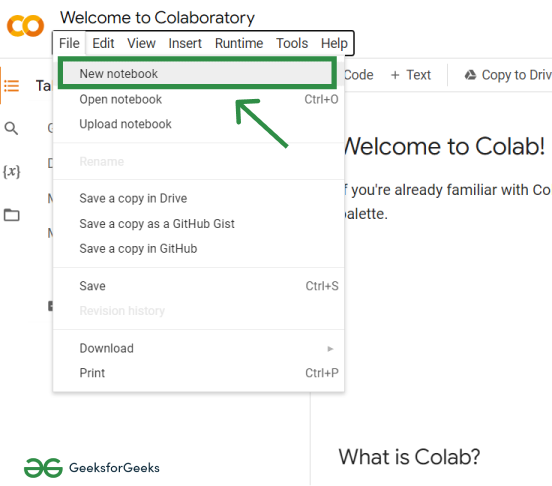
Another method to create new notebook in Colab
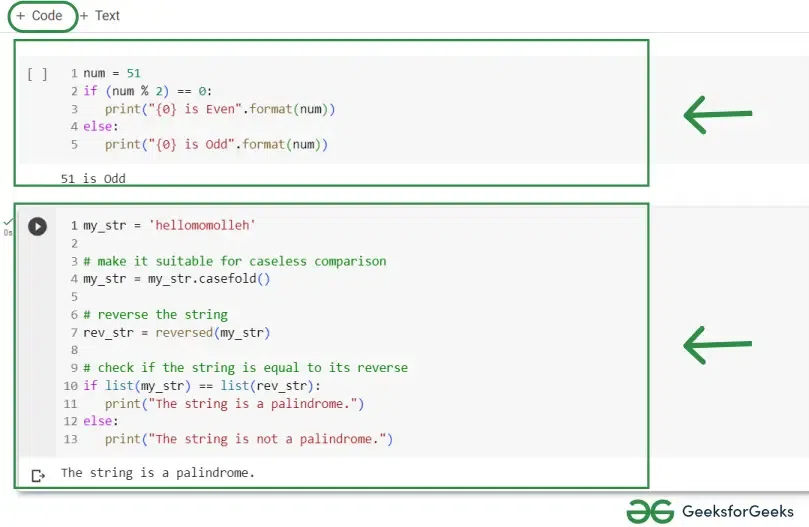
4. Executing Code Cell
You can able to write your program within the code cell and can run the code to check your desired output.
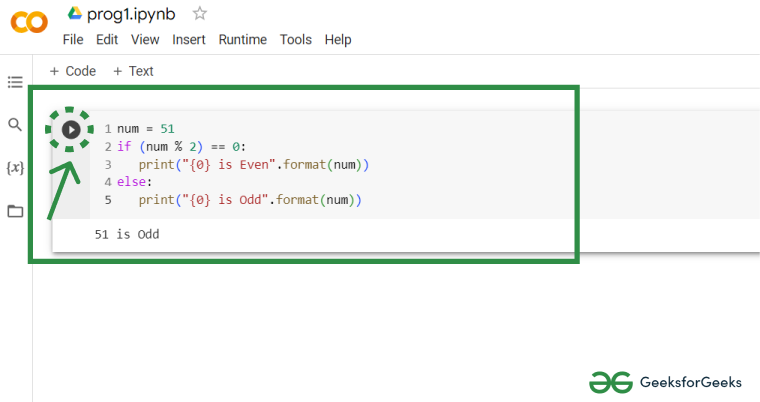
code execution in google colab
Working with Google Drive in Google Colab
Linking Drive to Colab
1. Open Google Colab and click on the Mount Drive button.
Mounting drive in Colab
2. Click on the Connect button to give Colab access to your Drive.
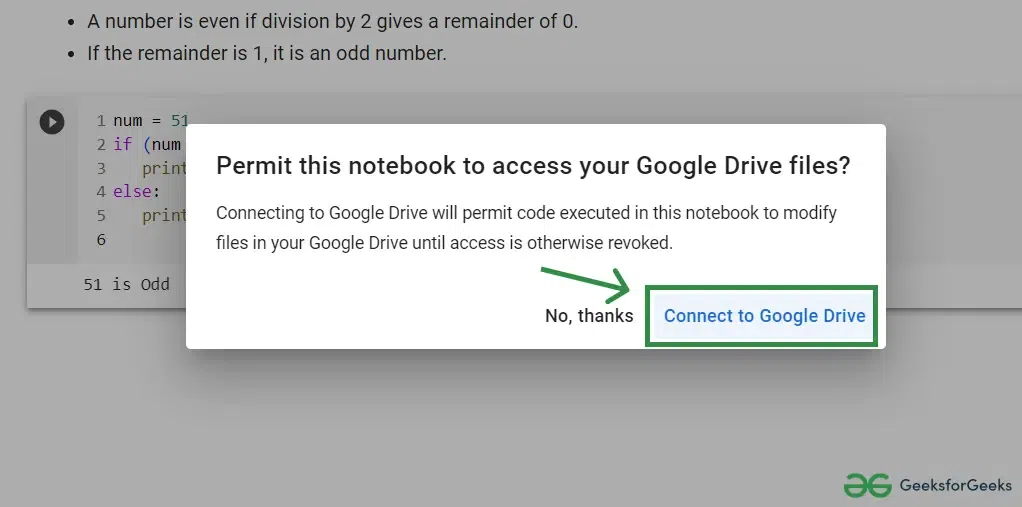
connecting colab to drive

google drive gets connected/mounted in collab
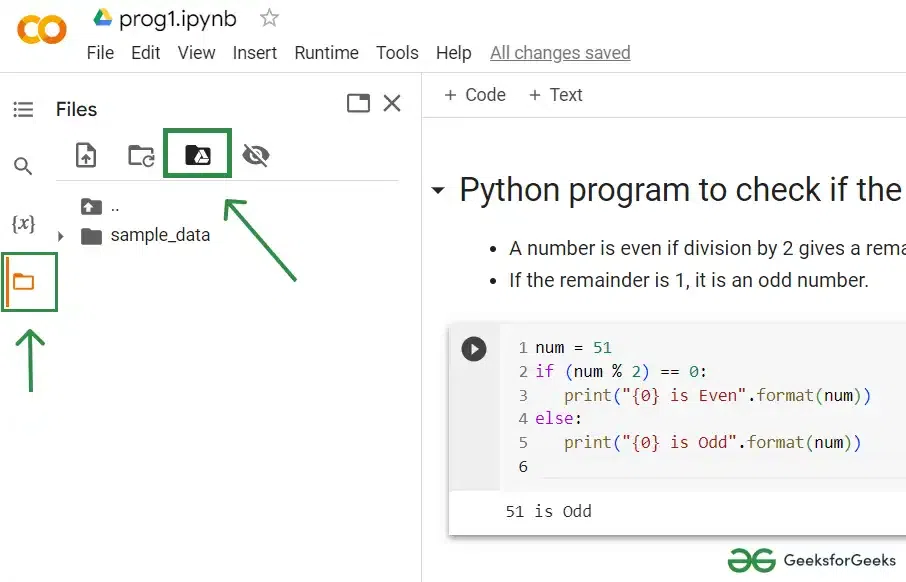
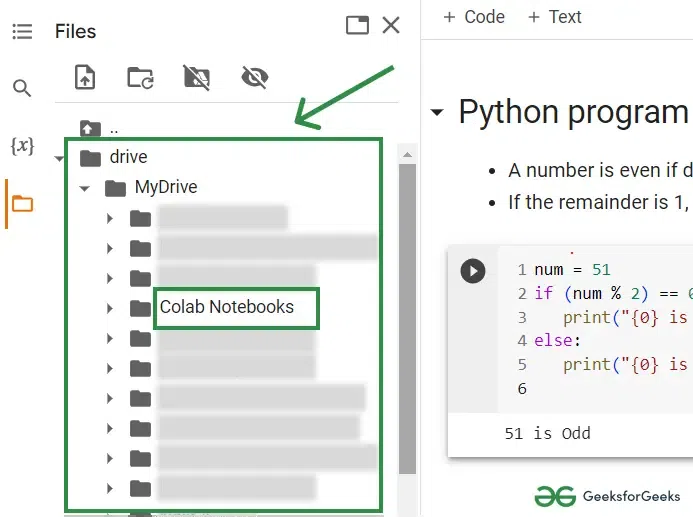
Accessing and Saving Notebook in Drive
Once you’ve linked your Drive to Colab, you can access and save notebooks from Drive directly within Colab.
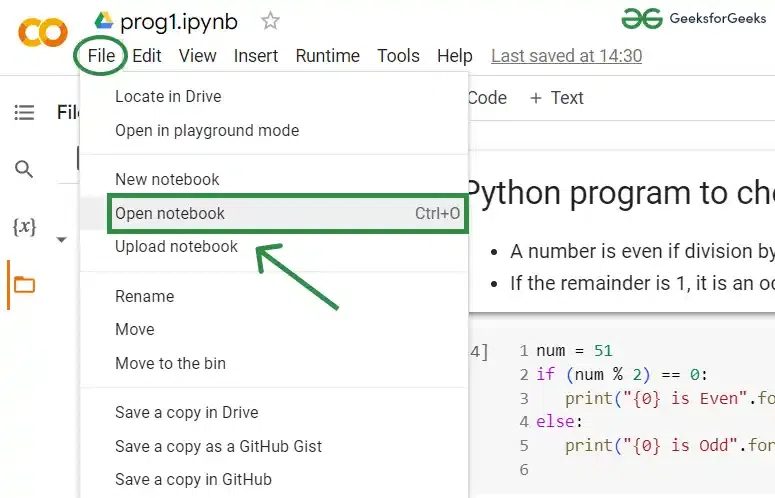
To access a notebook from Drive
1. Click on the File menu and select Open Notebook.
access notebook from file menu
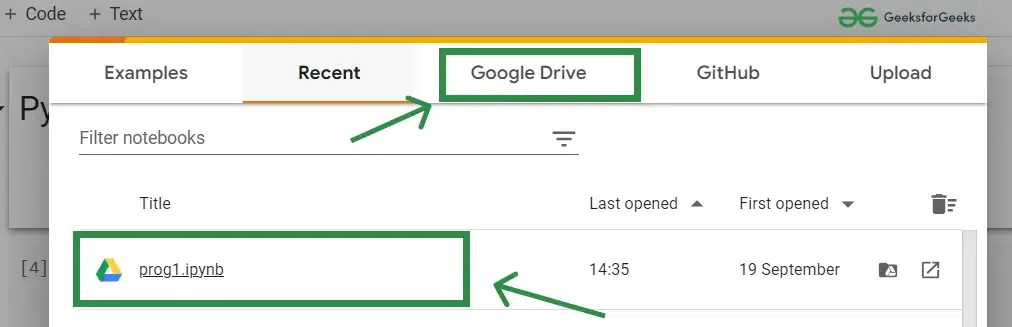
2. Click on the Drive tab and navigate to the notebook you want to open.
open your saved notebook from drive
To save a notebook to Drive
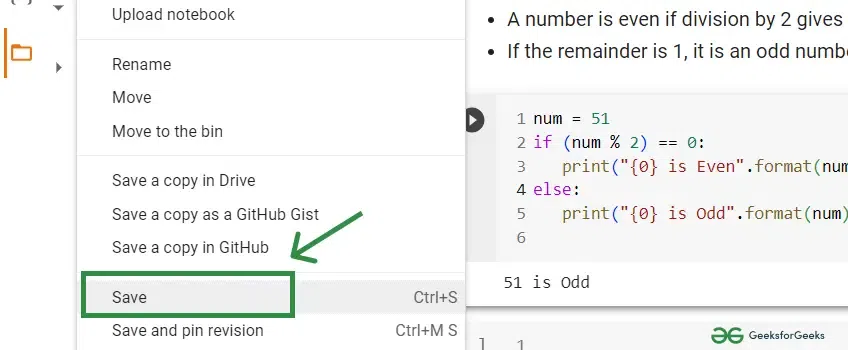
1. Click on the File menu and hit Save your notebook.
save the notebook from file menu
2. Click on the Drive tab and navigate to the folder where you want to save the notebook and click on the Save button.
collab notebooks folder in drive
3. Colab automatically saves your notebooks to a “Colab Notebooks” folder in Google Drive.
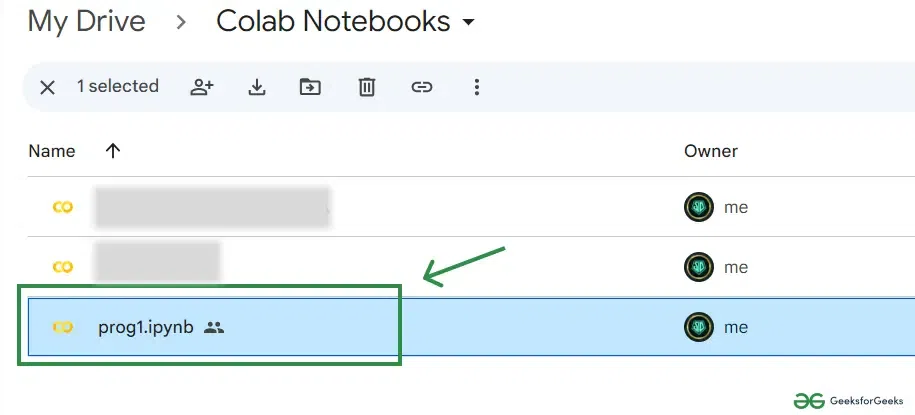
colab notebooks folder in drive
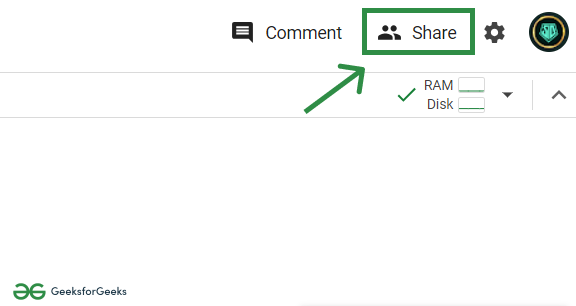
Share your Notebook
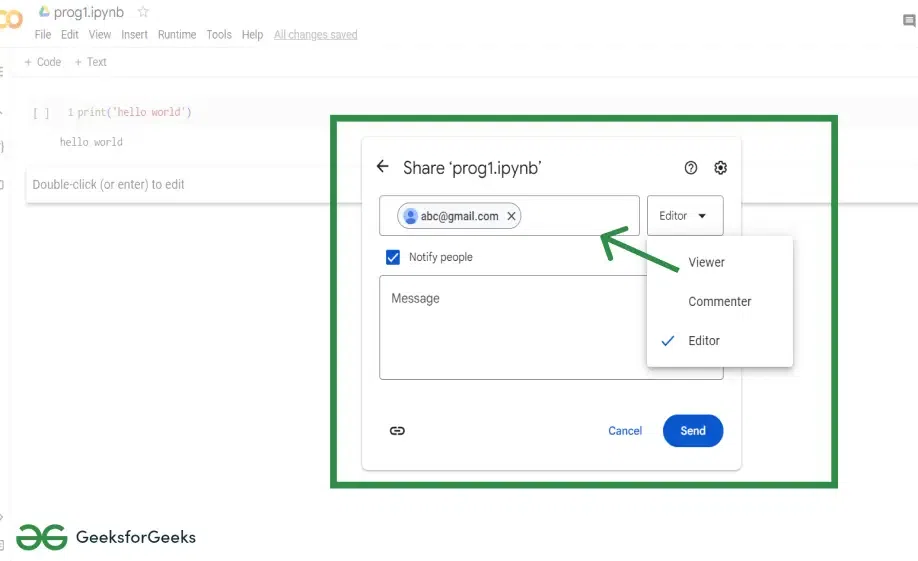
1. Click on the Share button in the top right corner of the notebook.
select share button
2. Enter the email addresses of the people you want to share the notebook.
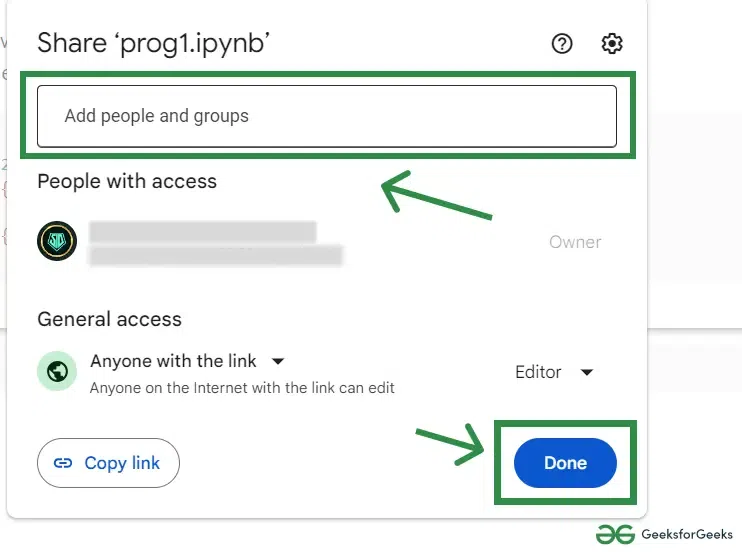
share notebook using email address
Additionally you can upload or download your Notebook as .py or .ipynb format.
1. Upload Notebook
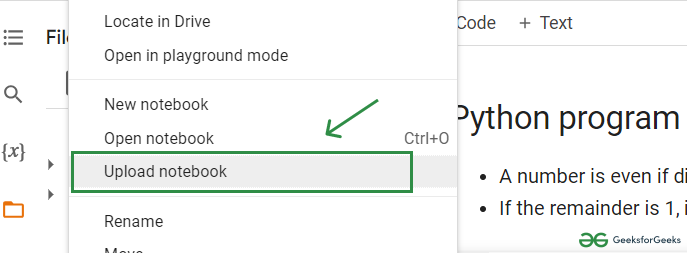
upload your colab notebook from file menu
2. Download Notebook
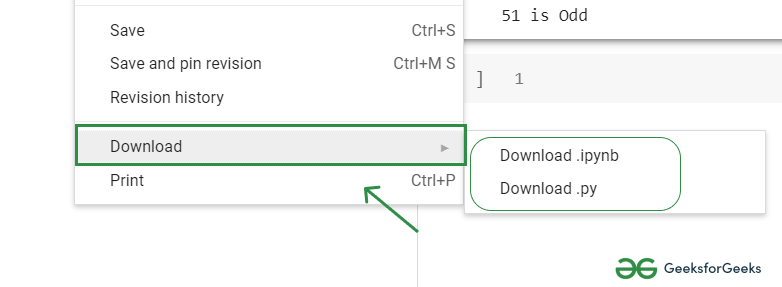
download your colab notebook from file menu
Understanding the Colab Interface
1. Editor
The editor is where you write your code. It also includes a number of features to help you write and debug your code, such as code completion, syntax highlighting, and error messages.
Code cells
- The area where you can able write and execute the program.
- Click the Play icon in the left gutter of the cell;
- Type Cmd/Ctrl+Enter to run the cell in place;
- Type Shift+Enter to run the cell and move focus to the next cell (adding one if none exists); or
- Type Alt+Enter to run the cell and insert a new code cell immediately below it.
Code cells in google colab
Text cells
- The area where you can able write any text.
- It supports Markdown syntax.
- You can also add math to text cells using LaTeX to be rendered by MathJax. Just place the statement within a pair of $ signs. For example: $\sqrt{3x-1}+(1+x)^2$ becomes √(3x-1) + (1+x)2.
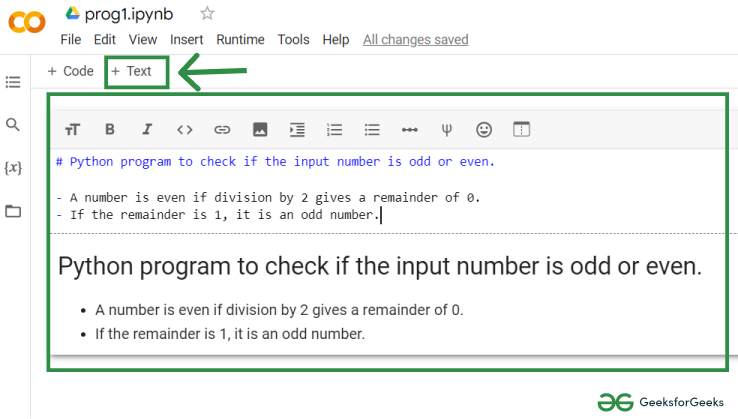
Colab text area which support Markdown
Additionally you can add new cells by using the + CODE and + TEXT buttons that show when you hover between cells. These buttons are also in the toolbar above the notebook where they can be used to add a cell below the currently selected cell. This makes your code well organized and proof helpful for other people whom you share.
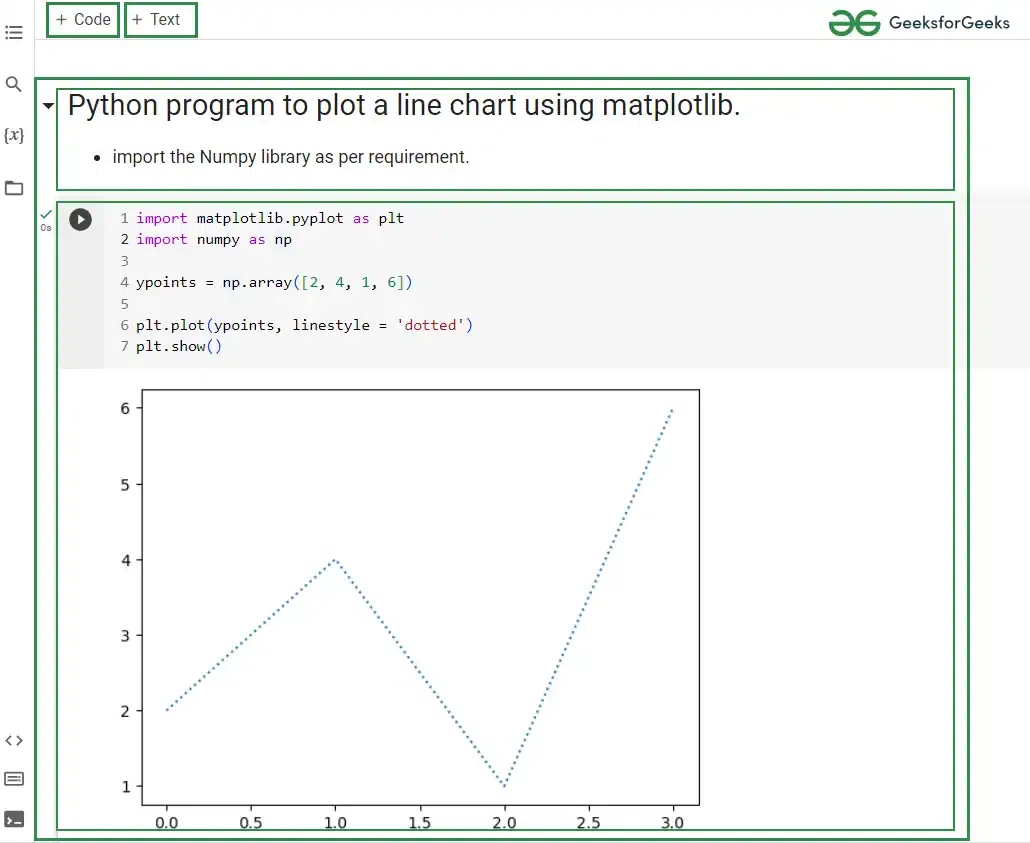
Adding & moving cells using top toolbar in Google colab
The runtime is where your code is executed. It includes a number of features to help you run your code.
Colab runtimes are servers that are used to execute your code such as :
- GPU : Graphical Processing Unit. Capable of enhancing your graphical interface.
- TPU : Tensor Processing Unit. Much powerful powerful custom-built processors to run the project made on a specific framework, i.e. TensorFlow
- CPU : Central Processing Unit. It manage all your functions such as calculations and input/output of the computer.
To select runtime, navigate to the Runtime menu and select Change runtime type according to the usability.

select runtime type from runtime menu
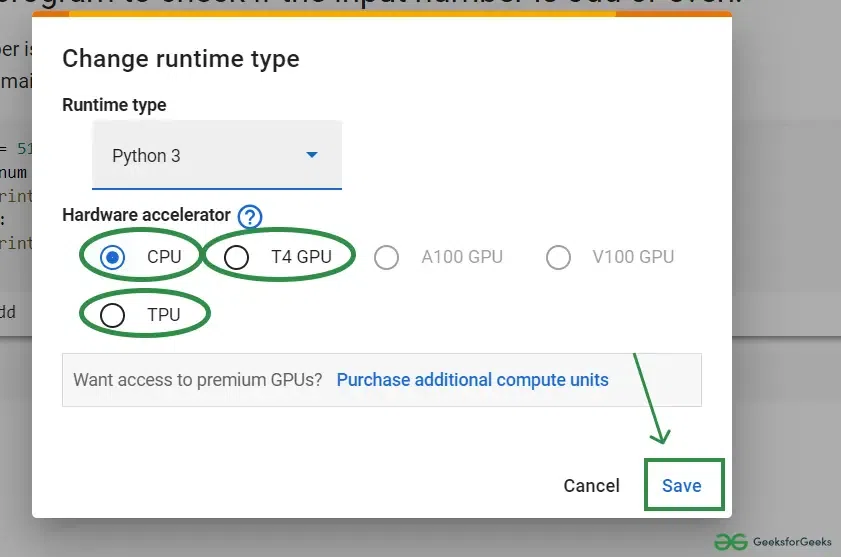
change the required runtime type
Keyboard Shortcuts for a Better Colab Experience
Here are some keyboard shortcuts that you can use to improve your Colab experience:
- Ctrl + Enter : Run the current code cell.
- Shift + Enter : Run the current code cell and move to the next one.
- Ctrl + Z : Undo the previous action.
- Ctrl + Y : Redo the previous action.
- Ctrl + C : Copy the current cell or selected text.
- Ctrl + V : Paste the copied cell or text.
- Ctrl + X : Cut the current cell or selected text.
- Ctrl + / : Comment/Uncomment the current line or selected text.
- Ctrl + S : Save the current notebook.
Share your thoughts in the comments
Please Login to comment...