Generate an angular@16 project within nx workspace
Last Updated :
29 Apr, 2024
Nx Workspace is a powerful tool that provides monorepo-style development for Angular projects. It offers enhanced capabilities for managing multiple applications, libraries, and shared code within a single workspace. In this article we will see how to generate an Angular 16 project withing NX workspace.
Prerequisites:
What is NX Workspace?
Nx is a powerful way to manage multi-project applications. It also has support for Angular 16. Nx is designed to simplify development within a monorepo (Mono = Single, Repo = Repository) structure. A monorepo is a single version control repository that covers all your projects. Nx provides features and functionalities to effectively manage these projects within a monorepo, enhancing user experience and build performance.
Benefits of using NX Workspace
- Improved Developer Experience: Nx offers a streamlined development workflow with a unified CLI, automation, and code generation which makes for a good developer experience.
- Faster Builds and Tests: Nx employs caching mechanisms and parallelization techniques to reduced build time and testing.
- Simplified Dependency Management: Nx streamlines dependency management within the monorepo, reducing versioning issues and simplifying the development process.
- Scalability and Maintainability: Nx uses the efficient organization and management of large and complex projects, which makes it easier to scale and maintain over time.
Steps to Generate Angular Project
Step 1: Install Nx.dev globally if you haven’t already
npm install -g create-nx-workspace
Step 2: Creating NX workspace
Use npx-create-nx-workspace to generate nx workspace.
command : npx create-nx-workspace my-nx-workspace
After this command, it will ask us to choose stack, we will use “angular with modern tooling” option.
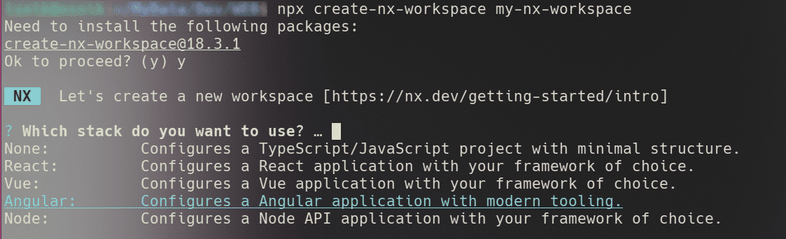
selecting stack for nx workspace generation
Choose remaining options as you want, and wait some time for workspace generation.
Step 3: Generate the Angular application
Use the Nx generator with the @nrwl/angular:app to create a new Angular application using following command.
nx generate @nrwl/angular:app my-angular-app
This command will generate angular app in our nx directory.
Note : Replace “my-angular-app” with your application name of choice.
Step 4: Build and serve the application
Once the generation is complete, we can build and serve your new Angular application. Use following command to serve and build the application.
command : nx serve my-angular-app
Note : This command will build the application and start a server at http://localhost:4200 by default
Output:
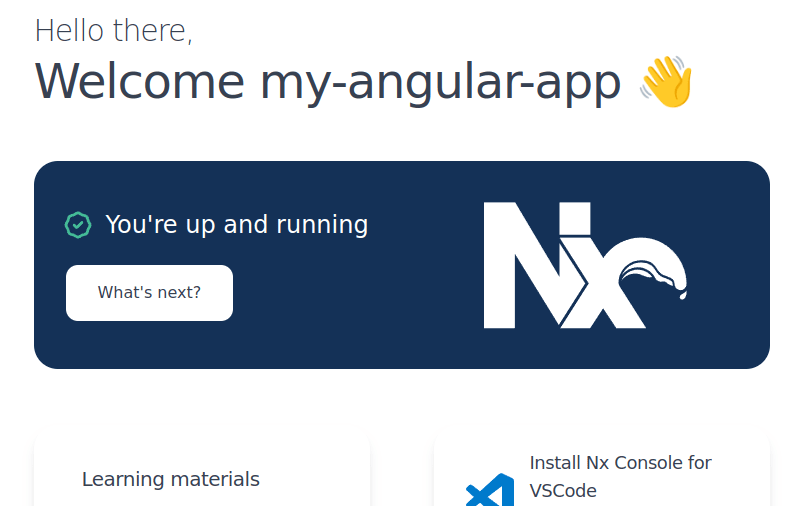
Output
Share your thoughts in the comments
Please Login to comment...