Dynamic Visualization using Python
Last Updated :
05 Jun, 2023
Data visualization in Python refers to the pictorial representation of raw data for better visualization, understanding, and inference. Python provides various libraries containing different features for visualizing data and can support different types of graphs, i.e. Matplotlib, Seaborn, Bokeh, Plotly, and others.
Required Module:
pip install numpy matplotlib
What is Dynamic Visualization in Python
Dynamic visualization for any system means a representation of the change of state of the current system graphically during the presentation. In the aspect of data visualization in Python, dynamic visualization is a dynamic graph that either changes with the passage of time like in a video else may vary as the user varies the input but in the current presentation as if it were alive.
Steps to Create Dynamic Plot in Python
Below are the steps to create our first Dynamic Visualization in Python.
Step 1. Create a Queue of Fixed Length
A Queue is a linear data structure that stores items in the First In First Out(FIFO) principle. It can be implemented in various ways in Python. Creating a queue of fixed length for dynamic plotting in Python refers to creating a data structure that can store a fixed number of elements and discard the oldest element when the container is full. It is useful when we want to plot data points that are continuously updated. By limiting the size of the container, we can prevent the plot from becoming overcrowded thus improving the performance and clarity of the plot.
Python3
from collections import deque
data_points = deque(maxlen=3)
data_points.append(40)
data_points.append(60)
data_points.append(30)
print(data_points)
data_points.append(13)
data_points.append(99)
print(data_points)
|
Output
deque([40, 60, 30], maxlen=3)
deque([30, 13, 99], maxlen=3)
Step 2. Generate the Points and save them to Queue
Here we generate data points dynamically and append them to a queue data structure rather than performing manual operations as shown in the above example. Here we will use functions available in the random module of Python in order to generate data points.
Python3
from collections import deque
import random
data_points = deque(maxlen=5)
for i in range(7):
new_data_point = random.randint(0, 100)
data_points.append(new_data_point)
print(data_points)
|
Output
Note: Output will vary.
deque([64], maxlen=5)
deque([64, 57], maxlen=5)
deque([64, 57, 15], maxlen=5)
deque([64, 57, 15, 31], maxlen=5)
deque([64, 57, 15, 31, 35], maxlen=5)
deque([57, 15, 31, 35, 25], maxlen=5)
deque([15, 31, 35, 25, 12], maxlen=5)
Step 3. Remove the first point
In dynamic plotting in Python, when we generate a new data point and add it to a fixed-length queue, we need to remove the oldest point from the queue in order to maintain the fixed length of the queue. Here we remove the element from the left side following the FIFO principle.
Python3
from collections import deque
import random
data_points = deque(maxlen=5)
data_points.extend([1, 2, 3, 4, 5])
print("Deque before removing the first element:", data_points)
data_points.popleft()
print("Deque after removing the first element:", data_points)
|
Output
Deque before removing the first element: deque([1, 2, 3, 4, 5], maxlen=5)
Deque after removing the first element: deque([2, 3, 4, 5], maxlen=5)
Step 4. Plot the Queue. Pause the Plot to visualize
We first plot the data points that are stored in the queue using Matplotlib and then pause the plot for a certain amount of time so that the plot can be visualized before it is updated with the next set of data points. This can be done using the plt.pause() function in Matplotlib.
Here in our example code block, we will generate a random set of y values for a constant increase in x-axis values from 0 and then observe the plot and then pause it. The explanation of the code is following.
- data_points = deque(maxlen=50): Create a deque object with a maximum length of 50 to store the data points.
- fig, ax = plt.subplots(): Create a figure and axes object for the plot.
- line = ax.plot([]): Create an empty plot using the plot() method of the axes object and store it in the line variable.
- ax.set_xlim(0, 100) and ax.set_ylim(0, 100): Set the x-axis and y-axis limits to 0 and 100, respectively.
- for I in range(50): Iterate through 50 data points to update the plot.Generate new data points for x and y axes. Append the new data points to the deque. Update the plot with the new data points using the set_data() method of the line object. Pause the plot for 0.01 seconds using plt.pause(0.01) to allow time for the plot to be updated.
Python3
import matplotlib.pyplot as plt
from collections import deque
import random
data_points = deque(maxlen=50)
fig, ax = plt.subplots()
line = ax.plot([])
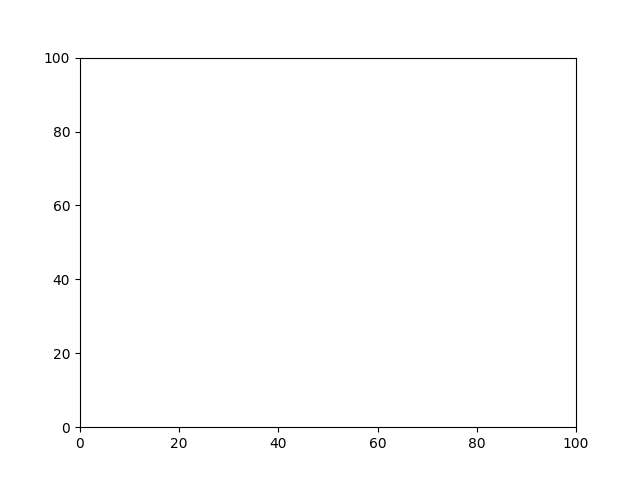
ax.set_xlim(0, 100)
ax.set_ylim(0, 100)
for i in range(50):
new_x = i
new_y = random.randint(0, 100)
data_points.append((new_x, new_y))
x_values = [x for x, y in data_points]
y_values = [y for x, y in data_points]
line.set_data(x_values, y_values)
plt.pause(0.01)
plt.show()
|
Output :

The plot for the above code block( Note the output will vary as y is randomly generated )
Step 5. Clear the plot for the next set of values
When updating the data points in real-time, we will clear the plot before plotting the next set of values. This can be done using the line.set_data([], []) function in Matplotlib so that we maintain the display of the fixed size of the queue data structure in real-time.
Note: In dequeue even if elements are not popped it gets removed automatically from the front of the queue assuming the FIFO principle. The explanation of the code is following.
- data_points = deque(maxlen=50): Create a deque object with a maximum length of 50 to store the data points.
- fig, ax = plt.subplots(): Create a figure and axes object for the plot.
- line, = ax.plot([]): Create an empty plot using the plot() method of the axes object and store it in the line variable.
- ax.set_xlim(0, 100) and ax.set_ylim(0, 100): Set the x-axis and y-axis limits to 0 and 100, respectively.
- for i in range(100): Iterate through 100 data points to update the plot. Generate new data points for the x and y axes. Append the new data points to the deque. Update the plot with the new data points using the set_data() method of the line object. Pause the plot for 0.01 seconds using plt. pause(0.01) to allow time for the plot to be updated. Clear the plot for the next set of data points by calling the line.set_data([], []).
Python3
import matplotlib.pyplot as plt
from collections import deque
import random
data_points = deque(maxlen=50)
fig, ax = plt.subplots()
line, = ax.plot([])
ax.set_xlim(0, 100)
ax.set_ylim(0, 100)
for i in range(100):
new_x = i
new_y = random.randint(0, 100)
data_points.append((new_x, new_y))
x_values = [x for x, y in data_points]
y_values = [y for x, y in data_points]
line.set_data(x_values, y_values)
plt.pause(0.01)
line.set_data([], [])
plt.show()
|
Output:
Plot for above code( Note :- Plot might vary since y is random )
Dynamic Scatter Plot
The explanation of the code is following.
- data_points = deque(maxlen=50): Create a deque object with a maximum length of 50 to store the data points.
- fig, ax = plt.subplots(): Create a figure and axes object for the plot.
- ax.set_xlim(0, 100) and ax.set_ylim(0, 100): Set the x-axis and y-axis limits to 0 and 100, respectively.
- scatter = ax.scatter([], []): Create an empty scatter plot using the scatter() method of the axes object and store it in the scatter variable. The scatter() method takes empty lists as arguments for the x and y coordinates, which will be updated later.
- for i in range(100): Iterate through 100 data points to update the scatter plot. Generate new data points for the x and y axes. Append the new data points to the deque. Update the scatter plot with the new data points using the set_offsets() method of the scatter object. The set_offsets() method takes a list of tuples representing the x and y coordinates of the data points. Pause the plot for 0.01 seconds using plt.pause(0.01) to allow time for the plot to be updated.
Python3
import matplotlib.pyplot as plt
from collections import deque
import random
data_points = deque(maxlen=50)
fig, ax = plt.subplots()
ax.set_xlim(0, 100)
ax.set_ylim(0, 100)
scatter = ax.scatter([], [])
for i in range(100):
new_x = i
new_y = random.randint(0, 100)
data_points.append((new_x, new_y))
x_values = [x for x, y in data_points]
y_values = [y for x, y in data_points]
scatter.set_offsets(list(zip(x_values, y_values)))
plt.pause(0.01)
plt.show()
|
Output:
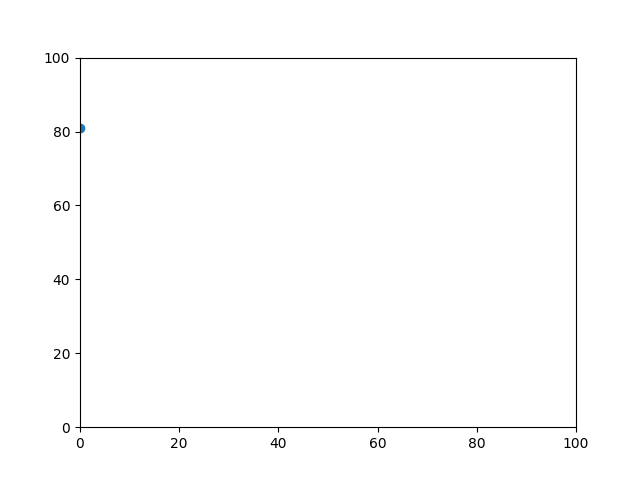
Plot for above code( Note : – plot may vary as y is random )
Dynamic Scatter Plot and Line Plot
The explanation of the code is following.
- fig, ax = plt.subplots(): Create a figure and axes object for the plot.
- line, = ax.plot([]): Create an empty line plot using the plot() method of the axes object and store it in the line variable. The [] argument specifies that no data is initially plotted on the line plot.
- ax.set_xlim(0, 100) and ax.set_ylim(0, 100): Set the x-axis and y-axis limits to 0 and 100, respectively.
- scatter = ax.scatter([], []): Create an empty scatter plot using the scatter() method of the axes object and store it in the scatter variable. The scatter() method takes empty lists as arguments for the x and y coordinates, which will be updated later.
- for i in range(100):: Iterate through 100 data points to update the scatter plot and line plot. Generate new data points for the x and y axes. Append the new data points to the deque.Update the scatter plot with the new data points using the set_offsets() method of the scatter object. The set_offsets() method takes a list of tuples representing the x and y coordinates of the data points. Update the line plot with the new data points using the set_data() method of the line object. The set_data() method takes the x and y values as arguments. Pause the plot for 0.01 seconds using plt.pause(0.01) to allow time for the plot to be updated.
Python3
import matplotlib.pyplot as plt
from collections import deque
import random
from matplotlib.animation import FuncAnimation
data_points = deque(maxlen=50)
fig, ax = plt.subplots()
line, = ax.plot([])
ax.set_xlim(0, 100)
ax.set_ylim(0, 100)
scatter = ax.scatter([], [])
for i in range(100):
new_x = i
new_y = random.randint(0, 100)
data_points.append((new_x, new_y))
x_values = [x for x, y in data_points]
y_values = [y for x, y in data_points]
scatter.set_offsets(list(zip(x_values, y_values)))
line.set_data(x_values, y_values)
plt.pause(0.01)
plt.show()
|
Output:
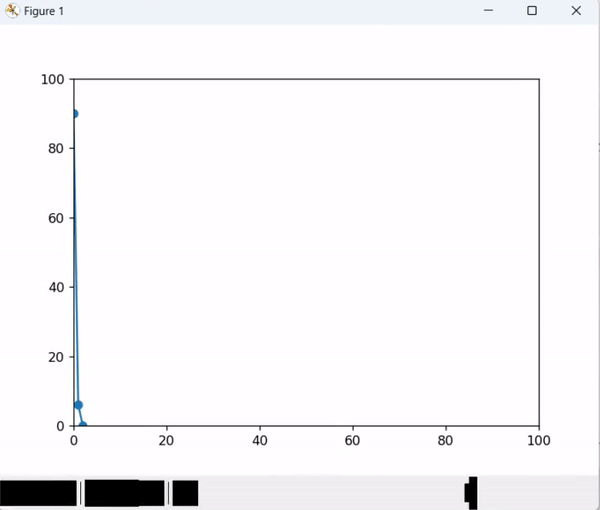
Both Plot
Share your thoughts in the comments
Please Login to comment...