How to Access Dynamic Variable {{$guid}} inside Pre request in Postman?
Last Updated :
29 Nov, 2023
During the testing stage in API development, it is important to extensively test the APIs to ensure they work without any problems in the production stage. We need a huge amount of test data for this purpose. Generating it manually can be a cumbersome and time-consuming task. Instead, we need some kind of library to generate this test data. Postman has dynamic variables integrated into it that do this task. This article focuses on discussing dynamic variables and how to use them in your pre-request scripts to generate data for test cases.
Prerequisites
- NodeJS is installed on your machine. You can download it from here.
- Postman desktop application installed on your machine. You can download it from here.
What are Dynamic Variables in Postman?
Dynamic variables in Postman are special variables that can be used to create randomly generated data using the Faker library.
- Dynamic variables can be used to create various kinds of test data for your APIs such as names, credentials, IDs, dates, and so on.
- Whenever these variables are accessed, it returns a new randomly generated value.
- They can be accessed using the pm.variables.replaceIn function in Postman scripts.
- For example, pm.variables.replaceIn(“{{$guid}}”). It can also be included directly in the request body.
- For example, {“fname”:”{{$randomFirstName}}”}.
Accessing Dynamic Variables
Follow the steps below to access dynamic variables in Postman:
1. Creating a server
To verify that the dynamic variables are set correctly in Postman, we need to create an HTTP server in NodeJS.
1. Create a directory named postman-dynamic-variables.
2. Inside this directory execute the following command to install express.
npm install express
3. Create a new file named app.js and paste the following code in it.
Javascript
const express = require("express");
const app = express();
app.use(express.json());
app.post("/", (req, res, next) => {
console.log(req.body);
res.status(200).json({ success: true });
});
app.listen(3000, () => {
console.log("Listening on port 3000");
});
|
Output:

4. Start the server by entering the following command in the terminal.
node app.js
2. Generating Random Data with Dynamic Variables
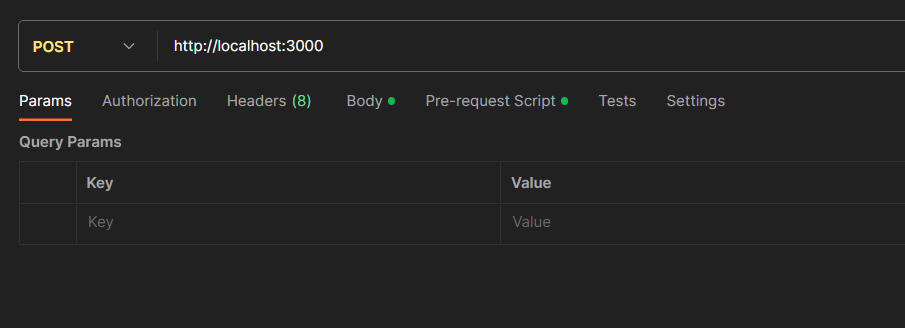
1. Launch Postman.
2. Create a new collection.
3. Add a new request to it.
4. Set HTTP method to POST and URL to http://localhost:3000.
Generating Random Person Data
Method 1:
- Go to the pre-request scripts tab and paste the following code in it. This code creates a random first and last name and add it to the request body.
Javascript
let fname = pm.variables.replaceIn("{{$randomFirstName}}")
let lname = pm.variables.replaceIn("{{$randomLastName}}")
pm.request.body.raw = JSON.stringify({fname,lname})
|
- Hit the send button. When you hit the send button a random first name and last name is generated and sent with the request body.
- Send the request once again. You will see two objects printed in the terminal of your node server. Note that both of them are randomly generated.

Method 2:
- Comment the code in the pre-request script.
- Go to the Body tab and select raw and JSON in place of Text.
- Paste the following code into the editor.
{ “fname”:”{{$randomFirstName}}”, “lname”:”{{$randomLastName}}”}
- You get autocomplete features this way and this method is way simpler than using pre-request scripts. Send the request and see the output in the server terminal.

Generating Random IDs
Postman has dynamic variables for generating random GUID, UUID, timestamps too.
Request body:
{ “guid”:”{{$guid}}”, “uuid”:”{{$randomUUID}}”, “timestamp”:”{{$timestamp}}”}
Output:
Generating Random Credentials
You can also generate credentials like email, username, passwords etc with dynamic variables which can be used to test authentication systems, create fake users and many other features in your application that required data.
Request body:
{ “username”:”{{$randomUserName}}”, “email”:”{{$randomEmail}}”, “password”:”{{$randomPassword}}”}
Output:

Conclusion
Using dynamic variables, it is very easy to create test cases for testing REST APIs. There is a wide variety of use cases for dynamic variables in API testing for generating test data such as: random credentials like username, first name, last name, email address, password and so on to create fake users for testing authentication systems or to simulate user activities, financial information such as account numbers, card numbers, balance, PIN etc, ids, IP addresses, port numbers etc.
Share your thoughts in the comments
Please Login to comment...