Django CSV Output
Last Updated :
17 Oct, 2023
Generating CSV files in a Django web application can be achieved easily with the right libraries and a structured approach. By following the steps outlined in this article, you can provide users with the ability to download data in these popular formats, enhancing the usability and functionality of your Django application.
Step to Create CSV Output In Django
You can install Django by following these steps.
Step 1: First make a project by using the command :
django-admin startproject  csv_downloader
cd csv_downloader
Step 2: Create an application named ‘gfg’ by using the command
python3 manage.py startapp gfg
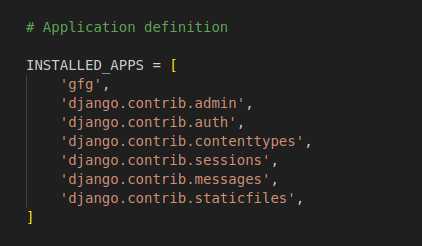
The next step is to register your app in setting.py
Step 2: Create all the necessary files a mentioned below.
gfg/view.py: The “home” view handles HTTP requests, checking for POST submissions. If valid, it saves book data to the database and redirects to the home page. For GET requests, it displays an empty book input form via an HTML template (‘myapp/create_user_profile.html’) with the form as context data.
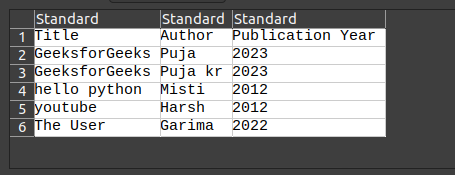
The generate_csv view generates a CSV file as an HTTP response, sets the content type to ‘text/csv’ with the filename “book_catalog.csv,” writes column names as the header, fetches all books from the database, writes book details to the CSV, and serves the file for user download upon accessing the view.
Python3
from django.http import FileResponse
from reportlab.pdfgen import canvas
from .models import Book
from django.shortcuts import redirect, render
from .forms import BookForm
def home(request):
if request.method == 'POST':
form = BookForm(request.POST)
if form.is_valid():
form.save()
return redirect('home')
else:
form = BookForm()
return render(request, 'myapp/create_user_profile.html', {'form': form})
import csv
from django.http import HttpResponse
from .models import Book
def generate_csv(request):
response = HttpResponse(content_type='text/csv')
response['Content-Disposition'] = 'attachment; filename="book_catalog.csv"'
writer = csv.writer(response)
writer.writerow(['Title', 'Author', 'Publication Year'])
books = Book.objects.all()
for book in books:
writer.writerow([book.title, book.author, book.publication_year])
return response
|
gfg/forms.py: The provided code defines a Django form called BookForm using the forms.ModelForm class. It’s designed to work with the Book model in a Django application. The form includes fields for ‘title’, ‘author’, and ‘publication_year’, which are derived from the corresponding model fields.
Python3
from django import forms
from .models import Book
class BookForm(forms.ModelForm):
class Meta:
model = Book
fields = ['title', 'author', 'publication_year']
|
gfg/model.py: This code defines a Django model named Book with three fields: title (for the book title), author (for the author’s name), and publication_year (for the publication year of the book). It also includes a __str__ method to display the book’s title as its string representation.
Python3
from django.db import models
class Book(models.Model):
title = models.CharField(max_length=100)
author = models.CharField(max_length=100)
publication_year = models.PositiveIntegerField()
def __str__(self):
return self.title
|
gfg/urls.py: This is the URL file inside the test app .The first path is used to direct to the home page and the second is used to generate the CSV file.
Python3
from django.urls import path
from . import views
urlpatterns = [
path('', views.home, name='home'),
path('generate-csv/', views.generate_csv, name='generate_csv'),
]
|
urls.py: This is the main url file. Here we have included the app URLs by the help of “include”
Python3
from django.contrib import admin
from django.urls import path, include
urlpatterns = [
path('admin/', admin.site.urls),
path('', include('mini.urls')),
]
|
Setting up GUI
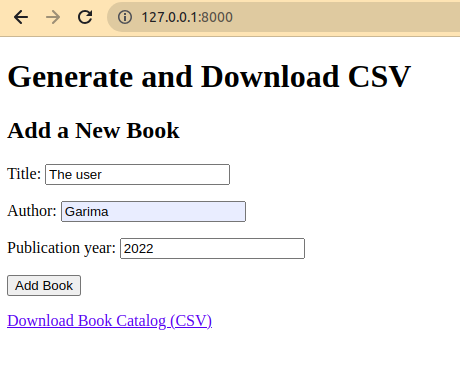
Html file: This file is used to Collect the book information from the user and download the csv file after collecting all the data from the user.
Python3
<!DOCTYPE html>
<html lang="en">
<head>
<meta charset="UTF-8">
<title>Generate PDF</title>
</head>
<body>
<h1>Generate and Download CSV</h1>
<h2>Add a New Book</h2>
<form method="post">
{% csrf_token %}
{{ form.as_p }}
<button type="submit">Add Book</button>
</form>
<!-- <p><a href="{% url 'home' %}" download>Download Book Catalog (PDF)</a></p> -->
<p><a href="{% url 'generate_csv' %}" download>Download Book Catalog (CSV)</a></p>
<br>
</body>
</html>
|
Deployement of the Project
Run these commands to apply the migrations:
python3 manage.py makemigrations
python3 manage.py migrate
Run the server with the help of following command:
python3 manage.py runserver
Output
Share your thoughts in the comments
Please Login to comment...