EC2 stands for Elastic Cloud Computing and is a service that AWS offers for running applications, hosting websites, processing data, and performing other computing operations.
How will we deploy our MERN application?
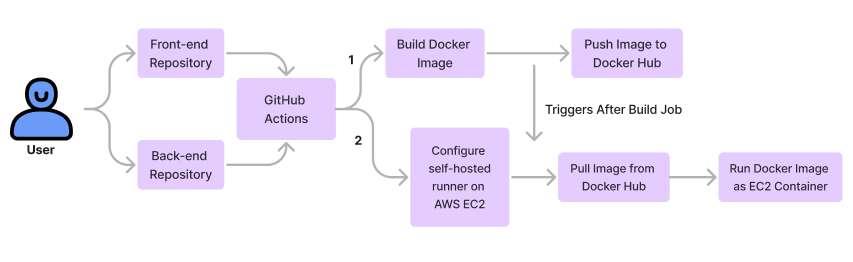
We will push our MERN project frontend and backend into two different repositories on GitHub from our local machine. After that, using GitHub actions, we will build a Docker image for both repositories separately. These images will be pushed to DockerHub and saved in two different repositories on DockerHub. On AWS, we will configure a self-hosted runner for both the front end and back end. When our image is pushed to DockerHub, then our AWS self-hosted runner will pull the image from DockerHub. After this, our application will run on EC2. First, we will deploy the backend, and then, in a similar way, we will deploy the frontend. Hurray! Now you have hosted the MERN stack application on EC2.
Deploy The Book Store Application On AWS EC2 Using Docker Through GitHub Actions
Here I have my “Book Store,” an application developed using the MERN stack. To deploy any MERN stack application, the process is similar.
Step 1: Create A Public Repository On DockerHub
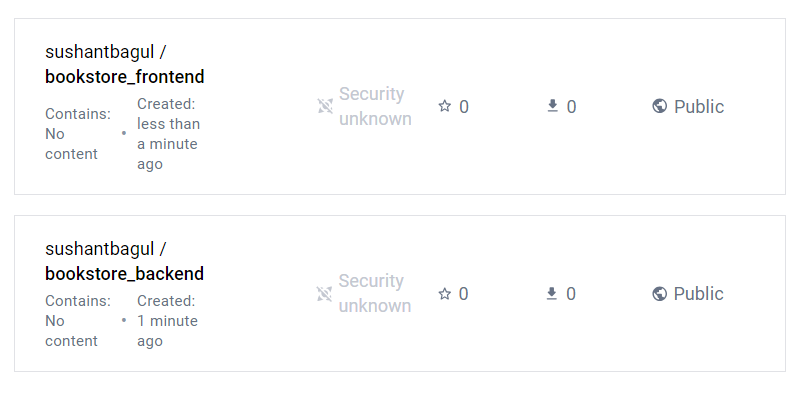
Login to DockerHub and create two public repositories, one for the frontend and the other for the backend. Also, note the username and repository name that we will need when we write the CICD workflow for our frontend and backend applications.
Remember, we have to store our DockerHub username and password in GitHub secrets when we create a repository for our project on GitHub.
Step 2: Allowing Access To The MongoDB Database
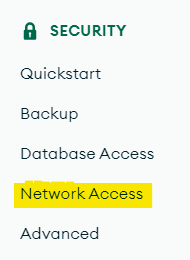
So our first step is to allow access to MongoDB from anywhere on the internet. Sometimes MongoDB allocates our IP to access the database; because of that, we can only access it from our network. This happens because we tested our application locally many times. To access it from anywhere, log in to your MongoDB account and go to the network access of your database. This option is present in the left-site navigation bar when you open your database under the Security section.
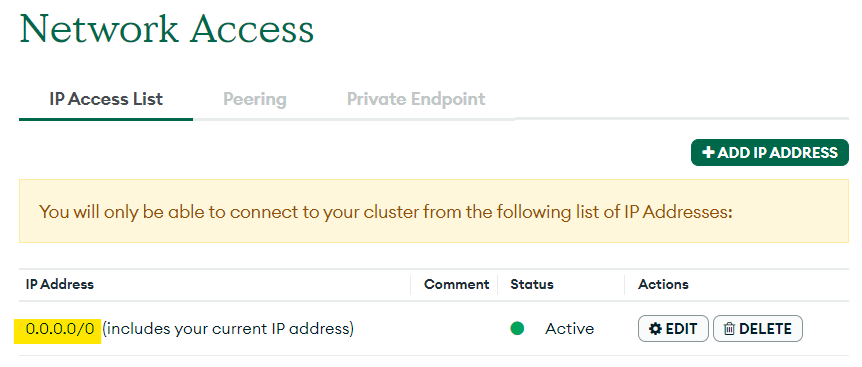
Now you will see an IP access list for your database. If you see IP “0.0.0.0/0,” then it is accessible from anywhere. If you see any other IP address, delete that and enter the given IP address.
Step 3: Push An Application On GitHub And Add GitHub Secrets
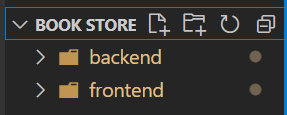
There will be two folders for your MERN application. First for the backend, and second for the frontend.
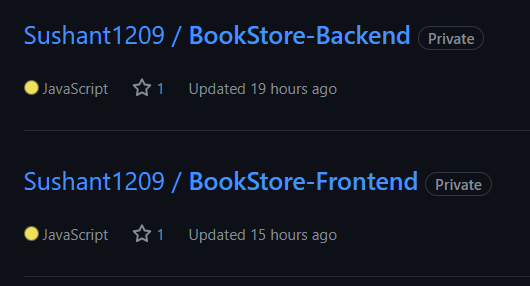
Now create two different repositories for frontend and backend, and push frontend folder files into the frontend GitHub repository and backend folder files into the backend GitHub repository of your project.
Adding GitHub Secrets: Hardcoding our username, password, and API inside code is not good practice. To secure our credentials in the production environment, GitHub provides a feature to add secrets. These secrets can be our “env” variables that we add at the time of development, connection keys or our credentials.
- In these both repositories, we will add our project environment variables with values.
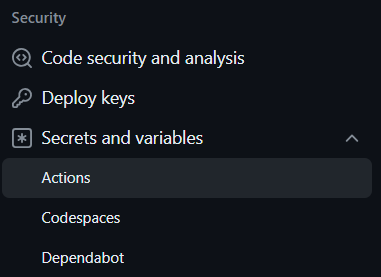
- Open your backend GitHub repository and click on settings. On the left navigation bar, you will see the “Secrets and Variables” dropdown. Click on that and choose “Actions.”
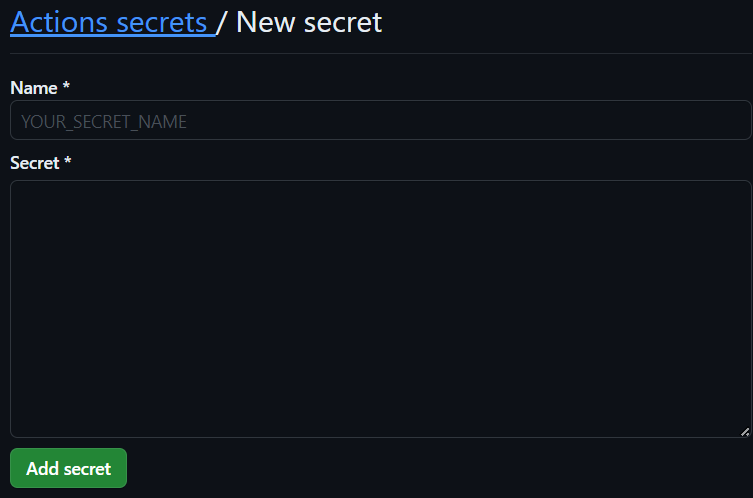
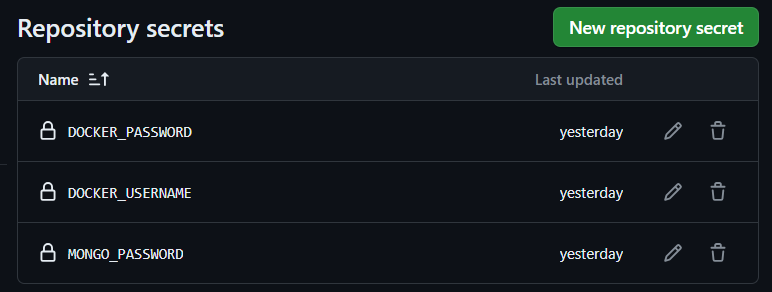
- Now you will see the option “New repository secrets.” Click on that. You will see two fields: name and secret. Add a variable name in “Name” and a value in “Secret.”
- Add the all three details present inside image in both repositories. These details will be needed in the upcoming steps.
Step 4: Creating An EC2 Instance
Log in to your AWS account as an IAM user. If you don’t have an IAM user, then create one and login with that user. Search for EC2 in the AWS console and click on the EC2 option appearing in the search result.
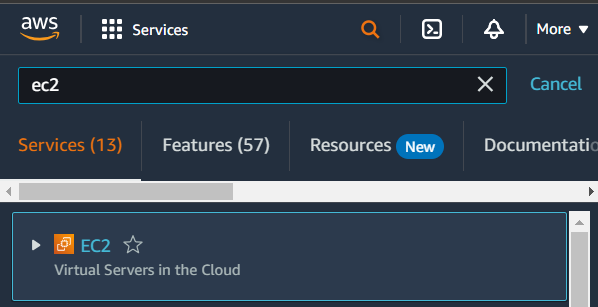
Click on EC2.
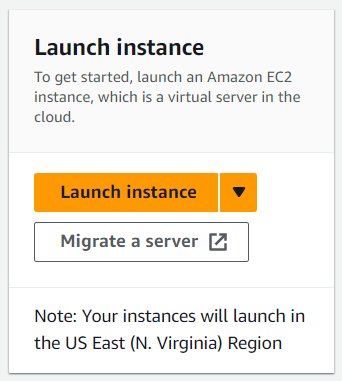
- After clicking on EC2, you will see a new screen. On that screen, click on “Launch instance.”
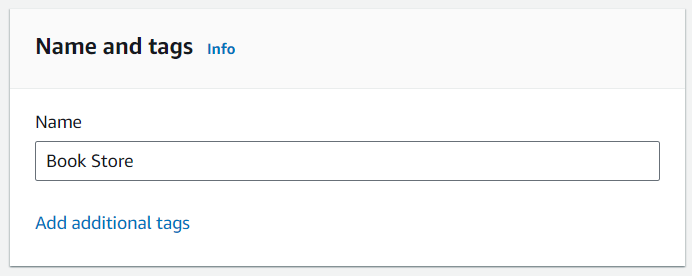
- Now under “Name and tags,” give a name for your EC2 instance, and if you want to add any tags to that, you can do so.
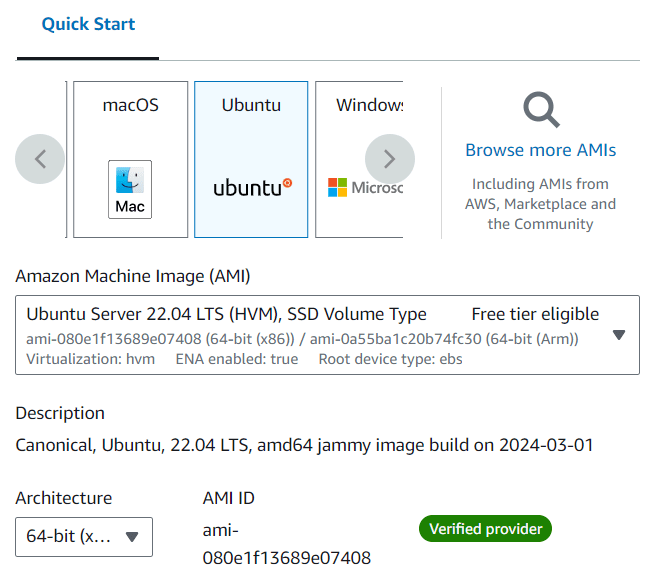
- Now under the “Application and OS Images (Amazon Machine Image)” section, select “Ubuntu” and check whether an Ubuntu image is selected in “AMI” or not. Leave other details as default.
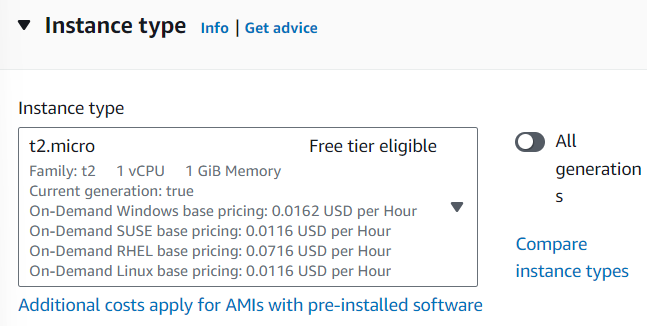
- In “Instance Type,” select “t2.micro”
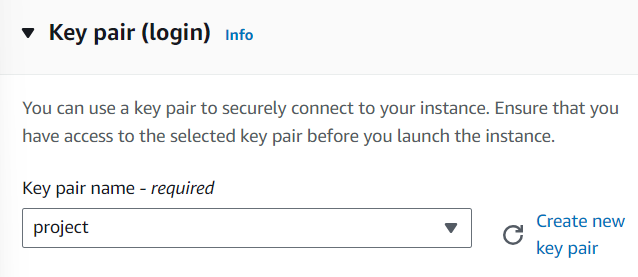
- In “Key Pair,” select your existing key if you want or create a new one.
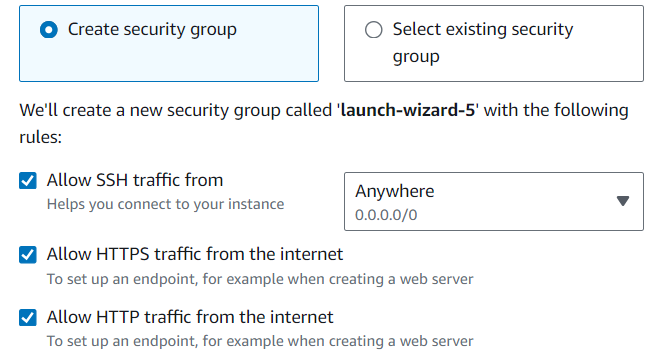
- Under “Network settings,” select traffic from anywhere and select all traffic options.
- Remaining things will remain the default, and by reviewing all previous details, click on “Launch instance.”
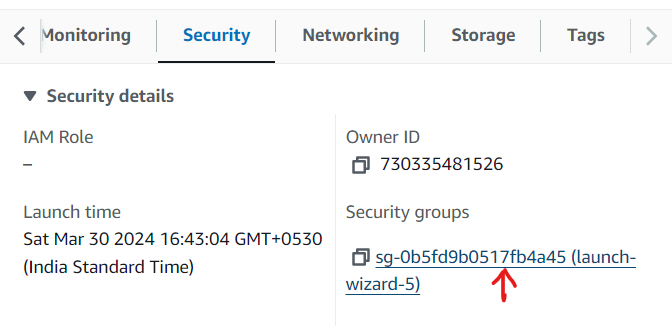
- After successfully creating an EC2 instance, click on “instance ID,” then a new window will open, then click on the “Security” tab, and then click on “Security Groups.”
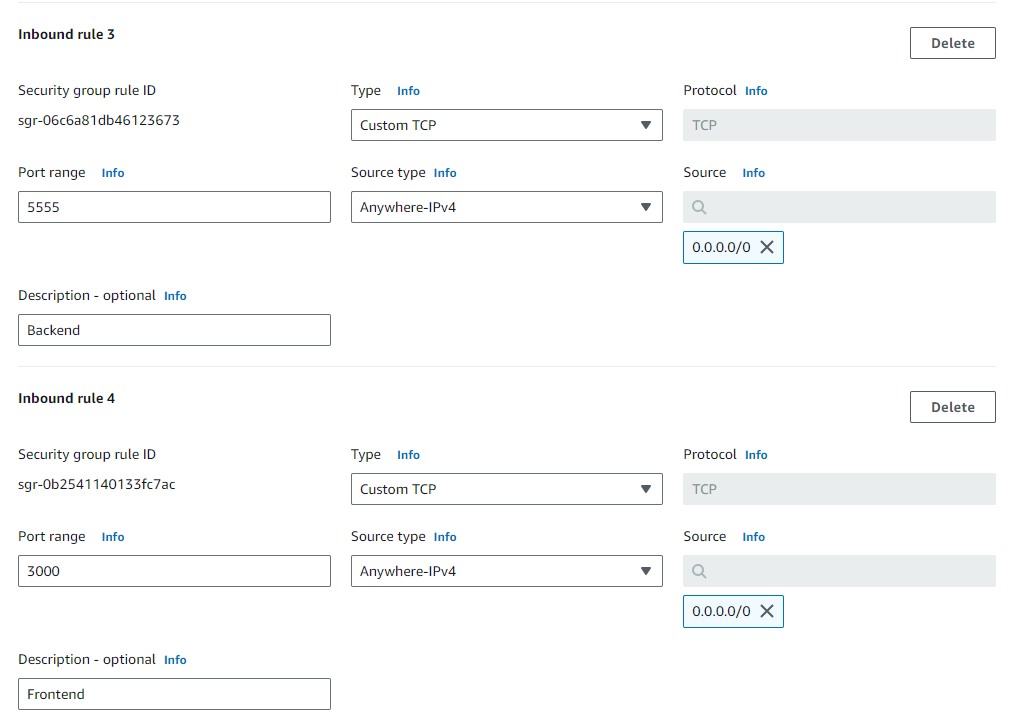
- Now, click on “edit inbound rule.” Here we will add our inbound rule port for our frontend and backend applications. Our backend app will be run on port 5555 and our frontend app on port 5173. Do as shown in the image, but add a port number according to your configuration and save it.
Step 5: Installing Docker On Our EC2 Instance
In previous steps, we successfully created our EC2 instance. Let’s connect them. Go to instances, click on our created instance, and click on “Connect.”

- Select “EC2 Instance Connect,” write the username, and then click on Connect.

- Now we will see an AWS terminal. Inside this run command is “docker –version” to see whether Docker is installed or not on our EC2 instance.
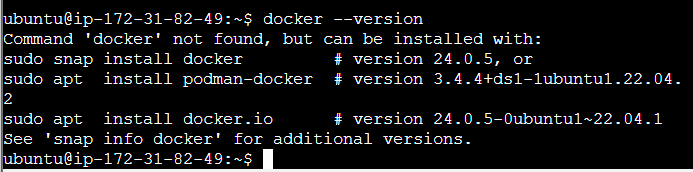
- Docker is not installed in our EC2 instance, so we have to install Docker in our EC2 instance.
- To install Docker in our EC2 instance, we have to run the following commands one by one in the AWS terminal:
Use the below commands to install Docker on AWS EC2:
sudo apt-get update
sudo apt-get install docker.io -y
sudo systemctl start docker
sudo docker run hello-world
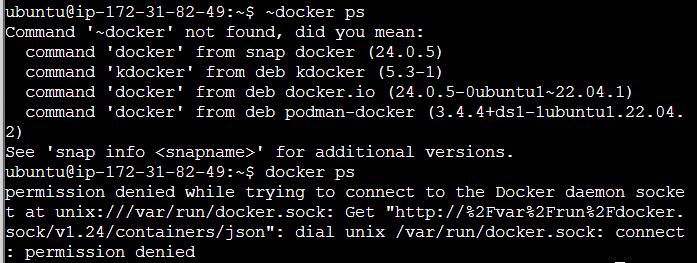
docker ps
After running this command, we will get permission denied as output. To give permission, we have to run the following command:
sudo chmod 666 /var/run/docker.sock
sudo systemctl enable docker
docker --version
- After running all these eight commands on the AWS EC2 terminal, we successfully installed Docker on our EC2.

Successfully installed Docker
Docker Installation EC2 Terminal Logs
Step 6: Creating Self-Hosted Runners On Our EC2 Instance
We have to create a runner on EC2, and that should be run simultaneously. To do this, we have to Configuring the self-hosted runner application as a service. To do this, we have to go to our created repositories in Step 3. So first, we will create a runner for our repository, “BookStore-Backend”. The process to create runners for both runners is the same.
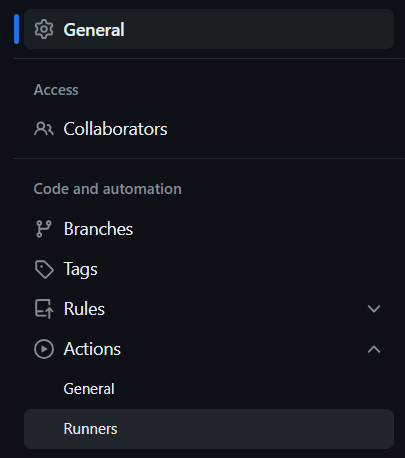
Creating a “BookStore-Backend” repository runner: Open our “BookStore-Backend” repository and click on settings. On the left navigation bar, you will see the option “Actions”. Click on that dropdown, and you will see the “Runners” option. Click on that.
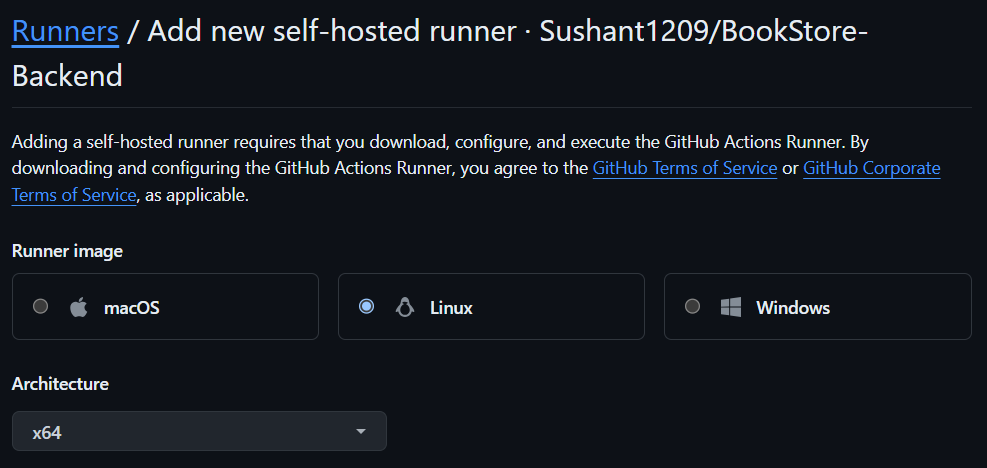
- Now you will see the option “New self-hosted runner.” Click on that.

- Our EC2 instance is Ubuntu, so select the option “Linux” for the runner image.
- Now you will see commands to create a runner; copy those commands one by one and run on our EC2 terminal.
- The first command is “mkdir actions-runner && cd actions-runner”. But we have to create two runners, so with the same name, we cannot create two folders, so in this command, add an extra word to identify a runner folder uniquely.
- For example, “mkdir actions-runner-backend && cd actions-runner-backend”
- Run the remaining commands as is.
What Happens After Running These Commands?
Commands under the download section:
- First, create a directory with the given name, and then change the terminal directory to the new directory.
- Second command: download the latest runner package for our repository in our created directory.
- Third command Validate the hash.
- The fourth command extracts the runner package.
Commands under the configure section:
- First command Create the runner and start the configuration of the runner.
- The second command runs the runner.
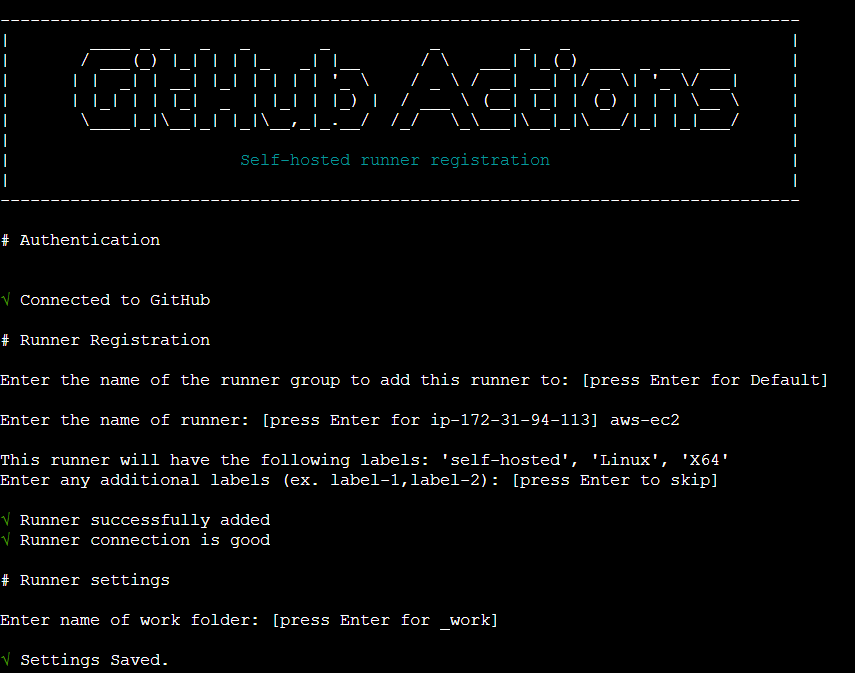
When we run our configuration command, the output terminal looks like this, and it asks for some input. We select some information by default and just add the name of the runner, “aws-ec2”. To run this runner, we have to run the “./run.sh” command every time.
Configure A Self-Hosted Runner As A Service: To run this runner without running a command every time, we have to configure Runner as a service. To do this in the terminal, run the following commands:
sudo ./svc.sh install
sudo ./svc.sh start
After running these commands, our runner will go into an “idle” state. It will run continuously.
Creating a “BookStore-Frontend” repository runner:
- Open our “BookStore-Frontend” repository and click on settings. On the left navigation bar, you will see the option of “Actions”. Click on that dropdown, and you will see the “Runners” option. Click on that.
- Now you will see the option “New self-hosted runner.” Click on that.
- Our EC2 instance is Ubuntu, so select the option “Linux” for the runner image.
- Now you will see commands to create a runner; copy those commands one by one and run on our EC2 terminal.
Note: Our terminal is in our backend folder, so we have to come into the root directory. To do this, run the “cd . . ” command.
- The first command is “mkdir actions-runner && cd actions-runner”. But we have to create two runners, so with the same name, we cannot create two folders, so in this command, add an extra word to identify a runner folder uniquely.
- For example, “mkdir actions-runner-frontend && cd actions-runner-frontend”
- Run the remaining commands as is.
When we run our configuration command, the output terminal looks like this, and it asks for some input. We select some information by default and just add the name of the runner, “aws-ec2.”. To run this runner, we have to run the “./run.sh” command every time.
Configure a self-hosted runner as a service: To configure Runner as a service in the terminal, run the following commands:
sudo ./svc.sh install
sudo ./svc.sh start
After running these commands, our runner will go into an “idle” state. It will run continuously. We successfully created a self-hosted runner for both repositories in our EC2 instance.

Step 7: Creating A Dockerfile And Workflow For The Backend Repository
Creating A Dockerfile: To write a Dockerfile for our backend, go to your development IDLE and create a file with the name “Dockerfile” in the root directory of the backend folder.

Inside package.json, see how we are starting our backend server if you are configured like this (“start”: “node index.js”), then paste this Dockerfile and change the port number as mentioned in your backend code.
{
  "name": "backend",
  "version": "1.0.0",
  "description": "",
  "type": "module",
  "main": "index.js",
  "scripts": {
    "start": "node index.js",
    "dev": "nodemon index.js"
  },
  "keywords": [],
  "author": "",
  "license": "ISC",
  "dependencies": {
    "cors": "^2.8.5",
    "express": "^4.19.2",
    "mongoose": "^8.2.3",
    "nodemon": "^3.1.0"
  }
}
FROM node:alpine3.18
WORKDIR /app
COPY package.json ./
RUN npm install
COPY . .
EXPOSE 5555
CMD [ "npm", "run", "start" ]
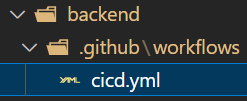
Creating A Workflow For Our Backend Application: Now create a “.github” folder under the “backend” folder. Inside the “.github” folder, create the “workflow” folder, and inside this folder, create the file “cicd.yml”.
Now we will write a workflow that will trigger GitHub actions when we push these updated files into our GitHub repository. I will keep my application details inside this. I will underline what you have to change inside this “cicd.yml”. At the time of changes, you have to remove details with an underline, update the file with your details, and also remove the underline from a particular section. In the curly bracket, I will mention what details you have to add.
name: Deploy BookStore-Backend (GitHub Repository Name)
on:
  push:
    branches:
      - master (Branch where this repository is pushed previously)

jobs:
  build:
    runs-on: ubuntu-latest
    steps:
      - name: Checkout Source
        uses: actions/checkout@v4
      - name: Login to docker hub
        run: docker login -u ${{ secrets.DOCKER_USERNAME }} -p ${{ secrets.DOCKER_PASSWORD }}
      - name: Build Docker Image
        run: docker build -t sushantbagul/bookstore_backend  . (DockerHub Username/Repository Name . )
      - name: Publish Image to docker hub
        run: docker push sushantbagul/bookstore_backend:latest (DockerHub Username/Repository Name:latest )


  deploy:
    needs: build
    runs-on: self-hosted
    steps:
      - name: Pull image from docker hub
        run: docker pull sushantbagul/bookstore_backend:latest (DockerHub Username/Repository Name:latest )
      - name: Delete old container
        run: docker rm -f bookstore-backend-container (Old Container Name if any/New container Name)
      - name: Run Docker Container
        run: docker run -d -p 5555:5555(Configured Port:Configured Port) --name bookstore-backend-container(New Container Name) -e MONGO_PASSWORD='${{ secrets.MONGO_PASSWORD }}' sushantbagul/bookstore_backend (DockerHub Username/Repository Name)
Push These Changes To The Backend Repository
- Through your development IDLE, push all the changes we made in our folder to our backend repository.
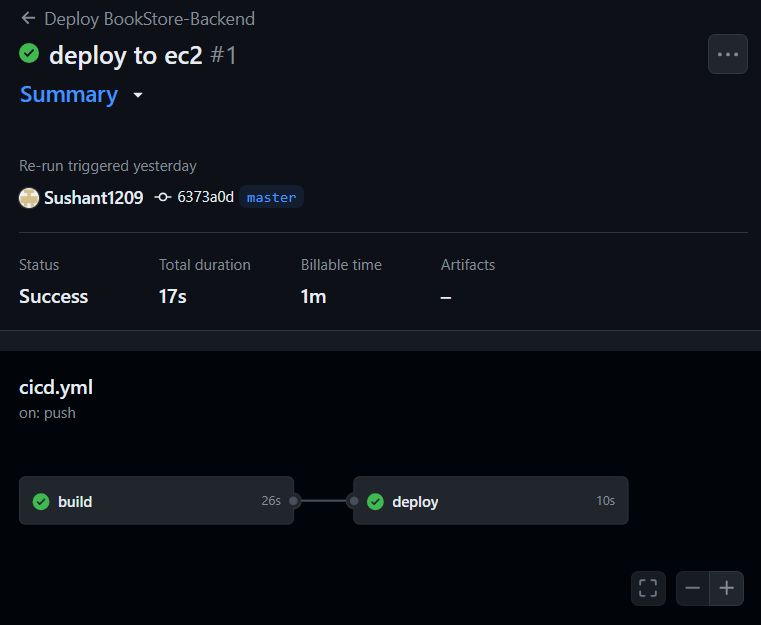
- After successfully pushing our changes (i.e., Dockerfile and cicd.yml), open your backend repository and click on actions.
- You will see two things happening: build and deploy.
- After successfully completing these steps, we can say that our backend application is deployed to AWS EC2.
Our GitHub action will look like this:
Step 8: Testing Our Backend
After successfully building and deploying our backend, we have to test it. To do this, we will require our EC2 instance public address. Copy your EC2 instance public address, paste it in the browser, and give your backend deployment port number.
The URL will be a combination of these: http://<Your-EC2-Public-IP>:<Allocated-Port-Number> My app URL is http://54.211.239.4:5555 Note: This URL is for demo purposes.
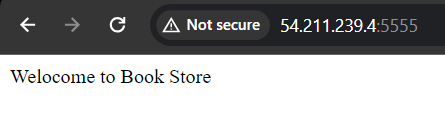
- If you see a message like this on your browser screen, then you have successfully deployed your backend on an EC2 instance.
- If you have not gotten any output, then verify whether you have followed all the steps or not. You can also see your deployment logs in GitHub Actions to find issues.
- Remember to add the inbound rule to the EC2 instance and the correct port number that you have configured.
Adding Secrets To The Frontend Repository: Our frontend application needs a backend to run, and we have deployed our backend successfully, so we will add our backend server URL to GitHub secrets. Go to the GitHub secret page and give a name according to your frontend base URL configuration variable name. And in value, paste your backend deployment URL in the format “http://<Your-EC2-Public-IP>:<Allocated-Port-Number>” and save this secret.
Note: If you have hardcoded the base URL in the frontend, then you have to manually change the base URL to the backend URL. Example: If your hardcode URL looks like this: “post(‘http://localhost/books’, data),” then it will be changed to “post(‘http://54.211.239.4:5555/books’, data)” inside your pages.
Step 9: Creating A Dockerfile And Workflow For The Frontend Repository
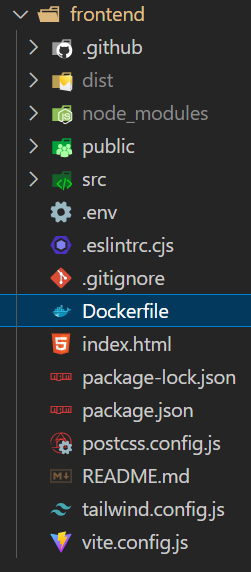
Creating a Dockerfile: To write a Dockerfile for our frontend, go to your development IDLE and create a file with the name “Dockerfile” in the root directory of the frontend folder.
Dockerfile: We will select an alpine image for our frontend and build our app. And after building, serve that with Niginx. Copy the following Dockerfile and paste it in your Dockerfile.
Note: Before saving inside your frontend folder root directory, run the command “npm run build” and see which new file is being created in your folder structure. And give the same name as the new folder name in this copy command, “COPY –from=build /app/dist .” at the place of dist.
FROM node:alpine3.18 as build
# Build App
WORKDIR /app
COPY package.json .
RUN npm install
COPY . .
RUN npm run build
# Serve with Nginx
FROM nginx:1.23-alpine
WORKDIR /usr/share/nginx/html
RUN rm -rf *
COPY --from=build /app/dist .
EXPOSE 80
ENTRYPOINT [ "nginx", "-g", "daemon off;" ]
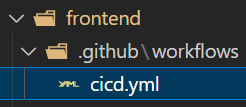
Creating a Workflow for our frontend: Now create a “.github” folder under the “frontend” folder. Inside the “.github” folder, create the “workflow” folder, and inside this folder, create the file “cicd.yml”.
Now we will write a workflow that will trigger GitHub actions when we push these updated files into our GitHub repository. I will keep my application details inside this. I will underline what you have to change inside this “cicd.yml”. At the time of changes, you have to remove details with an underline, update the file with your details, and also remove the underline from a particular section. In the curly bracket, I will mention what details you have to add.
Note: If you have not allocated a port for the frontend, then it will by default run on port 5173, so we will write this in the last command as “5173:80.”
name: Deploy BookStore-Frontend (GitHub Repository Name)

on:
  push:
    branches:
      - master (Branch where this repository is pushed previously)

jobs:
  build:
    runs-on: ubuntu-latest
    steps:
      - name: Checkout Source
        uses: actions/checkout@v4
      - name: Login to docker hub
        run: docker login -u ${{ secrets.DOCKER_USERNAME }} -p ${{ secrets.DOCKER_PASSWORD }}
      - name: Build Docker Image
        run: docker build -t sushantbagul/bookstore_frontend  . (Dockerhub Username/Repository Name . )


      - name: Publish Image to docker hub
        run: docker push sushantbagul/bookstore_frontend:latest (DockerHub Username/Repository Name:latest )

  deploy:
    needs: build
    runs-on: self-hosted
    steps:
      - name: Pull image from docker hub
        run: docker pull sushantbagul/bookstore_frontend:latest (DockerHub Username/Repository Name:latest )
      - name: Delete old container
        run: docker rm -f bookstore-frontend-container (Old Container Name if any/New container Name)
      - name: Run Docker Container
        run: docker run -d -p 5173:80(Configured/Default Port:Configured/Default Port) --name bookstore-frontend-container (New Container Name) sushantbagul/bookstore_frontend (DockerHub Username/Repository Name)
Push These Changes To The Frontend Repository
- Through your development IDLE, push all the changes we made in our folder to our frontend repository.
- After successfully pushing our changes (i.e., Dockerfile and cicd.yml), open your frontend repository and click on actions.
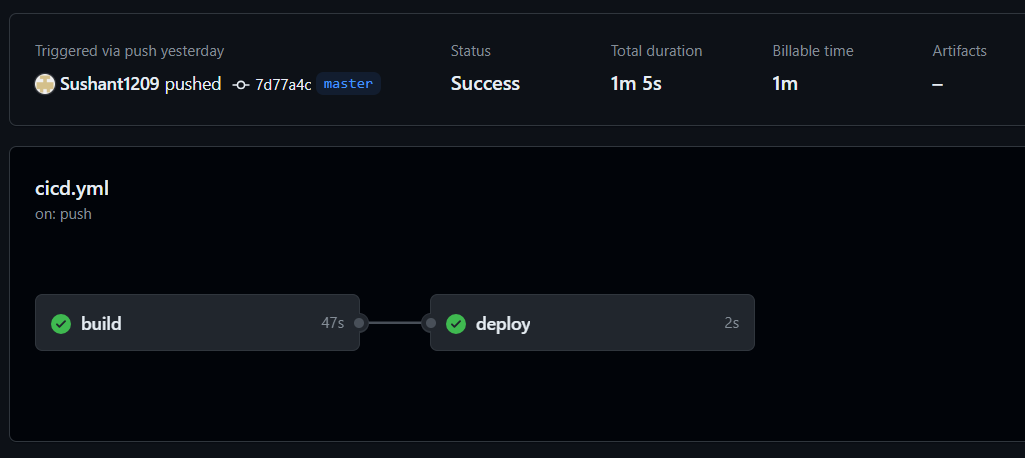
- You will see two things happening: build and deploy.
- After successfully completing these steps, we can say that our frontend application is deployed to AWS EC2.
Our GitHub action will look like this:
Step 10: Testing Our Frontend
After successfully building and deploying our frontend, we have to test it. To do this, we will require our EC2 instance public address. Copy your EC2 instance public address, paste it in the browser, and give your frontend deployment port number.
The URL will be a combination of these: http://<Your-EC2-Public-IP>:<Allocated-Port-Number/Default-Port> My app URL is http://54.211.239.4:5173 Note: This URL is for demo purposes.
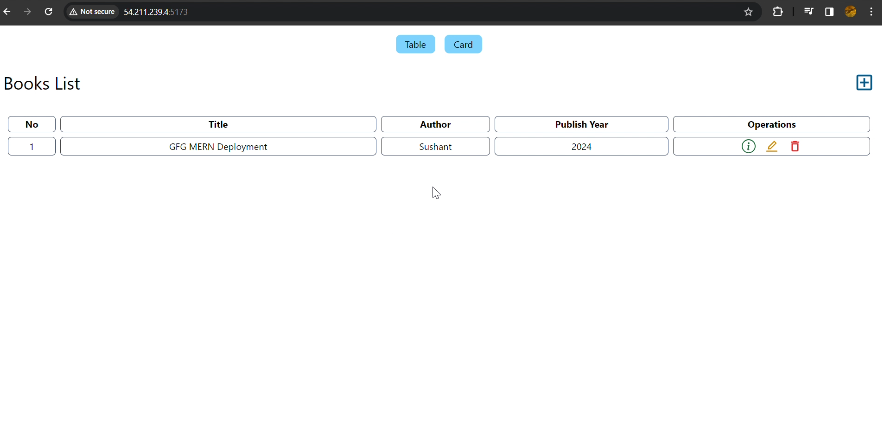
- If you see your application like this on your browser screen, then you have successfully deployed your frontend on an EC2 instance.
- If you have not gotten any output, then verify whether you have followed all the steps or not. You can also see your deployment logs in GitHub Actions to find issues.
Note: Remember to add the inbound rule to the EC2 instance and the correct port number that you have configured.
Demo For Testing our Book Store Application
We successfully deployed our backend application and frontend application on an EC2 instance, and it is working the same as in the local system.
A Recap Of the Steps That We Have Taken To Deploy The MERN Application
Conclusion
Using GitHub actions, we first deployed our backend application on our EC2 instance. By using our backend application’s public IP address, we configured our frontend BaseURL inside our frontend repository secrets. Then we deployed our front-end application on our EC2 instance. By performing all these steps, you can successfully deploy your MERN Stack application in AWS EC2 using Docker through GitHub actions
How To Deploy MERN Applications On AWS EC2 – FAQ’s
How Do I Allow Access To MongoDB From Anywhere?
To allow access to MongoDB from anywhere, log in to your MongoDB account, go to the network access of your database, and ensure that the IP access list includes “0.0.0.0/0” to allow access from anywhere.
How Do I Add GitHub Secrets?
To add GitHub secrets, go to the settings of your GitHub repository, navigate to “Secrets and Variables,” and click on “Actions.” Then, click on “New repository secrets” and add the required variables, such as DockerHub username and password.
How Do I Create A Dockerfile And Workflow For My Repositories?
To create a Dockerfile, write the Dockerfile for your backend and frontend applications. For workflows, create a YAML file that defines the steps for building and deploying your Docker images using GitHub actions.
How Do You Test Your Deployed Applications?
After deploying your applications, copy the EC2 instance public address and paste it in the browser along with the specified port number for your backend and frontend. Test the applications to ensure they are functioning as expected.
Tell The Steps Involved In Deploying MERN Application On AWS EC2 Instance Using GitHub Actions?
The steps involved in deploying your MERN application on AWS EC2 are:
- Push frontend and backend to GitHub
- Build Docker images and push to DockerHub
- Configure AWS self-hosted runners
- Deploy backend and frontend
- Test deployed applications
Share your thoughts in the comments
Please Login to comment...