Data Backup and Recovery with Azure Blob Storage
Last Updated :
28 Nov, 2023
Microsoft has various storage types, one of which is Azure Blob Storage. The data stored in Blob Storage can be of various formats including but not restricted to pictures and videos. Blob storage is suited to store unstructured data i.e. the data that doesn’t have a specific structure such as text or binary, on Microsoft’s data storage platform.
Azure Backup
Azure Backup offers a cloud-based backup solution that is easy to use, secure, affordable, and suitable for safeguarding application-critical data stored in Azure Blobs for your organization.
Azure Recovery
Azure recovery is the restoration of data and services within Microsoft Azure to a previous state. It includes data, applications, and virtual machine recovery to a specific point or from backups. Users can restore data and services from operational or vaulted backups, with operational backups offering point-in-time restoration and vaulted backups following a set schedule.
Types of Backup for Blobs
Continuous backups
To prevent unintentional deletion or corruption of your block blobs, you can set up operational backup, a managed local data protection solution. Instead of being moved to the backup vault, the data is kept locally within the source storage account. You don’t need to create a backup schedule.
Periodic backups
Vaulted backup is a managed offsite data protection service that you may set up to prevent your storage account and blobs from being maliciously or unintentionally deleted. The backup information is duplicated, preserved within the backup vault as dictated by the retention rules in the policy, and can be accessed as per the timetable and recurrence you set in the backup policy when utilizing vaulted backups.
Benefits of Azure Blob Backup
- Data Protection: Azure blob Backup ensures that errors like accidental deletion/corruption of data doesn’t occur, hence providing a layer of protection for your valuable data.
- Point-in-Time Restore: Azure Blob Backup also allows the user to restore data from a different save point. Using this, the user can go back to previous version of any data if any changes to data are made mistakenly.
- Soft Delete: In Azure, by default, when a user deletes a version of data, it stays available for restoring for a certain amount of time. It basically acts like a recycle bin, but for versions of data.
- Enhanced Data Recovery: Azure Blob Backup not only allows user to recover the blobs, but also specific containers, subsets of blobs etc.
Benefits of Azure Blob Recovery
- Data Recovery: Recovery points are created when changes are made. A user can retrieve data from any specific recovery point from past.
- Data Resilience: Azure Blob Recovery protects the user’s data from accidental/ malicious deletions. This provides an extra layer of security to data the user stores in Blob Storage.
- Management Centre: Azure allows a user to monitor and manage all their storage account from a single place, the Azure Backup Centre.
- Flexibility of Storage: In Azure Blob Recovery, user can restore data to:
- To Same Storage Account: Operational Backups
- To Different Storage Account: Vaulted Backups
Step 1: Creating a Storage Account in Azure.
- Click on Create a Resource button on the Home page of Azure Portal.

- In the search bar, type Storage Accounts. Click on Create then select Storage Account.

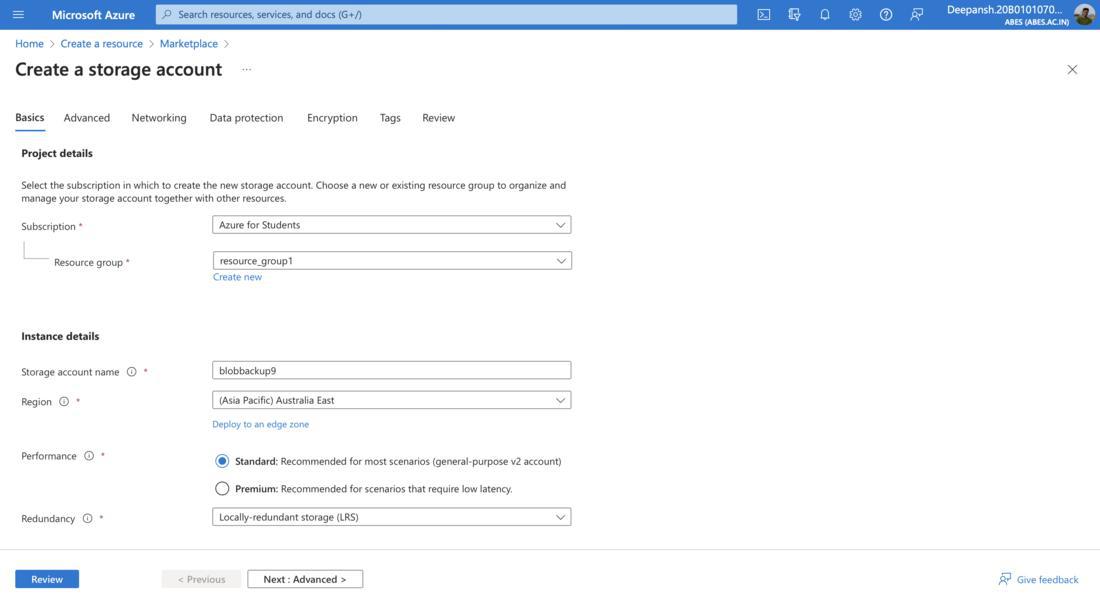
- On the Create a Storage Account Page, configure the Basics settings,
- Subscription: You might have multiple subscriptions present in Azure, choose the one where you want to create the Storage Account.
- Resource Group: A Storage Account has to be present inside a Resource Group. Choose one of the already created one’s or create a new resource group.
Note: To create a new Resource Group,Create New-> Provide Name-> Click OK.
- Storage Account Name: Give the Storage Account a unique name.
- Redundancy: Select the replication approach that best fits your needs for durability.
Note: After creating an account, some settings cannot be altered.
Following redundancy options are provided by Azure:
- Locally-redundant storage (LRS): The most affordable choice, offering minimal safeguards against server rack and disk malfunctions. Suited for non-critical scenarios.
- Geo-redundant storage (GRS): An intermediary choice in a backup area with failover capabilities. Suited for backup scenarios.
- Zone-redundant storage (ZRS): Provide protection against failures at the datacenter level. Suited for high availability scenarios.
- Geo-zone-redundant storage (GZRS): An ideal data security solution that incorporates ZRS and GRS. Suited for critical data scenarios.
We have selected LRS(Locally-redundant).
- Under Encryption tab, select the All service types.

- Click on Review. Click on Create option.

Step 2: Creating a Container.
- After successful deployment of this Storage Account, click the Go to Resource button.

- On the next window, go to Data Storage section.
- Then click on Containers.
- Click on the +Container button.

- Provide a Name for the container and hit the Create button.
Step 3: Installing the required libraries. Here we only need to install azure-storage-blob library.
Note: Install/Upgrade pip for further using it to install azure-storage-library.
- Checking the version,
For Python 3, run the command: pip3 –version
For Python 2, run the command: pip –version
- If pip is not installed, install using given commands:
python3 -m ensurepip –upgrade
OR
python -m ensurepip –upgrade
- Users with MacOS should open Terminal and one’s with Windows should open Command Prompt.
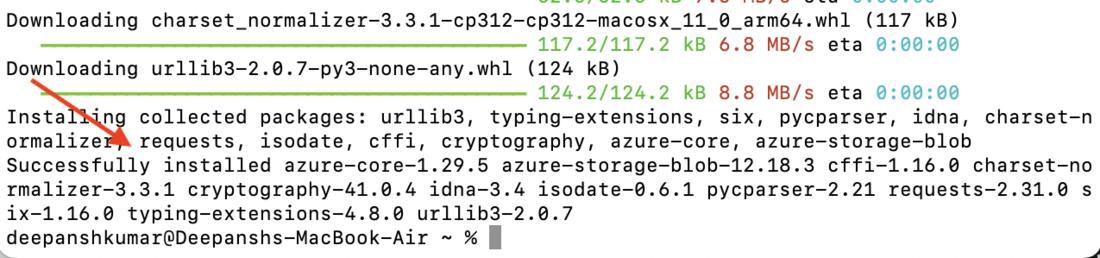
- Run the following command to install azure-storage-blob library.
pip install azure-storage-blob
OR
pip3 install azure-storage-blob

- Notice the following after command execution.
Note: For information about the library we have installed here and/or for related commands, please refer Microsoft Azure Blob Storage docs.
Step 4: Creating the backup.py file. We are using Python for writing the backup and recovery scripts.
- Either create a text file(you can use notepad) and save it with .py entenstion or use nano to create the file for you using this given command:
nano backup.py
- Now, this is the script you have to paste inside the backup python file.
Python3
from azure.storage.blob import BlobServiceClient
import os
storage_account_key = '[your_storage_account_key]'
storage_account_name = '[your_storage_account_name]'
connection_string = '[your_connection_string]'
container_name = '[your_container_name]'
def uploadToBlobStorage(file_path, file_name):
blob_service_client = BlobServiceClient.from_connection_string(connection_string)
blob_client = blob_service_client.get_blob_client(container=container_name, blob=file_name)
with open(file_path, "rb") as data:
blob_client.upload_blob(data)
print("Upload "+file_name+" file")
uploadToBlobStorage('[your_backup_file_path]', 'Task')
|
- Command to save is Ctrl+O. After saving, press Enter.
- Use Ctrl+X command to exit nano editor.

Step 5: Creating file named recovery.py.
- Create the recovery script file in the same way you created backup.py file.
- Create the recovery.py file using command given below:
nano recovery.py
- The code for recovery script is:
Python3
from azure.storage.blob import BlobServiceClient
import os
storage_account_key = '[your_storage_key]'
storage_account_name = '[your_storage_account_name]'
connection_string = '[your_connection_string]'
container_name = '[your_container_name]'
download_directory = '[your_recovery_directory_path]'
def download_files():
blob_service_client = BlobServiceClient.from_connection_string(connection_string)
container_client = blob_service_client.get_container_client(container_name)
os.makedirs(download_directory, exist_ok=True)
for blob in container_client.list_blobs():
blob_client = container_client.get_blob_client(blob)
blob_data = blob_client.download_blob()
blob_file_path = os.path.join(download_directory, blob.name)
with open(blob_file_path, "wb") as file:
file.write(blob_data.readall())
download_files()
|
- Key combination for saving is Ctrl+O inside nano editor. After having saved, press Enter.
- Press Ctrl+X to exit nano editor.

Step 6: Accessing the details required in Step 4 and Step 5.
- On the Storage Account window, under Security + Networking section, click on Access Keys.

- You need to insert these at the required spots in recovery and backup files:
- Storage account key: To access this, under Security+ Networking section, choose Access Keys.
- Storage account name: This is the name you gave to the Storage Account you created.
- Connection string: This is also provided in the Access keys blade.
- Container name: This is the name you must have given to the container you must have created inside the Storage Account.
- Your Local Directory: Pick a folder you’d like to backup. Copy the PATH and paste it inside the backup script file.
Data Backup
Step 7: Run the backup.py file.
- In the terminal/command prompt, run this command for backup.py:
python backup.py // for python2
python3 backup.py // for python3

Step 8: Check if the data has been backed up to the desired container.
- Navigate to Azure Portal.
- Search for Storage Account.
- Click on the Storage Account you created.
- From the left-hand menu, under Data Storage section, choose Containers option.
- Now, click on the required Container.
- If the backup process had been successful then you’ll see your file/data here.

Data Recovery
Step 9: Run the recovery.py file.
- Open Terminal or Command Prompt on Mac or Windows respectively, and then run the given command,
python recovery.py
OR
python3 recovery.py

Step 10: Verifying if recovery process was successful.
- Open the folder you specified in the recovery script. This is where the data will be downloaded when trying to recover from Azure Cloud.

Basic Troubleshooting
- How to resolve the given error?
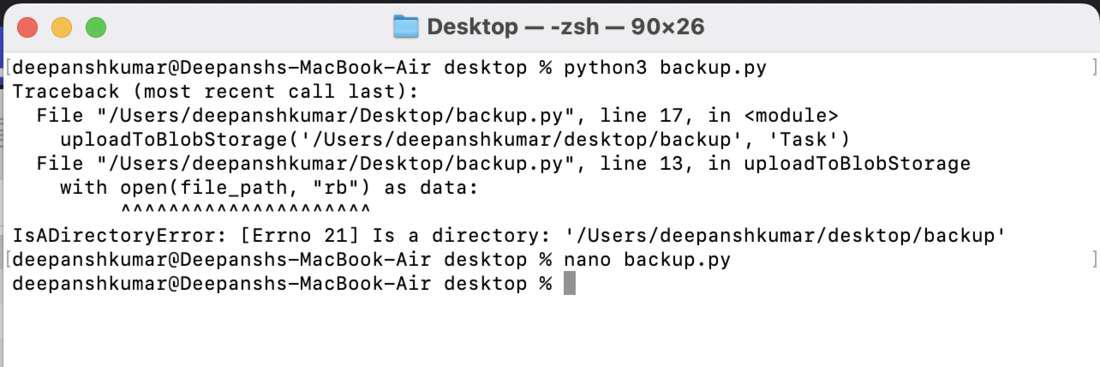 You must have provided the path address to a folder instead of a file. You can’t run a folder in Python.
- I can’t find the recovered file on my Local System even after running the recovery.py file.
- Make sure that you have given the right path to the folder/directory where you want to download your data at time of recovery. The script in recovery.py file should have the correct path.
- Check other details such as Storage Account and Container Name are also correct in the file.
- Why do I get command not found message when trying to check the version of Python present on my computer?
Try using Python3 in command instead of Python cause you might have Python3 installed and not Python2 and vice versa.
- Check that python(any of the versions) is available on your pc. You can use python –version command inside your CLI to check the version of python installed.
- Also, make sure that Python is added to your systems PATH.
FAQs On Data Backup and Recovery with Azure Blob Storage
1. Why is it that I have to give the access key information to the computer system to be able to use Azure Blob Backup and Recovery services?
A connection between your PC and Azure’s Blob Storage is made using the Access Key you provide. This is done so that necessary permissions are provided to make backup and recovery process seamless.
2. What are the basic nano commands?
You can type Ctrl+G to see list of all commands inside nano editor. Ctrl+O to save your file.
3. Can I create and modify the recovery.py and backup.py files without using nano command?
Yes, you can create/edit them without using the Command Prompt/Terminal. You can even create the files using any text editor(ex: notepad). Just save it with the extension ‘.py’
Share your thoughts in the comments
Please Login to comment...