Creating and Running a Fedora Linux Live USB stick on a PC with Windows 11
Last Updated :
25 Oct, 2023
This article presents a brief overview of the Fedora operating system, describes what live boot is, and then shows how to create a live bootable USB drive and then run a live version of the operating system on a PC with Windows 11 (Home).
Overview of Fedora
Fedora Linux is a popular free and open-source operating system (Linux distribution) developed by the Fedora project since 2003 and is sponsored by Red Hat. The Fedora operating system focuses on innovation, provision of cutting-edge technology, security, and open-source software. All the software shipped with the operating system by default is open source, though the proprietary ones can be installed separately by the user once the operating system is installed.
Fedora provides multiple versions of the operating system for different use cases –
- Fedora Workstation
- Fedora IoT
- Fedora Cloud
- Fedora Server
- Fedora CoreOS
Of these options, the “Fedora Workstation” is the one for desktop users and it will be the concerned version throughout this article. The Fedora Workstation ships with the polished stock GNOME environment (users who wish to use other environments like LXDE, XFCE, KDE, etc., it can be accomplished with “Fedora spins”).
Why choose Fedora?
There are multiple Linux-based operating systems out there, so the question arises “Why use Fedora?”. Here are a few reasons –
- Fedora is very innovative and provides the most cutting-edge software. It is a release every six months.
- It takes security very seriously. The “secure-linux” protocols are implemented by default thus presenting a high level of security and protection against vulnerabilities.
- It is maintained by the community and is fully open source. Contains no bloatware, etc.
- It has one of the largest repositories of open-source software out there. Developer tools, creator tools, entertainment, and lifestyle, just name it.
- It is an upstream for RHEL (Red Hat Enterprise Linux) distribution. So, if you want to get to the Red Hat side of things or maybe want to use RHEL in a production environment, then, Fedora is a good bet to try features close to RHEL for free and in an open-source manner.
Live Booting
When an operating system is loaded/booted from an external CD/DVD/USB drive without making any changes to the host PC (i.e., its hard drive and operating system), it is called a live boot. Live booting has the advantage that you can try an operating system without making any changes to your PC and just keep it on the USB drive. Moreover, the USB drive is portable and can be used with other systems too. A USB capable of live booting is referred to as a “Live Boot USB stick/drive” in this article.
Note that the live boot USB stick created in this article is non-persistent i.e., the system settings, apps installed, etc. are lost every time a session closes (shuts down). In other words, with each new session, the loaded operating system is clean. Creating a live boot USB stick with persistent storage is possible but is beyond the scope of this article.
Setup Required
To work out the next sections, one needs the following –
- A PC (desktop/laptop) running Windows 11
- An empty USB drive (8 GB or above)
- An Internet Connection
Moreover, it is recommended to back up any data on the PC, especially the important part. There is almost no chance of any happening here but just be prepared for the worst-case scenario.
Creating a Fedora live USB drive
Downloading and installing the required software
We need to download the following two software from the Fedora site –
- Fedora Workstation ISO image file (~2GB in size at the time of writing this article): Go to this download page on the official site and download the iso file titled “For Intel and AMD x86_64 systems”.
- Fedora Media Writer (< 50 MB in size at the time of writing this article): From the same download page, download the “Fedora Media Writer” titled “Windows”.
Once these files are downloaded, double-click the “Fedora Media Writer” file and install it. Once installed, launch the program (from Start Menu > Apps > Fedora Media Writer). Something like the following screenshot should appear –
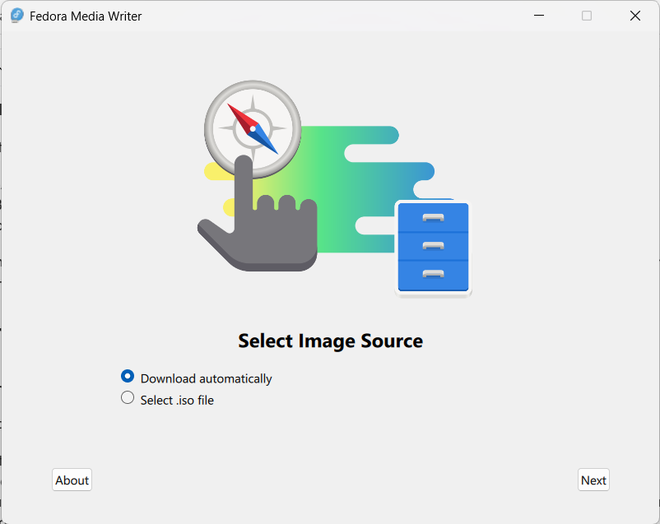
Figure 1: Image of Fedora Media Writer running on Windows
Flashing the fedora iso on the USB drive
Plug the USB into the computer and follow the following steps (or alternatively, the screen recording given at the end of the article) –
- Step 1: Mark the “Select .iso file” option and hit the “next” button.
- Step 2: Select the iso image file of Fedora we downloaded earlier using the “select” button.
- Step 3: Select your USB drive from the dropdown menu and hit the “write” button.
- Step 4: Wait for the program to finish flashing/writing and validating the flash. Once done, hit the finish button.
- Step 5: Close the program.
Now our fedora live boot USB drive is ready!
Booting into Fedora from the USB drive
Now we proceed to boot into Fedora from the USB! Unplug and re-plug the USB drive once and follow the following steps –
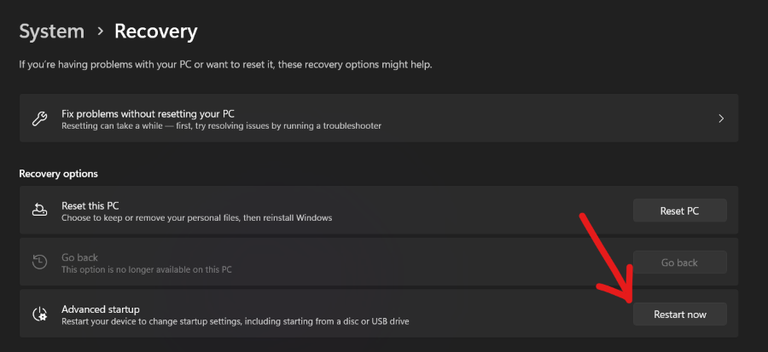
Figure 2: Advanced startup option on Windows 11
- Step 1: Go to Settings > System > Recovery.
- Step 2: Click the “Restart now” button on the “Advanced Startup” card keeping the USB drive plugged in. (Shown in Figure 2).
- Step 3: When the system restarts, it will ask to select the boot option. Navigate using the arrow keys and select “Start Fedora-Workstation-Live 38” (where 38 can be some other number depending upon your version)
- Step 4: Press Enter. Wait for the boot process to complete and you will boot into a Fedora live session!
- Step 5: When prompted if you want to install it, close the window (because this option is for permanent install on the host system).
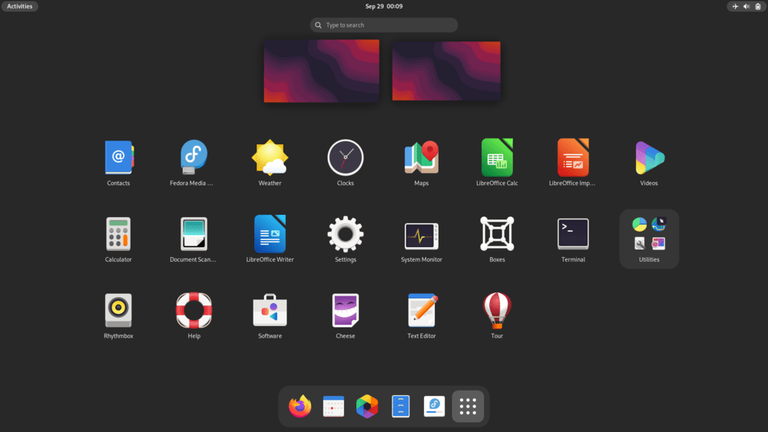
Figure 3: Screenshot of Fedora Workstation 38 running on live boot
Now you can explore the operating system as much as you like and when you are done, go to the top right corner and shut down using the “Power Off” option. Once the PC shuts down, pull out the live boot USB.
A bit of personal recommendation – If you are using a touchpad (instead of a mouse) then you will notice that you have to press the left mouse button to click because the “tap to click” option is disabled by default. You can change this behavior by going to “Settings > Mouse & Touchpad > Touchpad > Clicking” and enabling the “Tap to Click” option.
Booting back into Windows 11
Power on the PC (without the live boot USB plugged). When the boot options appear (blue screen titled “Choose an option”), select “Continue – Exit and continue to Windows 11″ and you will boot into Windows 11. Thats it.
Conclusion
Loading an operating system from an external CD/DVD/USB drive without making any changes to the host PC is called a live boot. With live boot, you can try an operating system without making any changes to your PC. Overall live booting is a two-step process – first flashing the operating system to the external CD/DVD/USB drive and then live booting from the device. This article discussed both these steps in detail for running Fedora Linux on a live boot on a PC having Windows 11 as the host operating system. The following video summarizes the flash process –
A short video summarising the flashing process
Share your thoughts in the comments
Please Login to comment...