How to Create Ubuntu Live USB in Windows?
Last Updated :
01 Feb, 2021
In this article, we will look into the process of creating an Ubuntu live USB on a Windows machine. This USB drive can be further used to either install Ubuntu on your Windows machine or use Ubuntu directly from the USB drive. Through this article, you will learn to create a bootable USB of Ubuntu in Windows. Instructions are valid for all versions of Ubuntu and Windows.
To do so follow the below steps:
Step 1: First you need to download the Ubuntu ISO image file, before installing it on USB. You can download the official Ubuntu ISO from here. You can download any version of Ubuntu at no cost.
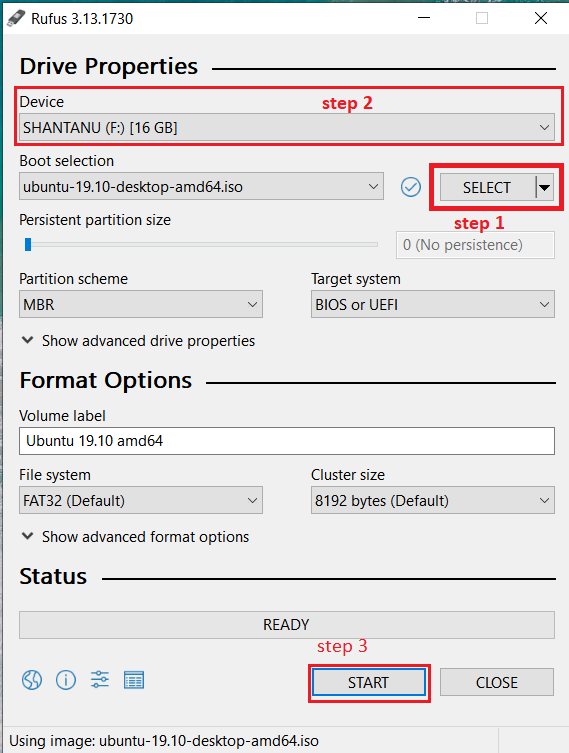
Step 2: Once you have downloaded the ISO of Ubuntu, go to this page and download the latest version of Universal USB Installer. For the sake of demonstration, we will be using the Rufus USB installer.
Note: Rufus is a utility that helps format and create bootable USB flash drives,
      such as USB keys/pendrives, memory sticks, etc.
Step 3: Now we need to create a bootable USB. To do so, Plugin the USB drive in the computer and run Universal USB Installer. Follow the below steps to work with the installer:
- Step 1: Browse to the location of the downloaded Ubuntu ISO
- Step 2: Select the USB drive in which you want to flash Ubuntu.
- Step 3: Click on the start button to start the process.
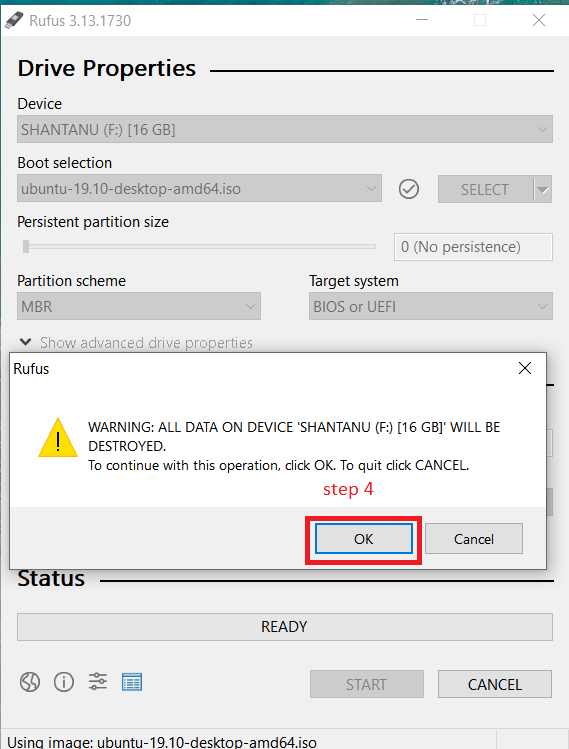
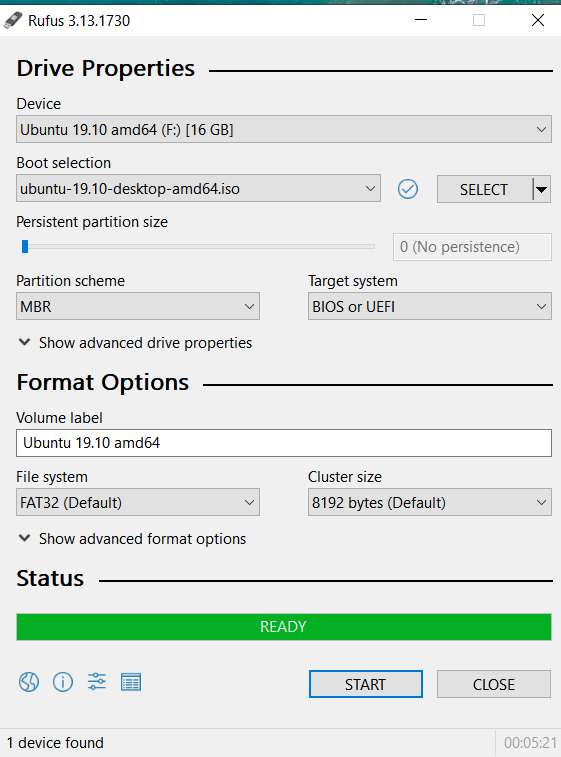
Now Wait for some time for the process to complete.
Once the live USB is created, you can proceed with testing Ubuntu in live mode. You will need to restart your computer. At boot time, press F2 or F10, or F12 (depending upon your system) to access the boot menu. Once there, choose to boot from USB or removable media. That’s it. You can use Ubuntu without installing here.
Like Article
Suggest improvement
Share your thoughts in the comments
Please Login to comment...