Creating a Docker Image with Git Installed
Last Updated :
29 Oct, 2020
Version control is one of the most important aspects of any software development project and when we talk about version control, there is no better tool than Git. The majority of the developers depend upon Git to manage and share their project components among the team members.
Even if you are running your project on Docker, you can still access your git account inside Docker Containers. All you need to do is just install Git inside your Docker Container. In this article, we will discuss exactly the same. We will create an Ubuntu Image, install Git inside it, create a Container associated with the Image, and verify whether Git has been installed or not.
To create a Docker image with git follow the below steps:
Step 1: Create the Dockerfile
You can use the following template to create your Dockerfile.
FROM ubuntu:latest
RUN apt-get -y update
RUN apt-get -y install git
In the above Dockerfile, we have specified instructions to pull the Ubuntu base image, update the OS, and install Git inside it.
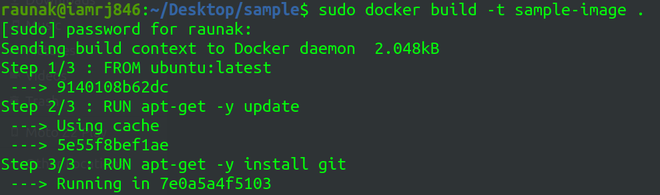
Step 2: Building the Image
After creating the Dockerfile, we can build the Docker Image using the Docker build command.
sudo docker build -t sample-image .
Step 3: Verify whether Image build
To verify whether the image has been built or not, you can list all the Images.
sudo docker images

Step 4: Run a Container associated with the Image
After you have built the Image, you can run the Container associated with the Image, using the Docker Run command.
sudo docker run -it sample-image bash

The above command creates and runs a Container and fires up the bash of the Docker Container.
Step 5: Verifying the Installation
After you have the bash opened up, you can verify whether Git has been installed or not by checking the version of Git.
git --version
This command returns the version of the git installed.

Share your thoughts in the comments
Please Login to comment...