Control Arduino with Python and pyFirmata
Last Updated :
08 Jun, 2023
In this article, we will learn how to link an Arduino to a Python script in order to operate the Arduino. This example of constructing a 4-bit binary up-counter using Python script to control Arduino helps us understand this better.
Components Required:
- An Arduino Board (We will be using Arduino UNO, but other similar boards like Arduino Mini, MEGA, or even Node MCU will also work with suitable declarations in the code)
- USB cable for Arduino
- Breadboard
- Jumper wires
- LEDs (we will need 4, but you can try with more)
- 4 resistors of resistance 200-500Ω (any in this range will work)
- An Arduino board.
- Computer with Arduino IDE. (Raspberry Pi 4, 3B+, or even 3B will also work)
Now let us quickly summarise the steps to achieve our Goal. You can directly skip to the required parts by scrolling along:
- Install PyFirmata Module
- Upload “StandardFirmata” to Arduino
- Making the connections
- Write the Python program and Run it
Installing PyFirmata Module
You should have Python and pip Installed in your system. Then you can run the following command to install the PyFirmata module in your system.
pip install pyFirmata
Upload “StandardFirmata” to Arduino
StandardFirmata is a code that helps Python get access to the Arduino board.
First, connect your Arduino to the computer/raspberry pi/laptop using the USB cable.
Know the port name the Arduino is connected to. In windows, the port name will be something like “COMx” (where x is an integer), while in Linux it will be a string starting with “/dev/tty”. You might find this information by opening Device Manager in Windows.
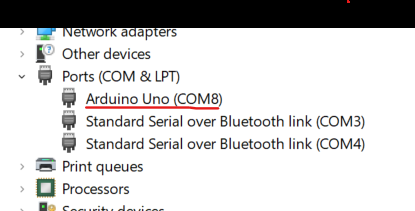
Windows Device Manager view
If you are using Linux, please refer to the official Arduino Documentation.
Next, you can open the Arduino IDE and follow the steps to upload the StandardFirmata to the board.
Get StandardFirmata: File -> Examples -> Firmata -> Standard Firmata
Specify Correct Board and Port: Tools -> Board -> Select Arduino UNO (or your own board) -> Tools -> Port -> Select your Port
Upload the StandardFirmata: Click on the upload button to upload the code to Arduino.
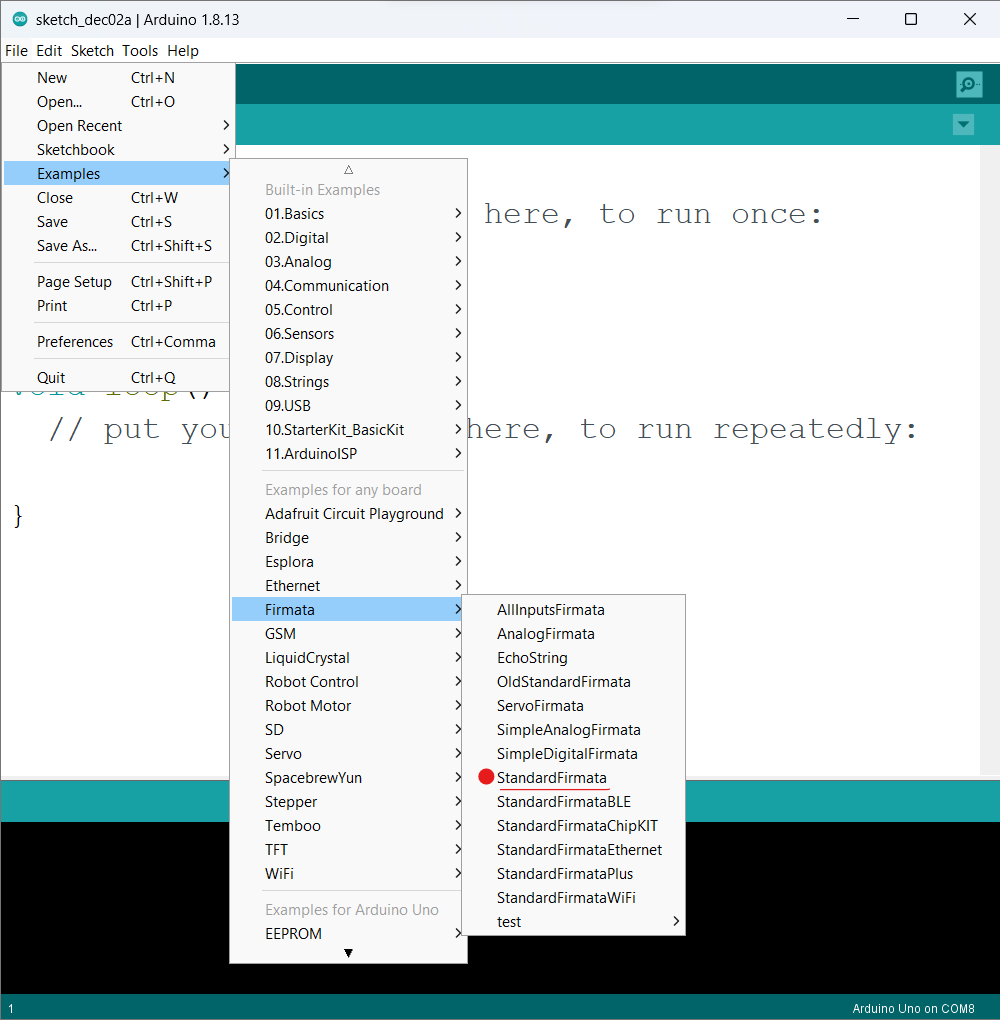
Selecting StandardFirmata
Making the connections
Make the connections like the image above. Here I have connected the 4 LEDs to the 13th, 12th, 11th, and 10th pins. There was no specific reason to connect them in that manner. You can use any other digital pin.
Write the Python program and Run it
Python
from pyfirmata import Arduino
from time import sleep
board = Arduino('COM8')
led1 = board.get_pin('d:13:o')
led2 = board.get_pin('d:12:o')
led3 = board.get_pin('d:11:o')
led4 = board.get_pin('d:10:o')
wait = 1
val_1 = val_2 = val_3 = val_4 = False
while True:
for ____ in range(2):
for ___ in range(2):
for __ in range(2):
for _ in range(2):
sleep(wait)
led1.write(val_1)
led2.write(val_2)
led3.write(val_3)
led4.write(val_4)
print(int(val_1), int(val_2), int(val_3), int(val_4))
val_4 = not val_4
val_3 = not val_3
val_2 = not val_2
val_1 = not val_1
print("\n\n")
|
C++
int led1 = 0;
int led2 = 0;
int led3 = 0;
int led4 = 0;
int counter;
int counter2;
int counter3;
int counter4;
void setup()
{
pinMode(13, OUTPUT);
pinMode(12, OUTPUT);
pinMode(11, OUTPUT);
pinMode(10, OUTPUT);
Serial.begin(9600);
}
void loop()
{
for (counter4 = 0; counter4 < 2; ++counter4) {
for (counter3 = 0; counter3 < 2; ++counter3) {
for (counter2 = 0; counter2 < 2; ++counter2) {
for (counter = 0; counter < 2; ++counter) {
delay(1000);
digitalWrite(13, led4);
digitalWrite(12, led3);
digitalWrite(11, led2);
digitalWrite(10, led1);
Serial.print(led4);
Serial.print(led3);
Serial.print(led2);
Serial.println(led1);
led1 = 1 - led1;
}
led2 = 1 - led2;
}
led3 = 1 - led3;
}
led4 = 1 - led4;
}
Serial.println();
}
|
Output:
0 0 0 0
0 0 0 1
0 0 1 0
0 0 1 1
0 1 0 0
0 1 0 1
0 1 1 0
0 1 1 1
1 0 0 0
1 0 0 1
1 0 1 0
1 0 1 1
1 1 0 0
1 1 0 1
1 1 1 0
1 1 1 1


...
Here is the Simulation Output!
simulation GIF
Share your thoughts in the comments
Please Login to comment...