EXPO! How Expo differs from React Native? Should I start my project with Expo? Many questions arise in newbies mind when he/she wants to get a start in the app development journey.
But, you are lucky as you have landed in the right place. I will try my best to explain everything in a simple manner.
As per official documentation of React Native, it is used to:
“Build native mobile apps using JavaScript and React”.
Let me break it down for you
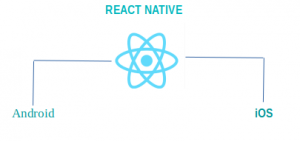
React Native is a framework that helps us to build apps (both android & iOS) using a single javascript code base. It allows faster development as a developer only need to know javascript for developing both apps (iOS & android).
Learn Once, Write Everywhere
This framework uses React.js library – one of the most discussed word in today’s market. Now, it may arise a question – what’s the difference between React and React Native? The answer is React Native uses native components with JSX – a javascript extension that gives a look like HTML whereas react uses web components.
React Native components like view and text behaves like web components ‘div’ and ‘span’. The styling in React Native gives you feel like CSS. The only difference is, in React Native, field names are written in CamelCase (say font-size) instead of dashed style (say font-size). It gives a feel of writing web apps.
Wait! This may arise another question of learning React.js before React Native. I would say..no! You can start. I have started my React Native journey without React.js knowledge, but yeah, there is a need to have some of the basic React components knowledge like JSX, components, state, and props.
I hope you got some pictures of React Native. Now let’s explore the market who is using React Native. There are many popular apps who are built using React Native like Facebook, Uber, Skype, Instagram… and maybe one day your app can come in this list!
Now, let’s explore what Expo is? How it differs from React Native?
According to Expo official documentation,
“Expo let you build native iOS and Android apps by writing JavaScript”.
If you look into the definition of React native, both definitions look similar. Expo is doing what React-Native does. They both allow us to build native apps (iOS & Android) using javascript but there is a difference. You can think Expo is helping hand that helps us in faster development of React-Native applications.
Expo apps are actually React-Native apps. The only difference is Expo comes with its SDK (Expo SDK) that provides us services like push notification, Facebook and Google login in just a few lines of code. It allows us to start our project in a minute. We don’t need Xcode (for iOS) & an Android studio (for Android) to get started. So, it’s easier to start.
Now, you might wonder why the hell I would start my journey with React Native. I will use the Expo. But there is a quote by Brom
“Everything comes with a price”.
Expo is good to start but it has some disadvantages. Let’s list down the advantages and disadvantages of an Expo.
Advantages:
- Project setup is so easy and can be done in minutes.
- App sharing is easy (using the QR code and link). You can publish your app using ‘expo publish’ command and can share that link. No need to build .apk(for Android) and .ipa(for iOS).
- Expo can build both .apk and .ipa very easily.
- It provides services like Facebook, Google login, push notifications which you can easily integrate into your app without putting so much effort.
Disadvantages:
- The biggest disadvantage which I faced was apk or ipa size. Yes, basic ‘hello world’ app is about 20 to 25 MB big. The reason is integrated libraries.
- You can’t use native modules that is written in Java/Objective-C.
That’s it! This is all about React Native with Expo.
Wait! we know what Expo is. What’s its relation with React Native but how to set up the project with Expo, from where to start? Here are the answers to your questions.
Let’s start with the setup of your first React Native project with Expo.
Assuming that you have installed NodeJS (if not, follow this link). Now, install expo-cli command line utility using npm :
npm install -g expo-cli
This will install expo-cli in your machine. Before moving ahead, I would like to tell you about the two main parts of it :
First part is an expo-cli. It is a tool that helps us in our development process like in setup of our project, in building APK or IPA, etc. The second part is Expo client app which we have to install on our Android or iOS phone to scan the QR code (which you can get using ‘expo start’ command) that will open a project in our Android or iOS phone. Confused!
If you don’t get it. It’s fine, I am going to explain it step by step.
After installing expo-cli, let’s create your project using:
expo init myApp
It will ask about choosing a template. Go with blank by pressing enter. You can also explore the second one with examples as well. Right now, go with blank and then follow below two commands to run your project.
cd myApp
expo start
This will generate QR code.

Generated QR code
Next step is to install the Expo client app. Expo client app can be installed using play store(for Android) and app store (for iOS) in your phone.
Now, it’s time to run your first React Native application using Expo. You can see your first app by scanning the QR code (that was generated in your terminal) using an Expo client app (which you have installed on your Android or iOS phone). In Android, as soon as you scan, it will compile/bundle your project to run on your device.

Bundling of project is taking place. App will run on your device after completion of bundling process.
Wait! You might think in the same way you can run on your iOS device which is somehow right, but scanning of the QR code is done using a camera. (QR Scan feature has been removed in Expo for iOS). Just open your camera and as soon as you scan, a notification will come-> open your app in the Expo. Click on it, it will start compiling/bundling your app to run on your iOS device.

Click on the notification, it will start bundling process.
Hurray! you have successfully run your first app using Expo.
Isn’t it an easy process. You can modify your code of app.js and see automatic reloading of your app once you save your changes.
Thanks for reading!
Share your thoughts in the comments
Please Login to comment...