How to add FTP like file manager to your WordPress Website ?
Last Updated :
25 Apr, 2024
Managing files on your WordPress website is critical for maintaining and organizing your content. While WordPress provides a built-in media library, sometimes you need more control over your files. Adding an FTP-like file manager can enhance your site’s functionality and make file management easier. In this article, we’ll explore how to add an FTP-like file manager to your WordPress Website.
What is an FTP-like File Manager?
An FTP-like file manager allows you to interact with your website’s files directly, similar to using an FTP client. It provides features like uploading, downloading, renaming, and organizing files and folders. By integrating such a tool into your WordPress site, you can streamline file management tasks.
This file manager operates similarly to a web-based FTP client within the WordPress website, providing a user-friendly interface to manage files. It is especially useful for users who lack access to FTP or cPanel on their website. With this tool, you can effortlessly edit, preview, upload, and download WordPress configuration and other files, just as you would with an FTP client.
Steps to Add an FTP-Like File Manager:
Step 1: Choose a Plugin:
- Start by selecting a suitable WordPress plugin that offers an FTP-like file manager. Some popular options include “File Manager” and “FileBird.”
- Install and activate the chosen plugin from your WordPress dashboard.
Log in to your WordPress website using the user id and password.
Hover over the “Plugins” section and then click on the “Add New” button to add the plugin.
Step 3: Access the File Manager:
- Once the plugin is active, navigate to your WordPress admin area.
- Look for the new “File Manager” menu item (or similar) in the sidebar.
- Click on it to access the file manager interface.
Search for the “file manager” in the search box and then click on the “Install Now” button to install the plugin.
After activating the plugin click on the “Activate” button to activate plugin.
Now the WP file manager will start appearing on the WordPress dashboard.
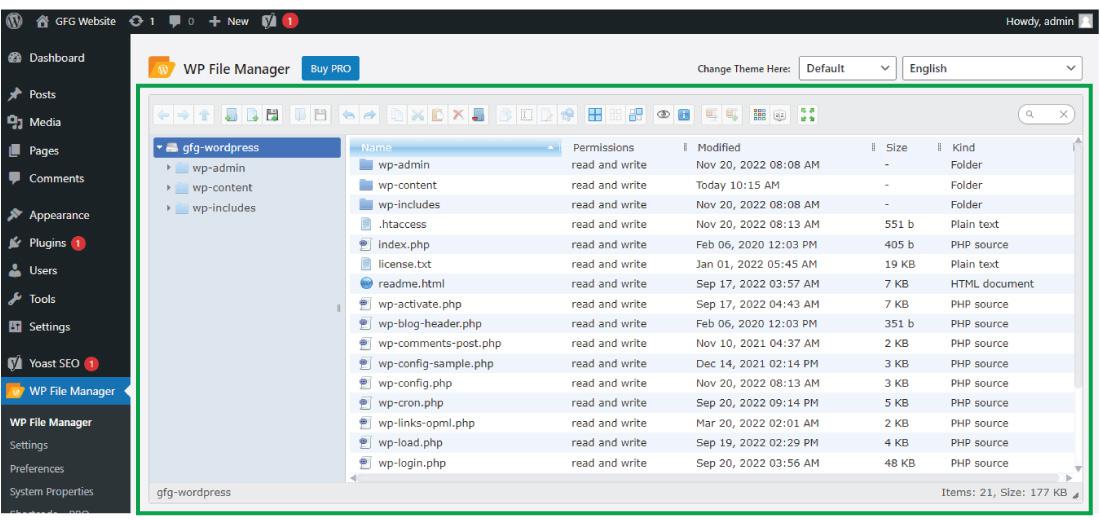
Step 5: Explore the Features:
- The file manager interface will resemble a typical file explorer.
- You’ll see folders, files, and options for uploading, creating directories, and managing permissions.
- Explore the features to get familiar with the interface.
Hover over the “WP File Manager” and then click on “WP File Manager”.
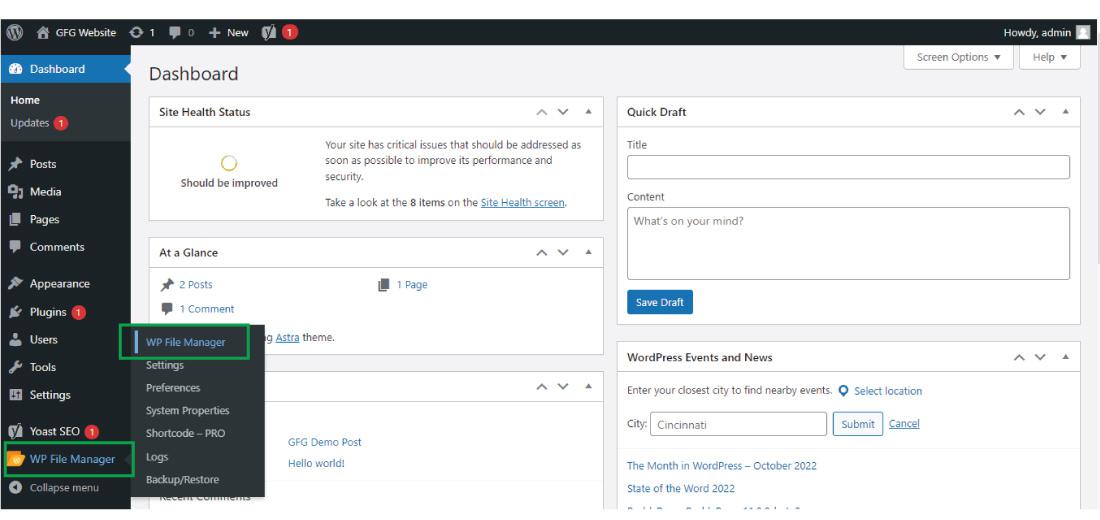
After clicking on the “WP File Manager”, its dashboard appears on your screen where you can edit, preview, and manage the WordPress file easily with the WordPress admin area and you don’t need to access the FTP or cPanel.
This is how you can add the FTP file manager to your WordPress website. Hope you find this article useful and solve your problem.
Conclusion
Adding an FTP-like file manager to your WordPress website can simplify file handling and improve your overall site management experience. Choose a reliable plugin, follow best practices, and enjoy efficient file management!
Share your thoughts in the comments
Please Login to comment...