10 Android Studio Tips and Tricks For Android Developers
Last Updated :
18 May, 2021
To become a good Android developer you should be familiar with Android Studio with some of its tips and tricks. These tips and tricks will help you to become a good Android developer and it will also help you to improve your efficiency in developing Android Apps. In this article, we will be discussing 10 Android Studio, Tips, Tricks, and Resources you should be familiar with as an Android developer.

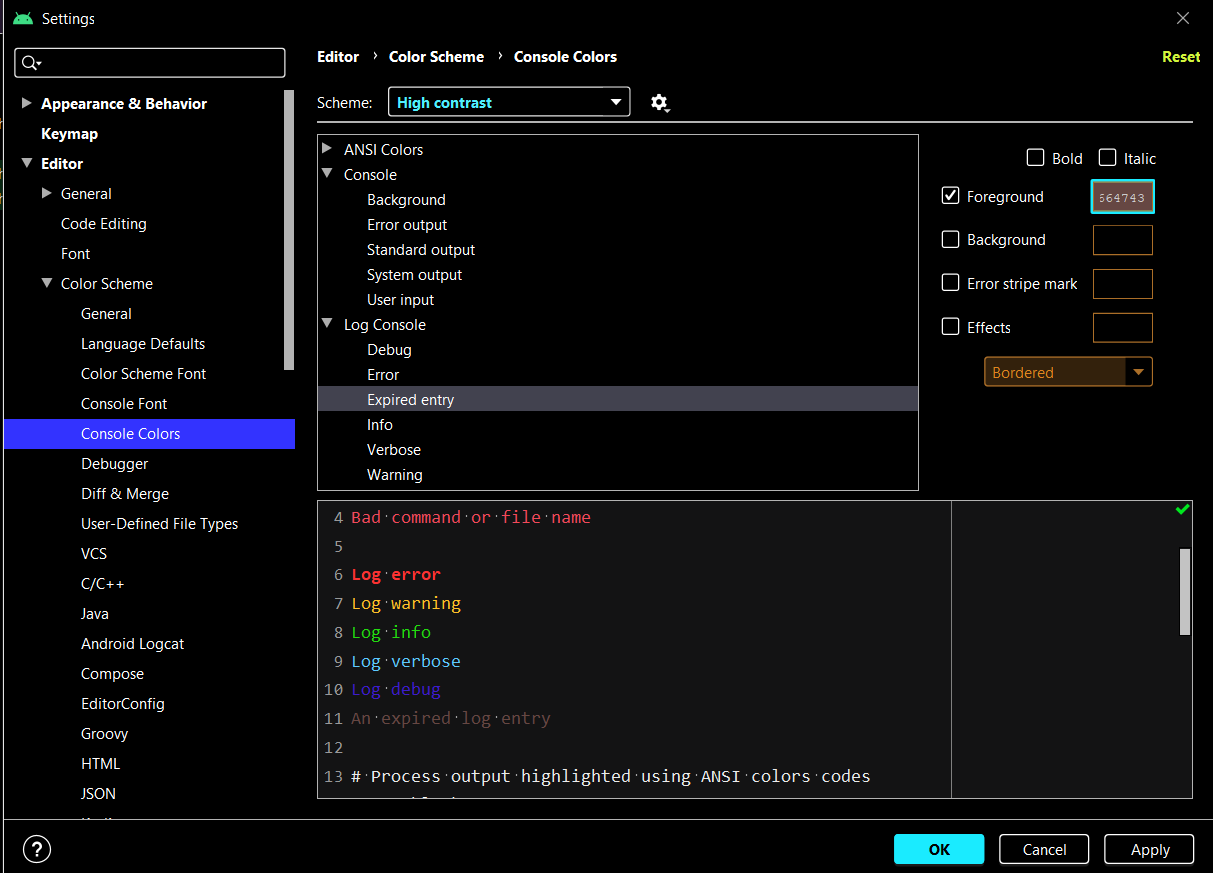
1. Use Material Color Theme for Logcat
Using color code for statements in Logcat will help you to easily identify whether it is an error, warning, info, or many more. To enable these color codes for different statements in Logcat. Navigate to the File > Settings > Editor > Color Scheme > Console Colors and you will get to see the below screen. On that screen, you can modify your colors according to your choice. Some standard colors are mentioned below in the screenshot.
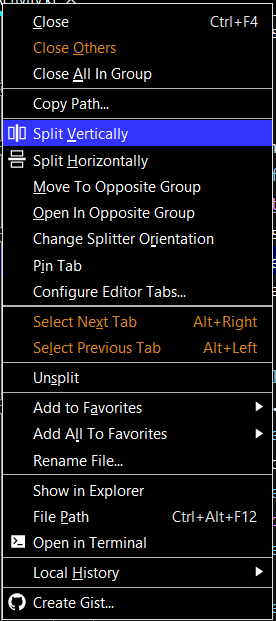
2. Using Split Screen to Increase Efficiency
This feature is very important and used by most professional Android developers. It is mostly used when we are initializing the ids for the UI components which we are using in our XML files. In this feature, we generally split our XML file with our java file to view both the files at a time. This will help us to increase our efficiency while writing the code. To use this feature we simply have to right-click on the XML or java file and we will get to see the option as Split Vertically and Split Horizontally option as shown below.
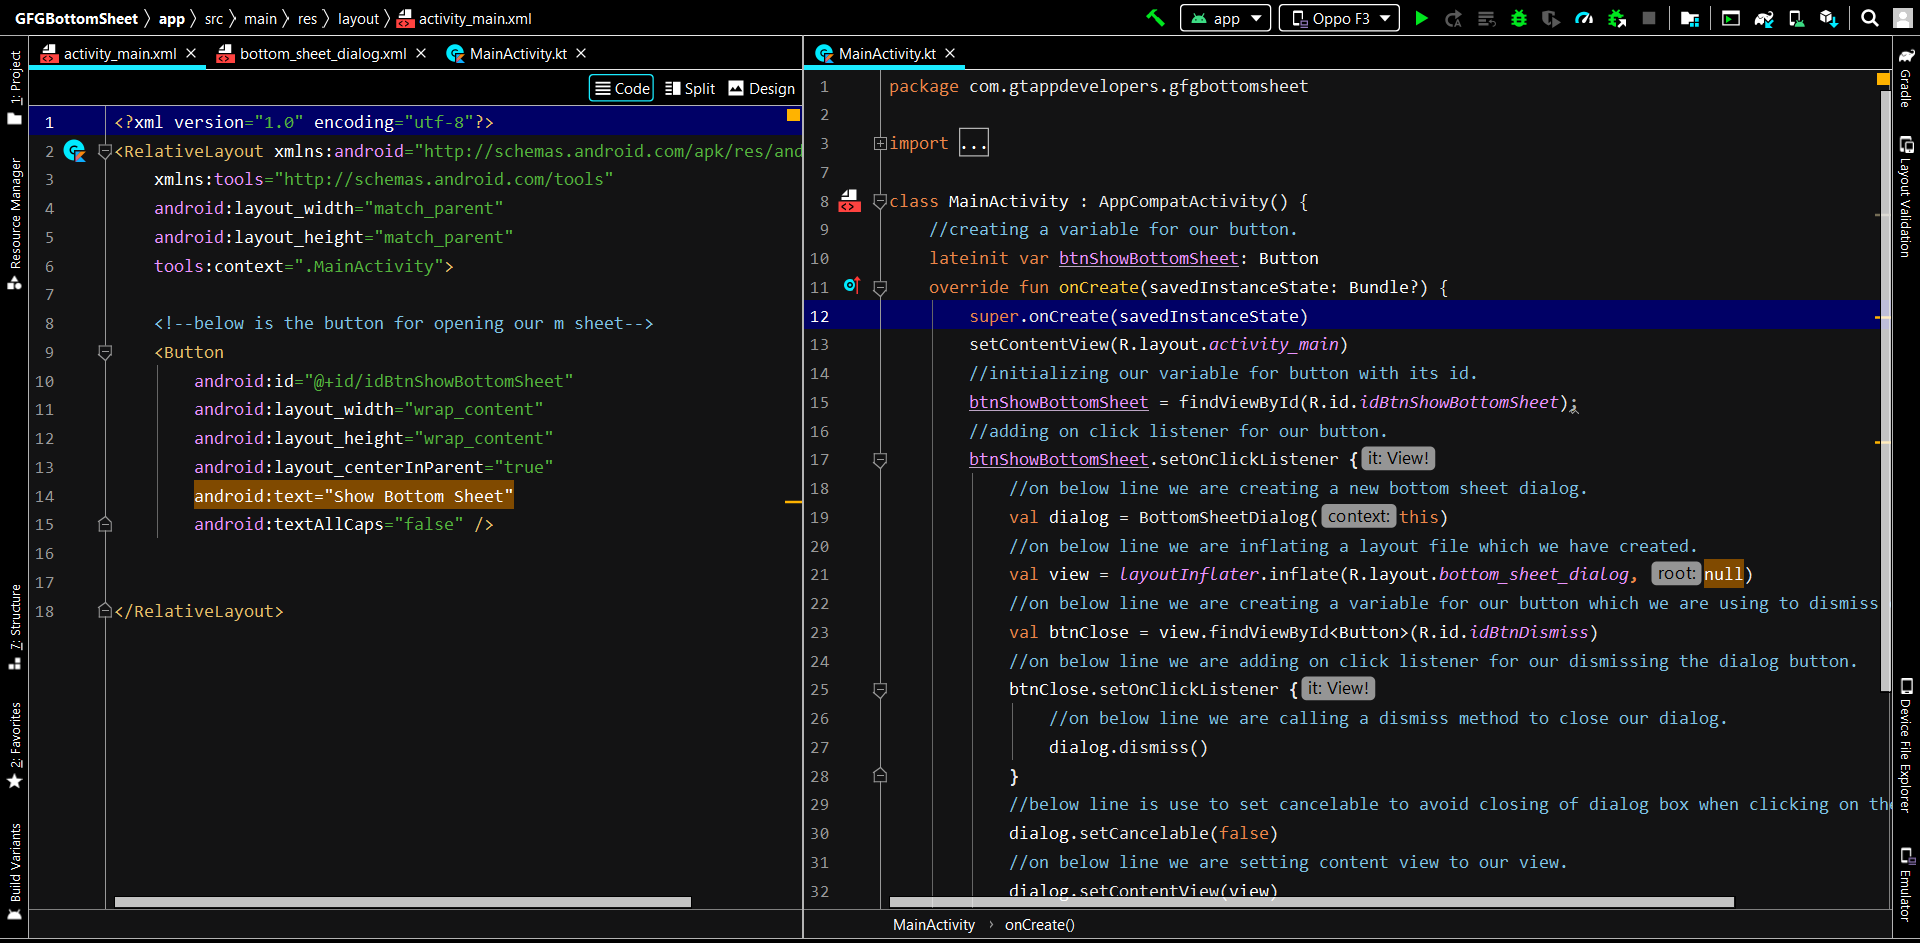
After clicking on the Split Vertically option we will get to see the below screen.
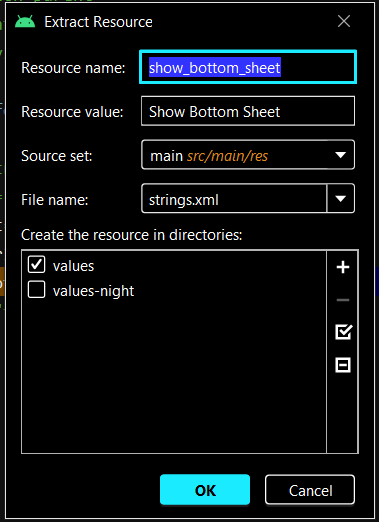
3. Easily move all strings to the strings.xml file
According to the standards, the strings which we used inside our app should be present in our strings.xml. Adding strings in the strings.xml will help us in the future when we have to enable multi-language support inside our application. But adding each string to the strings.xml file is a boring task. So to simplify this we simply have to click on that string and then press Alt+Enter you will get to see the below option as Extract String Resource we have to click on that we will get to see the below screen. Inside that screen, we have to specify the name for our string and its value will be already taken from the code itself. Below is the screenshot for it.
After adding that we simply have to click on the OK option to add this string in our strings.xml file.
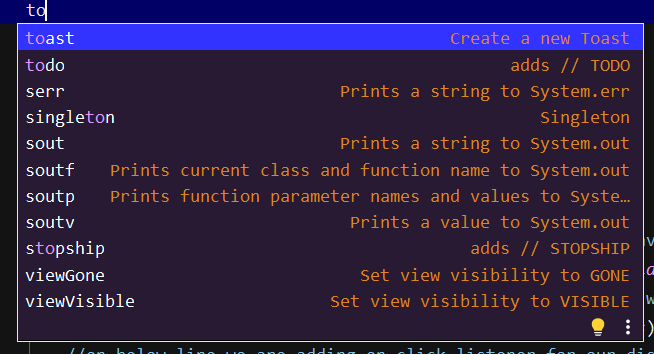
4. Use Live Templates
There are so many statements and small code snippets used inside the app but it is not possible that every developer has an idea how to use that particular code for using that feature. So for this Android studio provides an option for Live Templates with which we can easily type some letters for getting the specific code snippet. For example, if we have to display a simple toast message inside our application then we will simply press a shortcut key as “Ctrl+J” in windows and “Cmd+j” in Mac to open the Live Templates option. Inside that, we have to type toast and after clicking on it, Android Studio will automatically write the code for it. Below is the screenshot for the live template feature.
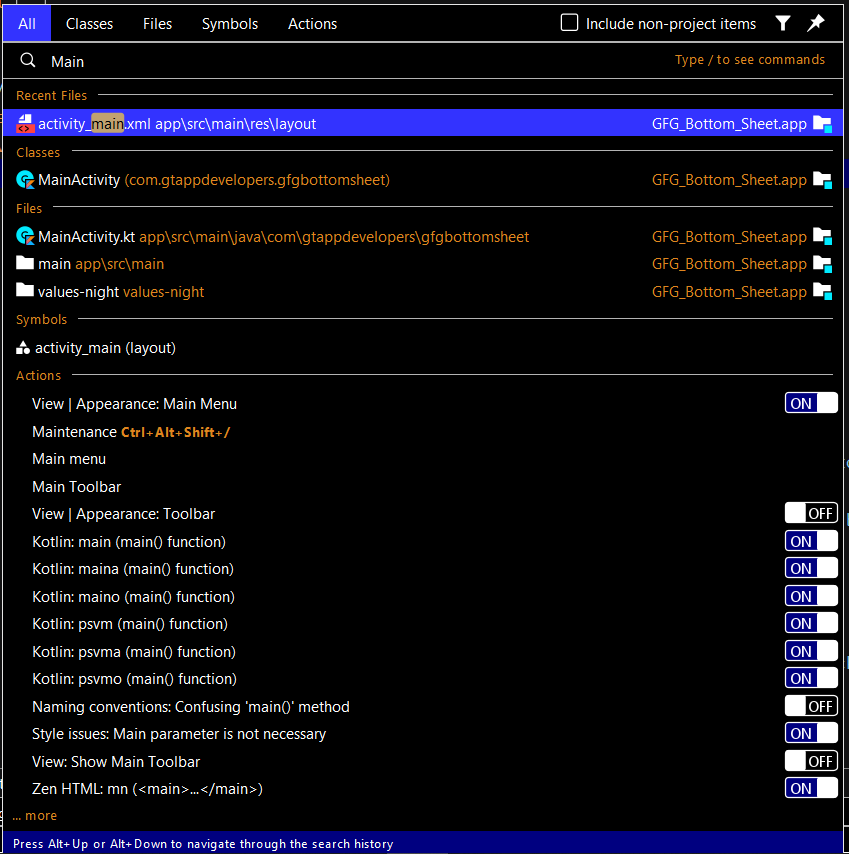
5. Searching a file with shortcut keys
If you are working on a huge project in Android Studio which is having so many files present in it. In that case, if we want to search any file inside our Android Studio Project. We simply have to press the left shift two times to open the search window. Inside this window, we can search for the file which we want to use for writing our code. Below is the screen for searching the files.
6. Using Find and Replace
When we have to update variable names in our app for better understanding we have to update each variable individually. To reduce this work we have to use the find and replace option to easily rename these variables. For using this option we have to click on the variable which we have to replace then we have to press “Ctrl+F” and we will get to see the variable highlighted in our project after that we have to press “Ctrl+R” to replace this variable. Now we have to click on Replace All option to replace this option.

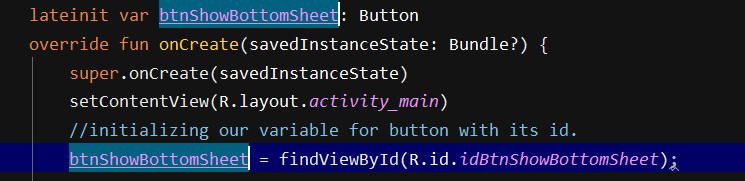
7. Using Multi Cursor in Android Studio
When we have to write the same code in the multiple blocks of code in Android Studio. We have to write the same code each and every time so to reduce this task and optimize our speed we should use multi cursor feature in our app. With the help of this feature, we can edit the variable or add the same code in multiple code blocks. To use this feature we simply have to click on the variable which we have to modify then press “Alt+J” in windows and “control+j” in Mac. You will get to see the multiple cursors as shown below.
8. Rearranging the code in the XML file
When we are writing an XML code in the XML file in our Android Studio Project, we should properly format our XML code to make it easily understandable and align it properly according to the standards. For that, we should use shortcut keys to arrange this code properly in your XML as well as the JAVA file. To rearrange your code you simply have to press “Ctrl+Alt+L” in your XML as well as Java file to arrange your code properly.
9. Removing unused import statements in your JAVA file
According to the standards, we should remove the import statements which are not used in our code. This will helps us to make our code clean and it will help us to maintain our code properly. Removing the unused statement in Android Studio is a tedious task so to optimize this we should use shortcut keys as “Ctrl+Alt+O” to remove unused import statements in our Project.
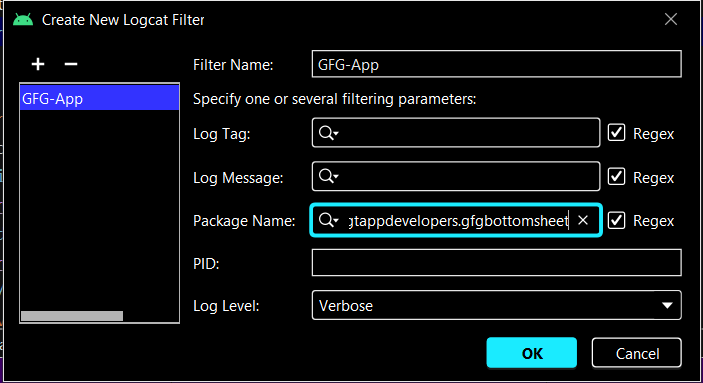
10. Prevent Android Studio Logcat from clearing log from the current application when it crashes
This feature is used many times when we are debugging or testing our application. This will help us to prevent the clearing of the logs from the current application when our app crashes. To enable this click on the Logcat option in the bottom window inside that we have to click on the right drop-down option as shown below.

Inside this drop-down click on the Edit Filter Configuration option, you will get to see below dialog box. In this box, we have to enter our App Name, app’s package name, and then click on the OK option. Below is the screenshot in which we have to add our file name as App name and then we have to add the app’s package name.
Share your thoughts in the comments
Please Login to comment...