While building the applications or projects in Vue.js, we need to actually change or pass the content or data between the parent (base) and child components so that the user can be able to build reusable User Interfaces. As in ReactJS, there is the concept of props through which we can pass the data between the components, so, in Vue.js, we can perform the same functionality with slots and scoped slots. In this article, we will know the slots and scoped slots along with their syntax and examples. Also, we will see the main differences between these terms with respect to some unique and important parameters.
VueJS Slots
In Vue.js, slots are an important term that helps us to pass the content or data from the parent or base component to the child component in a more reliable manner. Slots basically enable us to define the placeholders in the child-based component’s template where we actually infer the content of the parent. Slots are mainly used to develop reusable components that can have different data or content without the need to modify the structure of the application.
Syntax:
Below is the syntax of Slots in Vue.js:
<template>
  <div>
    <child-component>
      <p>This content or Data is from the parent component.</p>
    </child-component>
  </div>
</template>
<template>
  <div>
    <slot></slot>
  </div>
</template>
Example: This example illustrates the basic implementation of VueJS Slots.
Step 1: Initially, execute the below commands in the VSCode terminal to create the Vue project and install the Vue-router package.
vue create slots-example-app
cd slots-example-app
npm install -g @vue/cli@5.0.8
vue create .
npm install vue-router
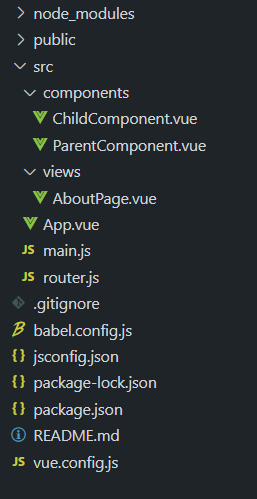
Step 2: Now, create the directory structure according to the below screenshot:
Step 3: Now, insert the below file code in the respective files.
HTML
<template>
<div>
<child-component>
<p>Content from the parent Component.</p>
</child-component>
</div>
</template>
|
HTML
<template>
<div>
<slot></slot>
</div>
</template>
|
HTML
<template>
<div>
<h2>This is About Page</h2>
<parent></parent>
</div>
</template>
<script>
import Parent from '@/components/ParentComponent.vue';
export default {
components: {
Parent
}
};
</script>
|
HTML
<template>
<div id="app">
<router-view />
</div>
</template>
<script>
export default {
name: 'App'
};
</script>
|
Javascript
import { createApp } from 'vue';
import App from './App.vue';
import router from './router';
createApp(App).use(router).mount('#app');
|
Javascript
import { createRouter, createWebHistory }
from 'vue-router';
import About from '@/views/AboutPage.vue';
const routes = [
{
path: '/',
component: About
}
];
const router = createRouter({
history: createWebHistory(),
routes
});
export default router;
|
- Package and dependency files for reference:
package.json:
{
    "name": "slots-example-app",
    "version": "0.1.0",
    "private": true,
    "scripts": {
        "serve": "vue-cli-service serve",
        "build": "vue-cli-service build",
        "lint": "vue-cli-service lint"
    },
    "dependencies": {
        "core-js": "^3.8.3",
        "vue": "^3.2.13",
        "vue-router": "^4.2.4"
    },
    "devDependencies": {
        "@babel/core": "^7.12.16",
        "@babel/eslint-parser": "^7.12.16",
        "@vue/cli-plugin-babel": "~5.0.0",
        "@vue/cli-plugin-eslint": "~5.0.0",
        "@vue/cli-service": "~5.0.0",
        "eslint": "^7.32.0",
        "eslint-plugin-vue": "^8.0.3"
    },
    "eslintConfig": {
        "root": true,
        "env": {
            "node": true
        },
        "extends": [
            "plugin:vue/vue3-essential",
            "eslint:recommended"
        ],
        "parserOptions": {
            "parser": "@babel/eslint-parser"
        },
        "rules": {}
    },
    "browserslist": [
        "> 1%",
        "last 2 versions",
        "not dead",
        "not ie 11"
    ],
    "_id": "slots-example-app@0.1.0",
    "readme": "ERROR: No README data found!"
}
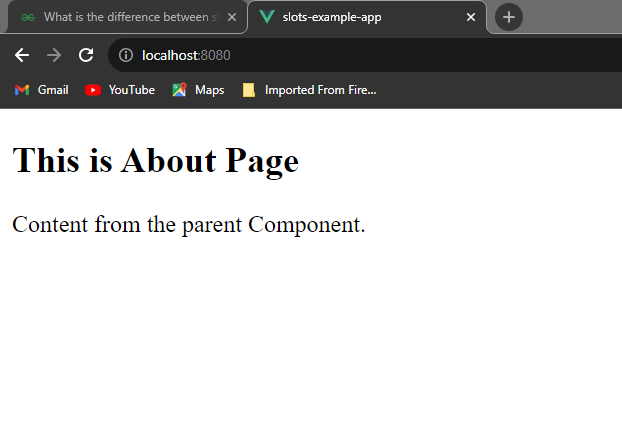
Step 4: Run the application by using the below command in the terminal.
npm run serve
Output:
Vue.JS Scoped Slots
In Vue.js, Scoped Slots are also called Named Slots, this s because they enable us to pass the content or the data from the base or parent component to the child components with dynamic data. Alike Slots, it is not just static oriented, but we can pass the dynamic data from parent to child. This allows the child component to actually render the data which is based on the content passed by the parent, which makes it more data-driven and customizable.
Syntax:
Below, is the syntax of Slots in Vue.js:
<template>
  <div>
    <child-component>
      <template #default="slotProps">
        <p>{{ slotProps.content}}</p>
      </template>
    </child-component>
  </div>
</template>
<template>
  <div>
    <slot name="default" :message="content"></slot>
  </div>
</template>
<script>
export default {
  data() {
    return {
      message: "This is the Dynamic Content from the Child Component"
    };
  }
};
</script>
Example: This example illustrates the Scoped Slots in VueJS.
Step 1: Create the directory structure, & insert the below file code in the respective files.
HTML
<template>
<div>
<label for="messageInput">
Enter a message:
</label>
<input v-model="userMessage"
id="messageInput"
type="text" />
<child-component :user-message="userMessage">
<template #dataSlot="slotProps">
<p>{{ slotProps.data }}</p>
<button @click="reverseMessage(slotProps.data)">
Reverse Message
</button>
</template>
</child-component>
</div>
</template>
<script>
import ChildComponent from './ChildComponent.vue';
export default {
components: {
ChildComponent
},
data() {
return {
userMessage: "Hello from ParentComponent"
};
},
methods: {
reverseMessage(message) {
if (message) {
this.userMessage =
message.split('').reverse().join('');
}
}
}
};
</script>
|
HTML
<template>
<div>
<slot name="dataSlot" :data="userMessage"></slot>
</div>
</template>
<script>
export default {
props: {
userMessage: String
}
};
</script>
|
HTML
<template>
<div>
<ParentComponent></ParentComponent>
</div>
</template>
<script>
import ParentComponent
from '@/components/ParentComponent.vue';
export default {
components: {
ParentComponent
}
};
</script>
|
HTML
<template>
<div id="app">
<router-view />
</div>
</template>
<script>
export default {
name: 'App'
};
</script>
|
Javascript
import { createApp } from 'vue';
import App from './App.vue';
import router from './router';
createApp(App)
.use(router)
.mount('#app');
|
Javascript
import { createRouter, createWebHistory } from 'vue-router';
import HomePage from '../views/HomePage.vue';
const routes = [
{
path: '/',
name: 'Home',
component: HomePage
}
];
const router = createRouter({
history: createWebHistory(process.env.BASE_URL),
routes
});
export default router;
|
- Package and dependency files for reference:
package.json
{
    "name": "slots-example-app",
    "version": "0.1.0",
    "private": true,
    "scripts": {
        "serve": "vue-cli-service serve",
        "build": "vue-cli-service build",
        "lint": "vue-cli-service lint"
    },
    "dependencies": {
        "core-js": "^3.8.3",
        "vue": "^3.2.13",
        "vue-router": "^4.2.4"
    },
    "devDependencies": {
        "@babel/core": "^7.12.16",
        "@babel/eslint-parser": "^7.12.16",
        "@vue/cli-plugin-babel": "~5.0.0",
        "@vue/cli-plugin-eslint": "~5.0.0",
        "@vue/cli-service": "~5.0.0",
        "eslint": "^7.32.0",
        "eslint-plugin-vue": "^8.0.3"
    },
    "eslintConfig": {
        "root": true,
        "env": {
            "node": true
        },
        "extends": [
            "plugin:vue/vue3-essential",
            "eslint:recommended"
        ],
        "parserOptions": {
            "parser": "@babel/eslint-parser"
        },
        "rules": {}
    },
    "browserslist": [
        "> 1%",
        "last 2 versions",
        "not dead",
        "not ie 11"
    ],
    "_id": "slots-example-app@0.1.0",
    "readme": "ERROR: No README data found!"
}
Step 2: Run the application by using the below command in the terminal.
npm run serve
Output:
Difference between Slots and Scoped slots:
Basis
|
Slots
|
Scoped Slots
|
| Purpose |
Slots are used to define the placeholders for the data or content. |
Scoped Slots are used to pass the data and the customized rendering. |
| Multiple Slots |
Here, multiple unnamed slots are allowed. |
Here, multiple named slots are allowed. |
| Data Source |
In Slots, the parent component is the data source. |
Here, the parent component or the specific template is the data source. |
| Props in Child Component |
Here, Props in Child Component are not available. |
Here, Props are passed through the named slot |
| Interaction with the Parent Component |
Here, there is no interaction with the parent component. |
Here, there can be interaction with parents through props or events. |
| Access to Parent Data |
There is no direct access to parent component data. |
There can be access to the parent component’s data using props and events. |
Share your thoughts in the comments
Please Login to comment...