What is Flow in Kotlin and How to use it in Android Project?
Last Updated :
29 Oct, 2021
To build an app asynchronously we have to use RxJava and it is also one of the most important topics in Android Development. But now in Kotlin Jetbrains came up with Flow API. With Flow in Kotlin now we can handle a stream of data sequentially. Flow is a stream processing API in Kotlin developed by JetBrains. It’s an implementation of the Reactive Stream specification, an initiative whose goal is to provide a standard for asynchronous that executes sequentially. Jetbrains built Kotlin Flow on top of Kotlin Coroutines. In Kotlin, Coroutine is just the scheduler part of RxJava but now with Flow APIs, it can be an alternative to RxJava in Android.
What we are going to build in this article?
In this article, We will learn what is Flow in Kotlin, and also we will be building a simple android application in which we will integrate the Kotlin Flow APIs.
What is Flow in Kotlin?
Kotlin Flow API is a better way to handle the stream of data asynchronously that executes sequentially. By using Flow to handle streams of values, we can transform data in complex multi-threaded ways, by writing just a small bit of code. In Kotlin.
Steps by Step Implementation
Step 1: Create a new Project
To create a new project in Android Studio please refer to How to Create/Start a New Project in Android Studio. Note that select Kotlin as the programming language.
Step 2: Add dependencies in your grade files.
Navigate to the Gradle Scripts > build.gradle(Module: app) and add the below codes.
implementation "org.jetbrains.kotlinx:kotlinx-coroutines-core:1.3.3"
implementation "org.jetbrains.kotlinx:kotlinx-coroutines-android:1.3.3"
Navigate to the Gradle Scripts > build.gradle(Module: project) and add the below codes.
classpath "org.jetbrains.kotlin:kotlin-gradle-plugin:1.3.61"
Step 3: Working with the activity_main.xml file
Navigate to the app > res > layout > activity_main.xml and add the below code to that file. Below is the code for the activity_main.xml file.
XML
<?xml version="1.0" encoding="utf-8"?>
<androidx.constraintlayout.widget.ConstraintLayout
android:layout_width="match_parent"
android:layout_height="match_parent"
tools:context=".MainActivity">
<Button
android:id="@+id/button"
android:layout_width="wrap_content"
android:layout_height="wrap_content"
app:layout_constraintBottom_toBottomOf="parent"
android:text="Launch Kotlin Flow"
app:layout_constraintLeft_toLeftOf="parent"
app:layout_constraintRight_toRightOf="parent"
app:layout_constraintTop_toTopOf="parent"
android:backgroundTint="237E26"/>
</androidx.constraintlayout.widget.ConstraintLayout>
|
Step 4: Working with the MainActivity.kt file
In onCreate() function of Activity create two functions named as beginFlow() & btnClicks(). In the beginFlow() function, we will define the flow and In the btnClicks() function we will click the button to display the data which is emitted from the flow.
Kotlin
package com.mrtechy.gfg_flow
import android.content.ContentValues.TAG
import androidx.appcompat.app.AppCompatActivity
import android.os.Bundle
import android.util.Log
import android.widget.Button
import kotlinx.coroutines.CoroutineScope
import kotlinx.coroutines.Dispatchers
import kotlinx.coroutines.delay
import kotlinx.coroutines.flow.Flow
import kotlinx.coroutines.flow.collect
import kotlinx.coroutines.flow.flow
import kotlinx.coroutines.flow.flowOn
import kotlinx.coroutines.launch
class MainActivity : AppCompatActivity() {
lateinit var flow: Flow<Int>
override fun onCreate(savedInstanceState: Bundle?) {
super.onCreate(savedInstanceState)
setContentView(R.layout.activity_main)
beginFlow()
btnClicks()
}
private fun beginFlow() {
flow = flow {
Log.d(TAG, "flow Start")
(0..10).forEach {
delay(500)
Log.d(TAG, "Emitting value $it")
emit(it)
}
}.flowOn(Dispatchers.Default)
}
private fun btnClicks() {
val button = findViewById<Button>(R.id.button)
button.setOnClickListener {
CoroutineScope(Dispatchers.Main).launch {
flow.collect {
Log.d(TAG, it.toString())
}
}
}
}
}
|
beginFlow() description:
- It will emit values from 0 to 10 at a 500ms delay.
- emit() function is for emitting the number. It is part of FlowCollector which can be used as a receiver.
- flowOn() is similar to subscribeOn() in RxJava
- Codes written above flowOn will run in the background.
btnClick() description:
- flow.collect now will start extracting the value from the flow on the Main thread as Dispatchers. Main is used in launch coroutine builder in CoroutineScope
- When we click the button it will print the values one by one.
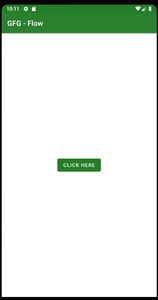
Output:
Whenever you click on the click here button you will see output like below in your logcat window.
Logcat Output:
flow Start
Emitting value 0
0
Emitting value 1
1
Emitting value 2
2
Emitting value 3
3
Emitting value 4
4
Emitting value 5
5
Emitting value 6
6
Emitting value 7
7

Emitting value 8
8
Emitting value 9
9
Emitting value 10
10
Share your thoughts in the comments
Please Login to comment...