What is Django User Concurrency?
Last Updated :
12 Apr, 2024
When developing web applications using Django, it’s essential to understand the Django User Concurrency that the application can handle. In this article, we will see about Django User Concurrency.
What is Django User Concurrency
Django User Concurrency is the process in which multiple number of users can access a Django application concurrently without compromising performance or causing system overload at a time. Django User Concurrency depends on various factors such as server specifications, application complexity, database queries, and network latency.
Implementation of Django User Concurrency
Below, is the Implementation of the Python Django User Concurrency:
Starting the Project Folder
To start the project use this command
django-admin startproject concurrent_users_estimate
cd concurrent_users_estimate
To start the app use this command
python manage.py startapp users
Now add this app to the ‘settings.py’
INSTALLED_APPS = [
    "django.contrib.admin",
    "django.contrib.auth",
    "django.contrib.contenttypes",
    "django.contrib.sessions",
    "django.contrib.messages",
    "django.contrib.staticfiles",
    "users",
]
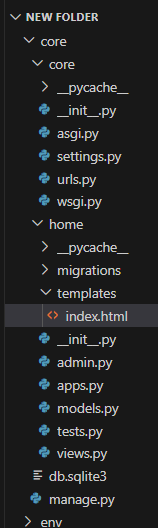
File Structure
Setting Necessary Files
users/models.py : Below, code defines a Django model called UserProfile with two fields: username, which is a character field with a maximum length of 100 characters, and email, which is an email field that must be unique.
Python3
# users/models.py
from django.db import models

class UserProfile(models.Model):
    username = models.CharField(max_length=100)
    email = models.EmailField(unique=True)
users/views.py : Below, Django view retrieves all instances of the UserProfile model from the database and passes them to a template named 'users/index.html' to be rendered
Python3
# users/views.py
from django.shortcuts import render
from .models import UserProfile


def index(request):
    users = UserProfile.objects.all()
    return render(request, 'users/index.html', {'users': users})
Creating GUI
users/templates/index.html: This HTML template displays a list of user profiles retrieved from the Django view. It uses basic styling to create a clean and visually appealing layout. Each user’s username is displayed within a list item (<li>).
HTML
<!DOCTYPE html>
<html lang="en">
<head>
    <meta charset="UTF-8">
    <title>User Profiles</title>
    <style>
        body {
            font-family: Arial, sans-serif;
            background-color: #f2f2f2;
            margin: 0;
            padding: 0;
        }
        .container {
            max-width: 600px;
            margin: 20px auto;
            padding: 20px;
            background-color: #fff;
            border-radius: 10px;
            box-shadow: 0 0 10px rgba(0, 0, 0, 0.1);
        }
        h1 {
            text-align: center;
        }
        ul {
            list-style-type: none;
            padding: 0;
        }
        li {
            padding: 15px; /* Adjust padding to create gap */
            margin-bottom: 10px; /* Add margin bottom for proper spacing */
            background-color: #f9f9f9;
            border-radius: 5px;
            box-shadow: 0 2px 4px rgba(0, 0, 0, 0.1);
        }
    </style>
</head>
<body>
    <div class="container">
        <h1> <strong style="color: green;">GeeksforGeeks</strong> User Profiles</h1>
        <ul>
            {% for user in users %}
                <li>{{ user.username }} </li>
            {% endfor %}
        </ul>
    </div>
</body>
</html>
core/urls.py : Below, are the urls.py file which integrate the HTML page with views file.
Python3
from django.contrib import admin
from django.urls import path

from home.views import *

urlpatterns = [
    path('', index, name='delete_note'),
    path('admin/', admin.site.urls),
]
admin.py:Here we are registering our models.
Python3
from django.contrib import admin
from .models import *

admin.site.register(UserProfile)
Deployment of the Project
Run these commands to apply the migrations:
python3 manage.py makemigrations
python3 manage.py migrate
Run the server with the help of following command:
python3 manage.py runserver
Output
Share your thoughts in the comments
Please Login to comment...