Using Zenity with Python
Last Updated :
11 Jun, 2021
Well no this is not another Tkinter tutorial. Instead, we will be using Zenity to create the GUI. Confused? Well, I’m here for the rescue. Zenity is free software and a cross-platform program that allows the execution of GTK dialog boxes in command-line and shell scripts. Zenity is available only in Linux. Sorry Windows users, this one is not for you. Instead, you can use python-zenity but we won’t cover that here.
So, let’s get started. First, you need to have Zenity installed on your system. To do so, simply open up your terminal and type the following in it
sudo apt-get update -y
sudo apt-get install -y zenity
Now that you have installed Zenity, let’s start scripting. First, create a new project directory and then inside the project directory, create a new file called run.sh and add in the following script inside it. Don’t worry, I’ll provide a detailed walkthrough of the entire code.
#!/bin/sh

zenity --forms --title="Contacts" \
   --text="New Contact" \
   --add-entry="First Name" \
   --add-entry="Last Name" \
   --add-entry="Phone" > data.txt
#optional: continue adding data to the existing data.txt file
#   --add-entry="Phone" >> data.txt

python3 contacts.py
Walkthrough:
- The first line is the shebang line. The shebang is a special character sequence in a script file that specifies which program should be called to run the script. The shebang is always on the first line of the file and is composed of the characters #! followed by the path to the interpreter program.
- The next line is where Zenity is called. The –forms attribute defines that the GUI will be of a form. –title specifies the title of the window. \ is line separator. The line separator is used because Zenity wants the entire thing to be written in one line, but we are making it multi-line so that our script looks clean. It is optional.
- The third line has the –text parameters. This simply adds a heading to the form.
- The fourth and fifth line specifies the input field and the field will be for the first name and last name respectively.
- The sixth line also is an input field but at the end of it note > data.txt So, this is a bash command to direct the output to the data.txt file
- The seventh line calls the python script which we will see in a moment.
Now, let’s get to the python script. There is no need to install any extra packages. We will be working with only the built-in modules. So, let’s get to coding.
Python3
import os, csv
def write(first, last, phone):
if os.path.isfile('data.csv'):
with open('data.csv', 'a') as file:
writer = csv.writer(file)
writer.writerow([first, last, phone])
else:
header = ['First Name', 'Last Name', 'Phone']
with open('data.csv', 'w') as file:
writer = csv.DictWriter(file, fieldnames = header)
writer.writeheader()
writer.writerow({
'First Name' : first,
'Last Name' : last,
'Phone' : phone})
if __name__ == "__main__":
data = open('data.txt').readline().strip().split('|')
first_name, last_name, phone = data
write(first_name, last_name, phone)
os.remove('data.txt')
|
So, what this basically does is, it reads the data from the file and then writes it to a csv file. You can then view the csv file using any spreadsheet viewer.
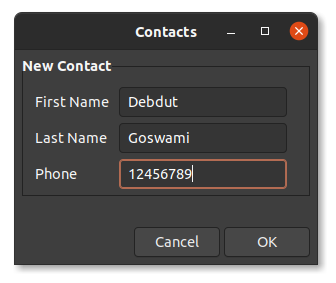
Now, you are all set. Now, to run the entire thing, simply open up your terminal inside the project folder and type ./run.sh and your GUI should open up. Fill in the details and click on Ok and your data should be written into data.csv file. Your Gui window should look something like this.
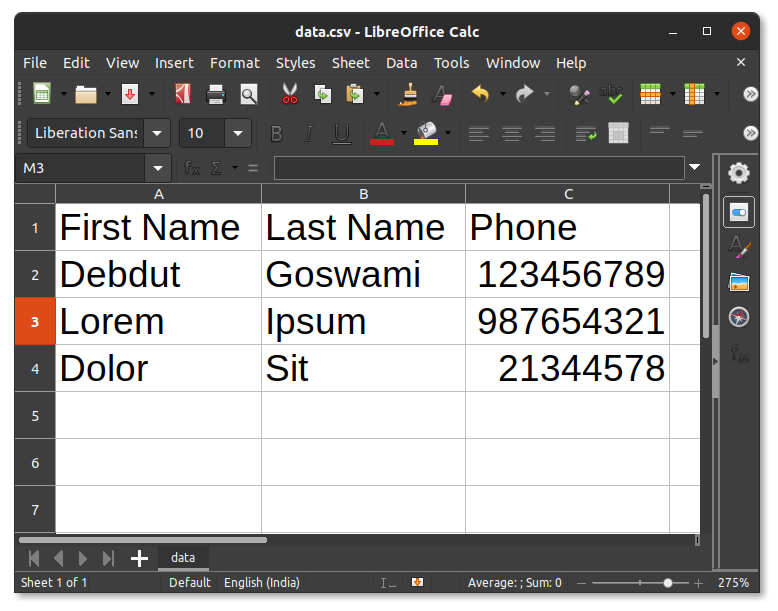
After entering a few data, your csv file should look something like this.
Zenity can be pretty useful for creating a simple GUI.
Share your thoughts in the comments
Please Login to comment...