DOM stands for Document Object Model. It is a programming interface for web documents that represents the page so that programs can change the document structure, style, and content. In simpler terms, the DOM is a tree-like structure that represents the HTML content of a web page in a structured manner, allowing JavaScript to manipulate the content and structure of the page dynamically.
Usage of DOM :
- Allows you to change the content and appearance of a web page dynamically.
- It can be used to validate form data entered by the user before it is submitted to the server.
- Can be used to create animations and other visual effects on web pages.
- Provides a way to handle events that occur on a web page, such as button clicks or key presses.
- It is used in conjunction with AJAX (Asynchronous JavaScript and XML) to create dynamic web applications that update content without requiring a page refresh.
Let’s talk about some of the tips and tricks on JavaScript DOM Methods :
1. Using getComputedStyle() Method
In JavaScript, the getComputedStyle() method is used to retrieve the computed style of an element. It returns an object that contains the final styles applied to the element after all styles have been computed, including inherited styles and styles applied via CSS rules or inline styles.
Let’s understand with the help of a code :
HTML
<!DOCTYPE html>
<html>
<head>
<title>GeeksforGeeks Learning</title>
<style>
#test {
background-color: green;
}
</style>
</head>
<body>
<h1>GeeksforGeeks Learning</h1>
<h2 id="test">getComputedStyle() method example</h2>
<p>The computed background color for the test div is:</p>
<p id="demo"></p>
<script>
const element = document.getElementById("test");
const cssObj = window.getComputedStyle(element, null);
let bgColor = cssObj.getPropertyValue("background-color");
document.getElementById("demo").innerHTML = bgColor;
</script>
</body>
</html>
|
Output :
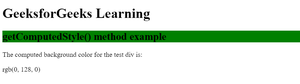
getComputedStyle() method example output
2. Using element.addEventListener() method
element.addEventListener() is a method in JavaScript that allows you to add an event listener to a DOM element. An event listener is a function that is triggered when a specific event occurs on the element, such as a click or mouseover.
Let’s understand with the help of a code :
HTML
<!DOCTYPE html>
<html>
<head>
<title>GeeksforGeeks Learning</title>
<style>
body {
font-family: Arial, sans-serif;
margin: 0;
}
h2 {
color: #333;
}
button {
padding: 10px;
background-color: #4CAF50;
color: white;
border: none;
cursor: pointer;
}
button:hover {
background-color: #3e8e41;
}
#demo {
margin-top: 20px;
}
</style>
</head>
<body>
<h2>GeeksforGeeks Learning</h2>
<p>
This example shows the addEventListener() method to
attach a click event to a button & help us understand
the concept well!
</p>
<button id="myBtn">Click me</button>
<p id="demo"></p>
<script>
document.getElementById("myBtn").addEventListener("click", displayDate);
function displayDate() {
document.getElementById("demo").innerHTML = Date();
}
</script>
</body>
</html>
|
Output :
element.addEventListener() method example output
3. Adding and Removing Classes
In JavaScript, the classList property of an element in the Document Object Model (DOM) allows you to add and remove classes from that element.
Let’s understand with the help of a code :
A. Add Class
To add a class to an element, use the element.classList.add() method.
HTML
<!DOCTYPE html>
<html>
<head>
<title>GeeksforGeeks Learning</title>
<style>
.mystyle {
width: 100%;
padding: 25px;
background-color: green;
color: white;
font-size: 27px;
}
</style>
</head>
<body>
<button onclick="myFunction()">Click</button>
<div id="myDIV">
Welcome Geek.
</div>
<script>
function myFunction() {
var element = document.getElementById("myDIV");
element.classList.add("mystyle");
}
</script>
</body>
</html>
|
Output :

Adding Classes example output
B. Remove Class
To remove a class, use the element.classList.remove() method.
HTML
<!DOCTYPE html>
<html>
<head>
<title>GeeksforGeeks Learning</title>
<style>
.mystyle {
width: 100%;
padding: 25px;
background-color: green;
color: white;
font-size: 27px;
}
</style>
</head>
<body>
<button onclick="myFunction()">Click</button>
<div id="myDIV" class="mystyle">
Welcome Geek.
</div>
<script>
function myFunction() {
var element = document.getElementById("myDIV");
element.classList.remove("mystyle");
}
</script>
</body>
</html>
|
Output :

Removing Classes example output
4. Clone a DOM Element
Any DOM node can be cloned by using cloneNode(). The method only accepts one argument, a boolean, which, when set to true, results in a deep copy of the DOM node and all of its children elements.
Let’s understand with the help of a code :
HTML
<!DOCTYPE html>
<html>
<head>
<style>
.container {
display: flex;
justify-content: center;
align-items: center;
height: 100vh;
}
.btn1,
.btn2 {
padding: 10px 20px;
font-size: 18px;
margin: 0 10px;
background-color: green;
}
</style>
</head>
<body>
<div class="container">
    <button class="btn1">GfG First Button</button>
    <button class="btn2">GfG Second Button</button>
</div>
<script>
const elem = document.querySelector(".container");
const clone = elem.cloneNode(true);
console.log(clone.outerHTML);
</script>
</body>
</html>
|
Output :
<div class="container">
<button class="btn1">GfG First Button</button>
<button class="btn2">GfG Second Button</button>
</div>
scrollIntoView() is a method in JavaScript that is used to scroll an element into view. This method is part of the Element interface, which represents an object on a web page (such as an element in the DOM).
When scrollIntoView() is called on an element, it will scroll the page (or the scrollable element that contains the element until the element is in view. If the element is already in view, nothing will happen.
Let’s understand with the help of a code :
HTML
<!DOCTYPE html>
<html>
<head>
<title>GeeksforGeeks Learning</title>
<style>
#myDIV {
height: 250px;
width: 250px;
overflow: auto;
background: green;
}
#content {
margin: 500px;
height: 800px;
width: 2000px;
background-color: green;
}
</style>
</head>
<body>
<h1>GeeksforGeeks Learning</h1>
<h2>scrollIntoView Method example</h2>
<button onclick="myFunction()">Scroll</button>
<p>Click "Scroll" to scroll to the top of the element with id="content".</p>
<div id="myDIV">
<div id="content">
<p>Hi, welcome to GeeksforGeeks</p>
<p>Learning the scrollIntoView Method?</p>
<p>Geek, you are at the right place</p>
</div>
</div>
<script>
function myFunction() {
const element = document.getElementById("content");
element.scrollIntoView();
}
</script>
</body>
</html>
|
Output :
scrollIntoView Method example output
6. Using insertAdjacentHTML()
insertAdjacentHTML() is a method in JavaScript that allows you to insert HTML content at a specified position relative to an element in the DOM (Document Object Model).
The method takes two arguments:
- A string that specifies where to insert the HTML content.
- A string that contains the HTML content to be inserted.
insertAdjacentHTML() is useful when you need to dynamically add or modify HTML content on a web page.
Let’s understand with the help of a code :
HTML
<!DOCTYPE html>
<html>
<head>
<title>Learning insertAdjacentHTML() Method</title>
<style>
p {
color: green;
}
</style>
</head>
<body>
<h1>GeeksforGeeks Learning</h1>
<h2>insertAdjacentHTML() example</h2>
<button onclick="myFunction()">Insert</button>
<p>Click Insert to understand the method better.</p>
<h2 id="myH2">Learn and Code</h2>
<script>
function myFunction() {
const h2 = document.getElementById("myH2");
let html = "<p>Hi Geek, hope you understood the method</p>";
h2.insertAdjacentHTML("afterend", html);
}
</script>
</body>
</html>
|
Output :
insertAdjacentHTML() example output
7. Using matches Method
The matches() method in JavaScript is a DOM (Document Object Model) method that allows you to check if an element matches a specified CSS selector. This method returns a Boolean value (true or false) based on whether the element matches the selector or not.
Let’s understand with the help of a code :
HTML
<!DOCTYPE html>
<html>
<head>
<title>GeeksforGeeks Learning</title>
<style>
.container {
background-color: green;
color: white;
padding: 20px;
}
</style>
</head>
<body>
<h1>GeeksforGeeks Learning</h1>
<h2>matches() method example</h2>
<p id="demo" class="container"></p>
<script>
const element = document.getElementById("demo");
let text;
if (element.matches(".container")) {
text = `This element matches the CSS selector and
thus, true is printed!`;
} else {
text = `This element does not match the CSS selector
and thus, false is printed!`;
}
document.getElementById("demo").innerHTML = text;
</script>
</body>
</html>
|
Output :
matches example output
JavaScript code checks whether the element with the id “demo” matches the CSS selector “.container” using the matches() method. Since the “demo” paragraph has the “container” class, the condition is true and the corresponding text is assigned to the text variable, which is then set as the innerHTML of the “demo” paragraph using document.getElementById(“demo”).innerHTML = text; . Therefore, the paragraph displays the “This element matches the CSS selector, and thus, true is printed!” message.
You can use the getAttribute() method to get the value of an element’s attribute, and the setAttribute() method to set the value of an element’s attribute. This can be useful for modifying things like the src attribute of an image or the href attribute of a link.
Let’s understand with the help of a code :
HTML
<!DOCTYPE html>
<html>
<head>
<title>GeeksforGeeks Learning</title>
<style>
.democlass {
color: green;
}
</style>
</head>
<body>
<h1 id="myH1">GeeksforGeeks Learning</h1>
<h2>setAttribute() method example</h2>
<p>Click "Add Class Button" to add a class attribute to the h1 element:</p>
<button onclick="myFunction()">Add Class Button</button>
<script>
function myFunction() {
document.getElementById("myH1").setAttribute("class", "democlass");
}
</script>
</body>
</html>
|
Output :
setAttribute() method example output
You can use the same technique to get or set other attributes, like href, class, or id. Just pass the name of the attribute as a string argument to getAttribute() or setAttribute().
Instead of adding an event listener to each individual element, you can add a single event listener to a parent element and use the event.target property to determine which element was actually clicked. This can simplify your code and make it more efficient.
Using event delegation can be particularly useful when you have a large number of elements to handle, or when you need to dynamically add or remove elements from the page. It also helps keep your code organized and efficient.
10. Cache elements
When you are going to be working with an element multiple times, it’s a good idea to store it in a variable. This avoids unnecessary DOM lookups and can improve performance.
For example, let’s understand with the help of a code :
A. Without Caching
Javascript
document.getElementById('myElement').style.color = 'blue';
document.getElementById('myElement').style.fontWeight = 'bold';
|
Here, we are calling document.getElementById twice, which means the browser has to search the DOM twice for the same element. This can be inefficient if you are working with a large or complex DOM.
B. With Caching
Javascript
const myElement = document.getElementById('myElement');
myElement.style.color = 'blue';
myElement.style.fontWeight = 'bold';
|
Here, we are caching the element in a variable called myElement. We then, use this variable to manipulate the element’s style properties. This avoids the need for additional DOM lookups and can improve performance.
Output-wise, both examples achieve the same result of setting the color and font weight of an element. However, the second example with caching should perform better and is generally considered to be a best practice.
Conclusion :
Thus, the DOM (Document Object Model) provides a powerful set of tools for working with HTML elements and web pages in JavaScript.
By using the above tips and tricks, you can write more efficient, maintainable, and secure code for your web applications.
Share your thoughts in the comments
Please Login to comment...