Swift – Decision Making Statements
Last Updated :
20 Dec, 2021
Decision-making statements are those statements in which the compiler needs to make decisions on the given conditions. If the given condition is satisfied then the set of statements is executed otherwise some other set of statements are executed. These statements always return a boolean value that is either true or false. If true then the if block is executed. Otherwise else (or) else if block is executed. Swift supports five different decision-making statements and they are :
- Simple if
- if-else
- if – else if – else
- Nested if
- Switch
Simple if statement
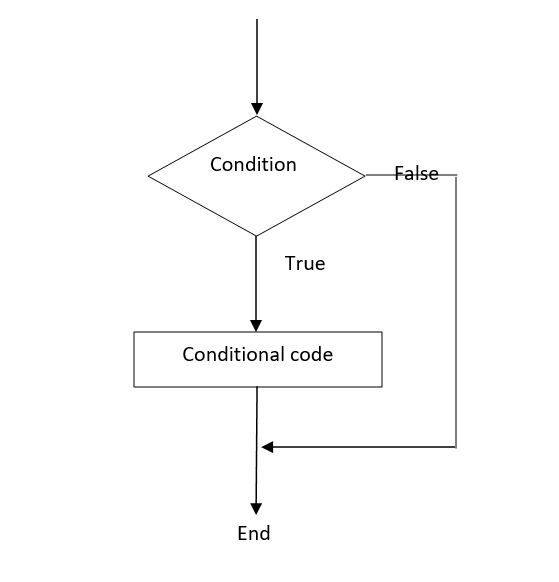
In Swift, a simple if works based on condition. If the given condition is satisfied, then the statements inside the if block is executed. If the given condition is false then the control return from the if statement and executes the statement present after the if statement block.
Syntax:
if condition
{
// statements
}
Flow diagram:
Example:
Swift
let a = 10
let b = 20
if (a < b)
{
print("Welcome to GeeksforGeeks")
}
|
Output:
Welcome to GeeksforGeeks
if – else Statement
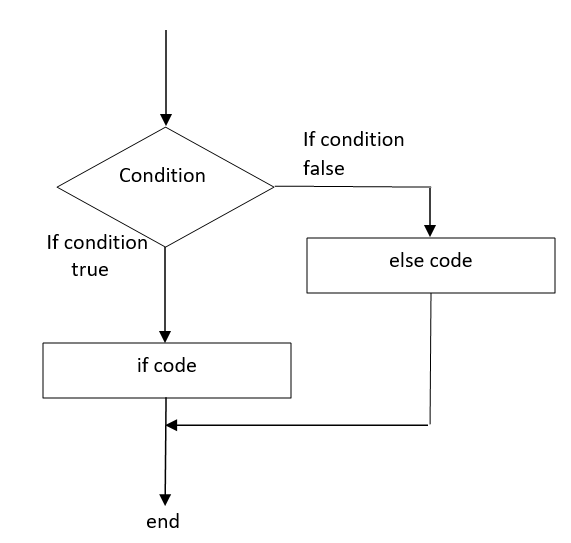
In Swift, if – else statement is just like other programming languages. If the condition is satisfied or true then the statements in the if block are executed. If the condition is not satisfied then the statements in the else block are executed.
Syntax:
if condition
{
// Statements
}
else
{
// Statements
}
Flow diagram:
Example:
Swift
let a = 10
let b = 20
if (a > b)
{
print("a is largest number")
}
else
{
print("b is largest number")
}
|
Output:
b is the largest number
if-else if-else Statement
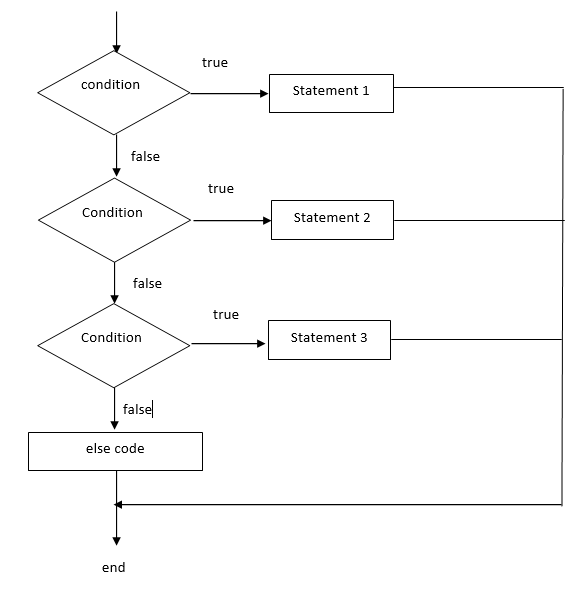
Generally else doesn’t have any condition checking part so when if condition fails then else part will be executed automatically. But using else if condition we can write a condition in else part also. We can write n number of else if conditions. So, it is called as if-else if ladder.
Syntax:
if condition
{
// Statements
}
else if condition
{
// Statements
}
….
else
{
// Statements
}
Flow diagram:
Example:
Swift
let a = 10
let b = 25
let c = 20
if a > b && a > c
{
print("a is biggest number")
}
else if b > c
{
print("b is biggest number")
}
else
{
print("c is biggest number")
}
|
Output:
b is biggest number
Nested if Statement
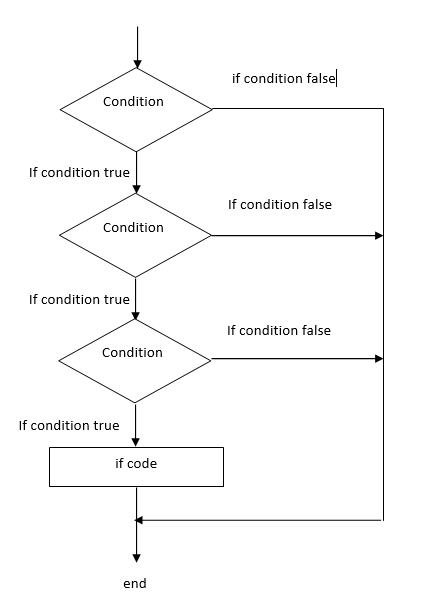
Nested means within. Nested if means if within if condition. Generally in if-else, if condition satisfied then the statements under if are executed. But in nested if, again condition is checked. Like that in single if condition we can write many if conditions. The statements are executed only after all the if conditions are satisfied. Otherwise else condition statements are executed.
Syntax:
if condition
{
if condition
{
if condition
{
……
//statements
}
}
}
else
{
//statements
}
Flow diagram:
Example:
Swift
let a = 10
let b = 20
if a == 10
{
if b == 20
{
print("geeks")
}
}
else
{
print("geeksforgeeks")
}
|
Output:
geeks
switch Statement
A switch is also like if – else if ladder we can write n number of else if conditions. Likewise in the switch statement also we can write n number of cases. if-else if ladder works automatically based on conditions. But the switch statement works like a switch. Based on the choice the desired case is executed. For example, we have chosen 2, then case 2 will be executed. And there is a default case, if all the cases are failed then the default case is executed. It is not mandatory to write a default case, it’s an optional case. And we write a break statement to stop controls to fall through the next subsequent cases.
Syntax:
switch(expression)
{
case constant-expression :
statement(s);
break;
case constant-expression :
statement(s);
break;
default : optional
statement(s);
}
Example:
Swift
let abc = 10
switch abc
{
case 1:
print("This is case 1")
break;
case 2:
print("This is case 2")
break;
case 3:
print("This is case 3")
break;
case 4:
print("This is case 4")
break;
default:
print("Example of switch statement using break")
}
|
Output:
Example of switch statement using break
Share your thoughts in the comments
Please Login to comment...