Steps to Configure Self Hosted Agents in Azure DevOps
Last Updated :
19 Oct, 2023
Azure DevOps is a versatile platform that allows you to automate your software development pipelines effortlessly. While it offers hosted agents for your convenience, there are scenarios where you might require specialized tools or software not available on Microsoft’s hosted agents. In such cases, self-hosted agents come to the rescue. This step-by-step guide will walk you through the process of configuring a self-hosted agent in your Azure DevOps agent pool, highlighting the use of Personal Access Tokens (PAT) for authentication.
Steps To Configure Self Hosted Agents In Azure DevOps
Step 1: Access Azure DevOps.
- Begin by logging in to your Azure DevOps account, accessible at https://dev.azure.com.
Step 2: Understanding the Need for Self-Hosted Agents.
- Before diving into the setup process, it’s important to comprehend why self-hosted agents are necessary. They provide the flexibility to run custom tools and software that aren’t available on Microsoft’s hosted agents, making them invaluable for certain project requirements.
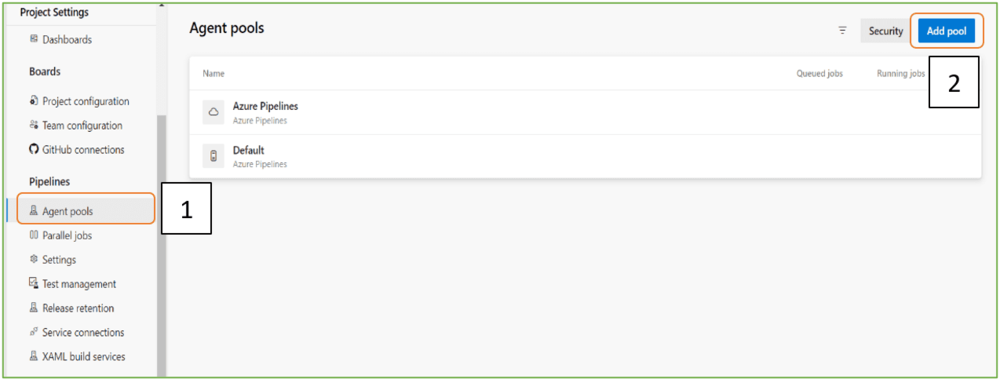
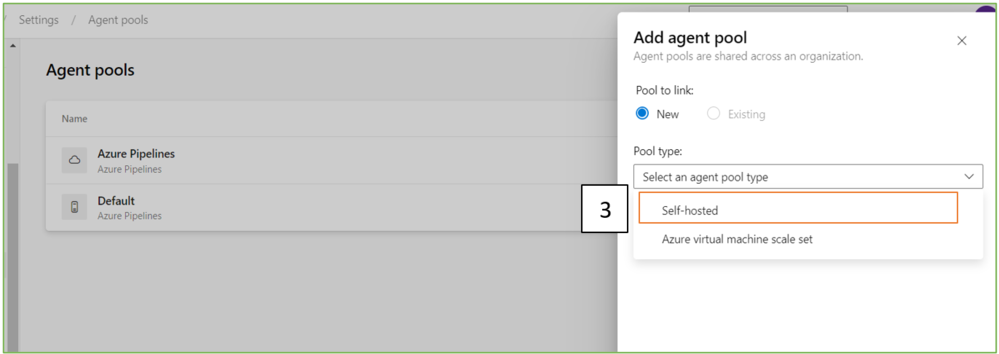
Step 3: Creating a New Agent Pool (Optional).
- If you prefer organization, consider creating an agent pool. Access Organization settings > Agent Pools.
-(1).png)
Step 4: Download the Agent Package.
- In case you created a new agent pool, ensure you choose it from the list.
-
 Agent pools.” width=”998″ height=”161″ srcset=”https://media.geeksforgeeks.org/wp-content/uploads/20230916000914/4.png 998w,https://media.geeksforgeeks.org/wp-content/uploads/20230916000914/4-100.png 100w,https://media.geeksforgeeks.org/wp-content/uploads/20230916000914/4-200.png 200w,https://media.geeksforgeeks.org/wp-content/uploads/20230916000914/4-300.png 300w,https://media.geeksforgeeks.org/wp-content/uploads/20230916000914/4-660.png 660w,https://media.geeksforgeeks.org/wp-content/uploads/20230916000914/4-768.png 768w”>
- Click New agent to initiate the agent installation.
Step 5: Configuring the Self-Hosted Agent:
- Unzip the downloaded package into a directory on your designated machine.
- Launch a terminal or command prompt and navigate to the agent directory.
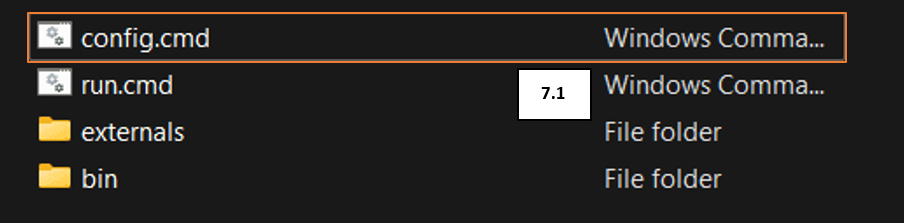
- Execute the agent configuration script:
- For Windows: Run config.cmd
- For macOS/Linux: Run ./config.sh
- Follow the on-screen instructions to configure the agent, which requires you to input:
- Azure DevOps organization URL.
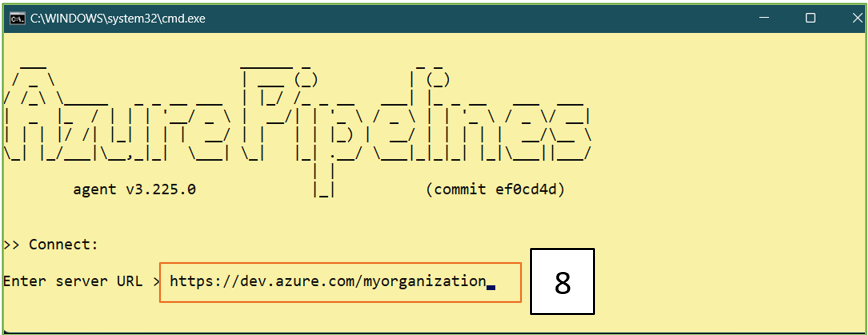
- Personal Access Token (PAT) or Alternate Credentials for authentication.
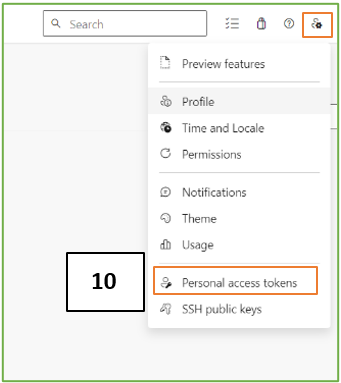
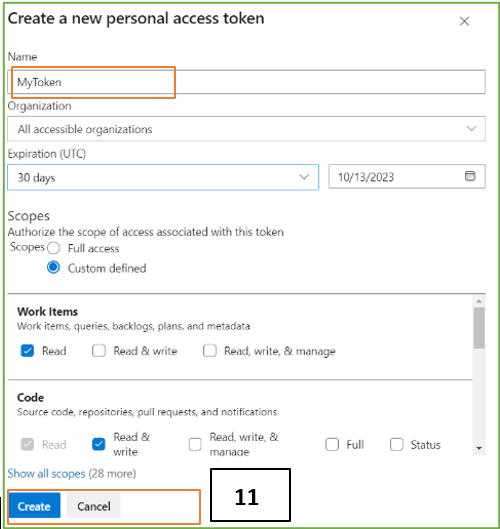
.png)
- Agent pool (you can select the one you created or the default pool).
-
- Agent name (a unique identifier for your agent).
- Agent capabilities (optional).
Step 6: Initiating the Self-Hosted Agent:
- After the configuration is complete, commence the agent using:
- On Windows: Execute run.cmd
.png)
- On macOS/Linux: Run ./run.sh
- 2. The agent will establish a connection with Azure DevOps, and you’ll observe it listed in the agent pool.
.png)
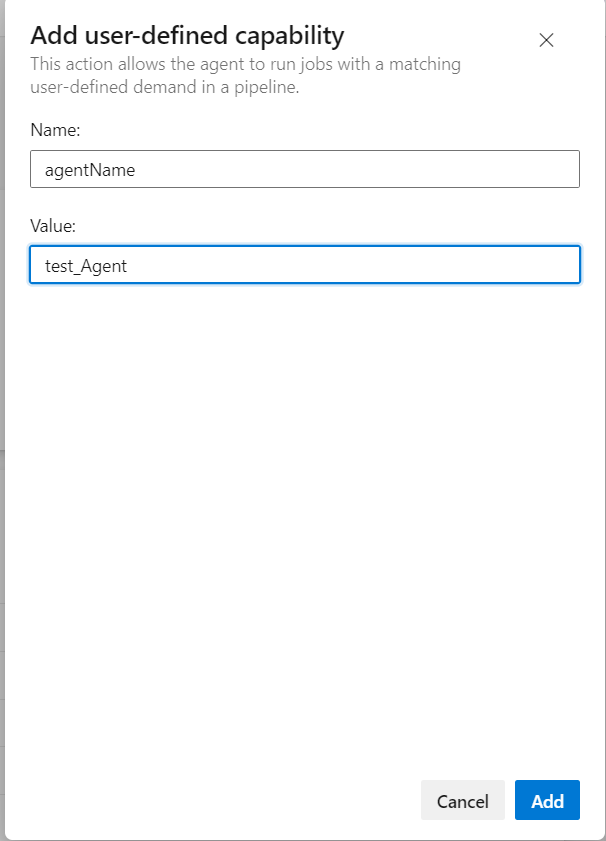
Step 7: Configuring Agent Capabilities (Optional):
- If required, you can add capabilities to your agent to help Azure DevOps recognize its specific tools or software.
- Within Azure DevOps, navigate to Project settings > Agent pools > Select your agent pool > Choose your agent.
Step 8: Using Your Self-Hosted Agent.
- In your build or release pipeline configurations, specify your preference for a self-hosted agent.
- Select the agent pool containing your self-hosted agent.
- Your pipeline jobs will now execute on your self-hosted agent in line with your pipeline settings.
Step 9: Monitoring and Maintenance.
- Regularly monitor your self-hosted agent’s status within Azure DevOps.
- Keep your agent up to date by applying updates as they become available.
- In case of issues, consult agent logs and Azure DevOps documentation for troubleshooting guidance.
Conclusion
Configuring self-hosted agents in Azure DevOps empowers you to customize your CI/CD pipelines while utilizing your infrastructure. This guide, featuring step-by-step instructions and the use of Personal Access Tokens (PAT) for authentication, ensures that even newcomers can effortlessly set up self-hosted agents, enabling efficient software development and deployment. Happy coding!
FAQs On Self Hosted Agents In Azure DevOps
1. What Are Azure Hosted Agents?
Azure Hosted Agents are Virtual machines in azure which are used to run the Azure pipelines. This are the most convenient way to run the Azure pipelines.
2. What Is Difference Between Self-Hosted Agent And Microsoft-Hosted Agent?
Both Self-Hosted Agent And Microsoft-Hosted Agent are used to build CI/CD pipelines in microsoft azure with different purpose some them are mentioned below.
Self-Hosted Agent:
- Hosted by the User
- Customization
- Security
- Costs
Microsoft-Hosted Agent:
- Hosted by Microsoft
- Standardized Environment
- Limited Customization
- Scalability
Share your thoughts in the comments
Please Login to comment...