Spring Cloud – How to Register Microservices Using Netflix Eureka?
Last Updated :
16 Jul, 2023
Service Discovery is one of the major things of a microservice-based architecture. Eureka is the Netflix Service Discovery Server and Client. The server can be configured and deployed to be highly functional, with each server copying the state of the registered services to the others. In this article, we are going to Register And Discover Microservices Using Netflix Eureka. So we are going to develop our Service Discovery and one Microservice.
Developing Microservice or Eureka Client
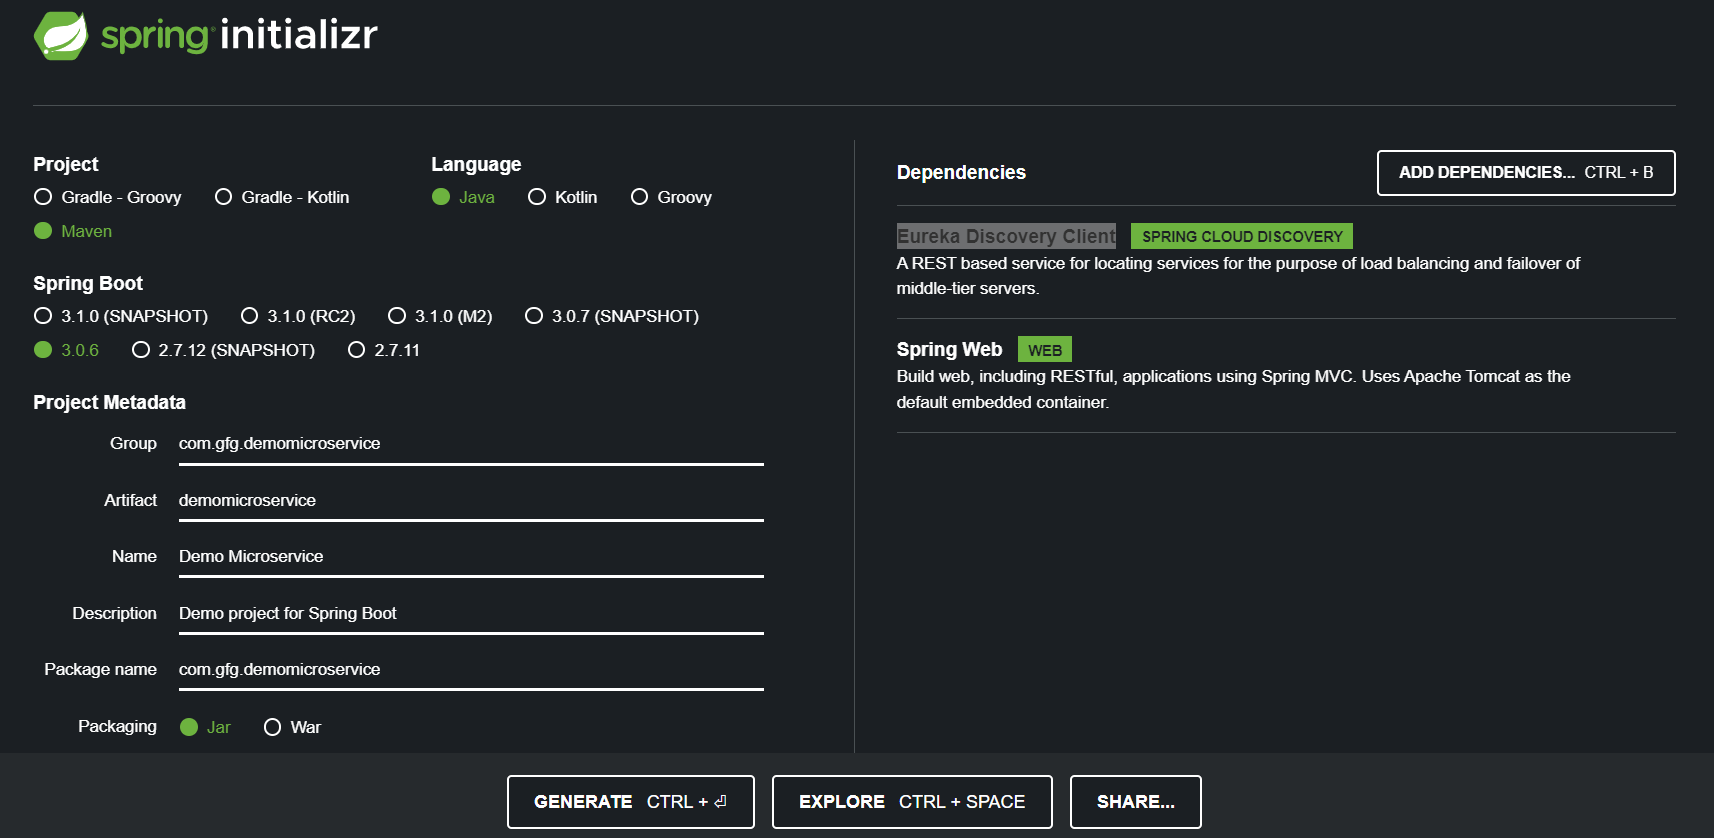
Step 1: Create a New Spring Boot Project in Spring Initializr
To create a new Spring Boot project, please refer to How to Create a Spring Boot Project in Spring Initializr and Run it in IntelliJ IDEA. For this project choose the following things
- Project: Maven
- Language: Java
- Packaging: Jar
- Java: 17
Please choose the following dependencies while creating the project.
- Eureka Discovery Client
- Spring Web
Generate the project and run it in IntelliJ IDEA by referring to the above article. Please refer to the below image.
Below is the complete pom.xml file. Please cross-verify if you have missed some dependencies.
XML
<?xml version="1.0" encoding="UTF-8"?>
<modelVersion>4.0.0</modelVersion>
<parent>
<groupId>org.springframework.boot</groupId>
<artifactId>spring-boot-starter-parent</artifactId>
<version>3.0.6</version>
<relativePath/>
</parent>
<groupId>com.gfg.demomicroservice</groupId>
<artifactId>demomicroservice</artifactId>
<version>0.0.1-SNAPSHOT</version>
<name>Demo Microservice</name>
<description>Demo project for Spring Boot</description>
<properties>
<java.version>17</java.version>
<spring-cloud.version>2022.0.2</spring-cloud.version>
</properties>
<dependencies>
<dependency>
<groupId>org.springframework.boot</groupId>
<artifactId>spring-boot-starter-web</artifactId>
</dependency>
<dependency>
<groupId>org.springframework.cloud</groupId>
<artifactId>spring-cloud-starter-netflix-eureka-client</artifactId>
</dependency>
<dependency>
<groupId>org.springframework.boot</groupId>
<artifactId>spring-boot-starter-test</artifactId>
<scope>test</scope>
</dependency>
</dependencies>
<dependencyManagement>
<dependencies>
<dependency>
<groupId>org.springframework.cloud</groupId>
<artifactId>spring-cloud-dependencies</artifactId>
<version>${spring-cloud.version}</version>
<type>pom</type>
<scope>import</scope>
</dependency>
</dependencies>
</dependencyManagement>
<build>
<plugins>
<plugin>
<groupId>org.springframework.boot</groupId>
<artifactId>spring-boot-maven-plugin</artifactId>
</plugin>
</plugins>
</build>
<repositories>
<repository>
<id>netflix-candidates</id>
<name>Netflix Candidates</name>
<snapshots>
<enabled>false</enabled>
</snapshots>
</repository>
</repositories>
</project>
|
Step 2: Make Changes in Your application.properties File
Now make the following changes in your application.properties file.
server.port=9090
spring.application.name=demo-service
Developing Service Discovery or Eureka Server
Step 1: Create a New Spring Boot Project in Spring Initializr
To create a new Spring Boot project, please refer to How to Create a Spring Boot Project in Spring Initializr and Run it in IntelliJ IDEA. For this project choose the following things
- Project: Maven
- Language: Java
- Packaging: Jar
- Java: 17
Please choose the following dependencies while creating the project.
Eureka Server: Generate the project and run it in IntelliJ IDEA by referring to the above article. Below is the complete pom.xml file. Please cross-verify if you have missed some dependencies.
XML
<?xml version="1.0" encoding="UTF-8"?>
<modelVersion>4.0.0</modelVersion>
<parent>
<groupId>org.springframework.boot</groupId>
<artifactId>spring-boot-starter-parent</artifactId>
<version>3.0.6</version>
<relativePath/>
</parent>
<groupId>com.gfg.discovery-service</groupId>
<artifactId>discovery-service</artifactId>
<version>0.0.1-SNAPSHOT</version>
<name>Discovery Service</name>
<description>Demo project for Discovery Service</description>
<properties>
<java.version>17</java.version>
<spring-cloud.version>2022.0.2</spring-cloud.version>
</properties>
<dependencies>
<dependency>
<groupId>org.springframework.cloud</groupId>
<artifactId>spring-cloud-starter-netflix-eureka-server</artifactId>
</dependency>
<dependency>
<groupId>org.springframework.boot</groupId>
<artifactId>spring-boot-starter-test</artifactId>
<scope>test</scope>
</dependency>
</dependencies>
<dependencyManagement>
<dependencies>
<dependency>
<groupId>org.springframework.cloud</groupId>
<artifactId>spring-cloud-dependencies</artifactId>
<version>${spring-cloud.version}</version>
<type>pom</type>
<scope>import</scope>
</dependency>
</dependencies>
</dependencyManagement>
<build>
<plugins>
<plugin>
<groupId>org.springframework.boot</groupId>
<artifactId>spring-boot-maven-plugin</artifactId>
</plugin>
</plugins>
</build>
<repositories>
<repository>
<id>netflix-candidates</id>
<name>Netflix Candidates</name>
<snapshots>
<enabled>false</enabled>
</snapshots>
</repository>
</repositories>
</project>
|
Step 2: Modify DiscoveryServiceApplication Class
Go to the discovery-service > src > main > java > DiscoveryServiceApplication and annotate it with @EnableEurekaServer annotation. Below is the complete code for DiscoveryServiceApplication Class.
Java
package com.gfg.discoveryservice;
import org.springframework.boot.SpringApplication;
import org.springframework.boot.autoconfigure.SpringBootApplication;
import org.springframework.cloud.netflix.eureka.server.EnableEurekaServer;
@SpringBootApplication
@EnableEurekaServer
public class DiscoveryServiceApplication {
public static void main(String[] args) {
SpringApplication.run(DiscoveryServiceApplication.class, args);
}
}
|
Step 3: Make Changes in Your application.properties File
Now make the following changes in your application.properties file.
# Recommend Port Number to Use for Eureka Server
# But you can use any
server.port=8761
spring.application.name=discovery-service
# By writing this we are saying discovery service
# that no need to fetch any registry from
# another discovery service.
# You are the only one here
eureka.client.fetchRegistry=false
# By writing this we are saying that there is
# no need to register yourself in
# your discover server registry
# I know your port number and IP and
# I know how to connect with you.
# You are here to discover other microservices not yourself
eureka.client.register-with-eureka=false
Why is this line eureka.client.fetchRegistry=false?
By writing this we are saying discovery service that no need to fetch any registry from another discovery service. You are the only one here.
Why is this line eureka.client.register-with-eureka=false?
By writing this we are saying that there is no need to register yourself in your discover server registry. It knows the port number and IP and it knows how to connect with you. You are here to discover other microservices not yourself.
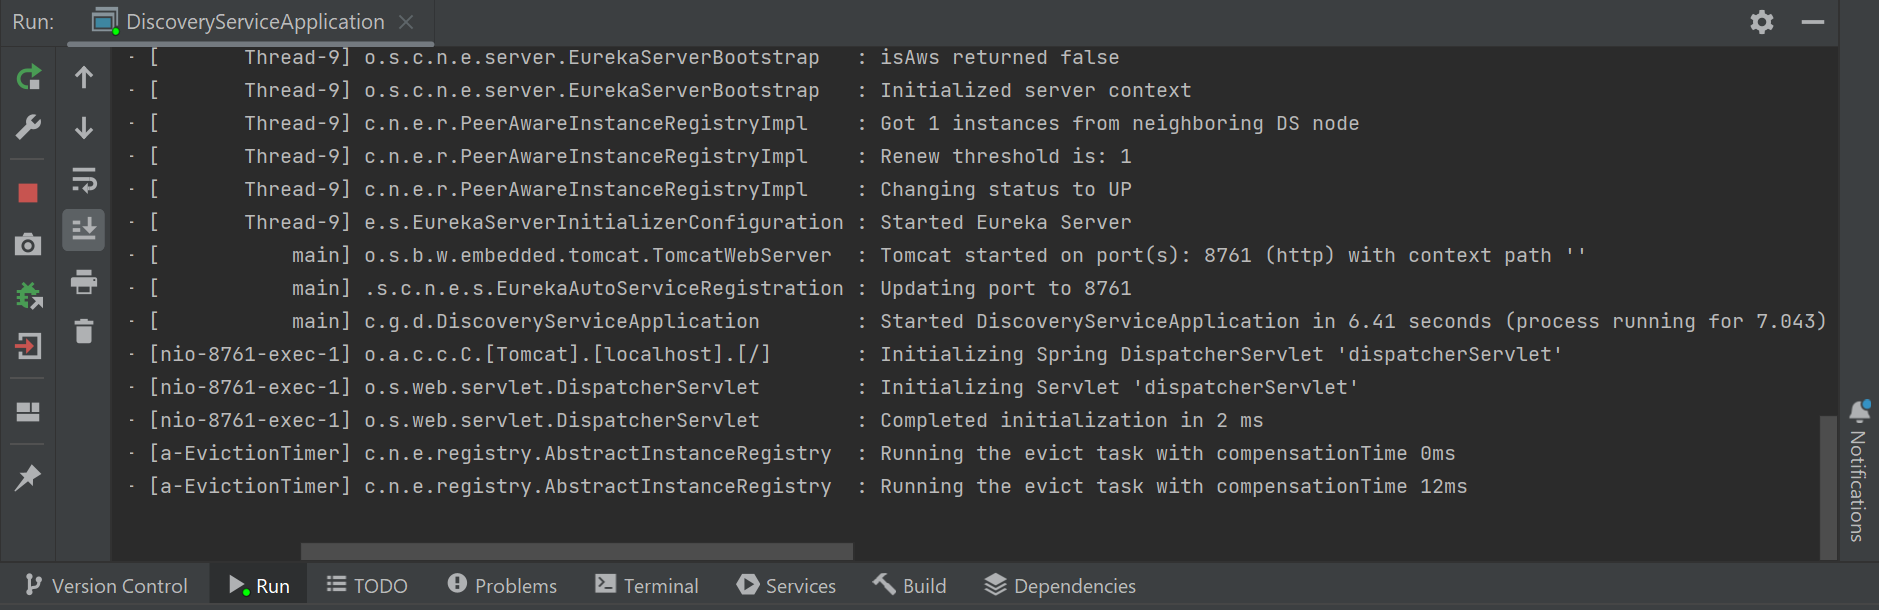
Now run your discovery-service. If everything goes well then you may see the following screen in your console. Please refer to the below image.
Now hit the following URL in your browser
http://localhost:8761/
And you can see the Spring Eureka dashboard like below.
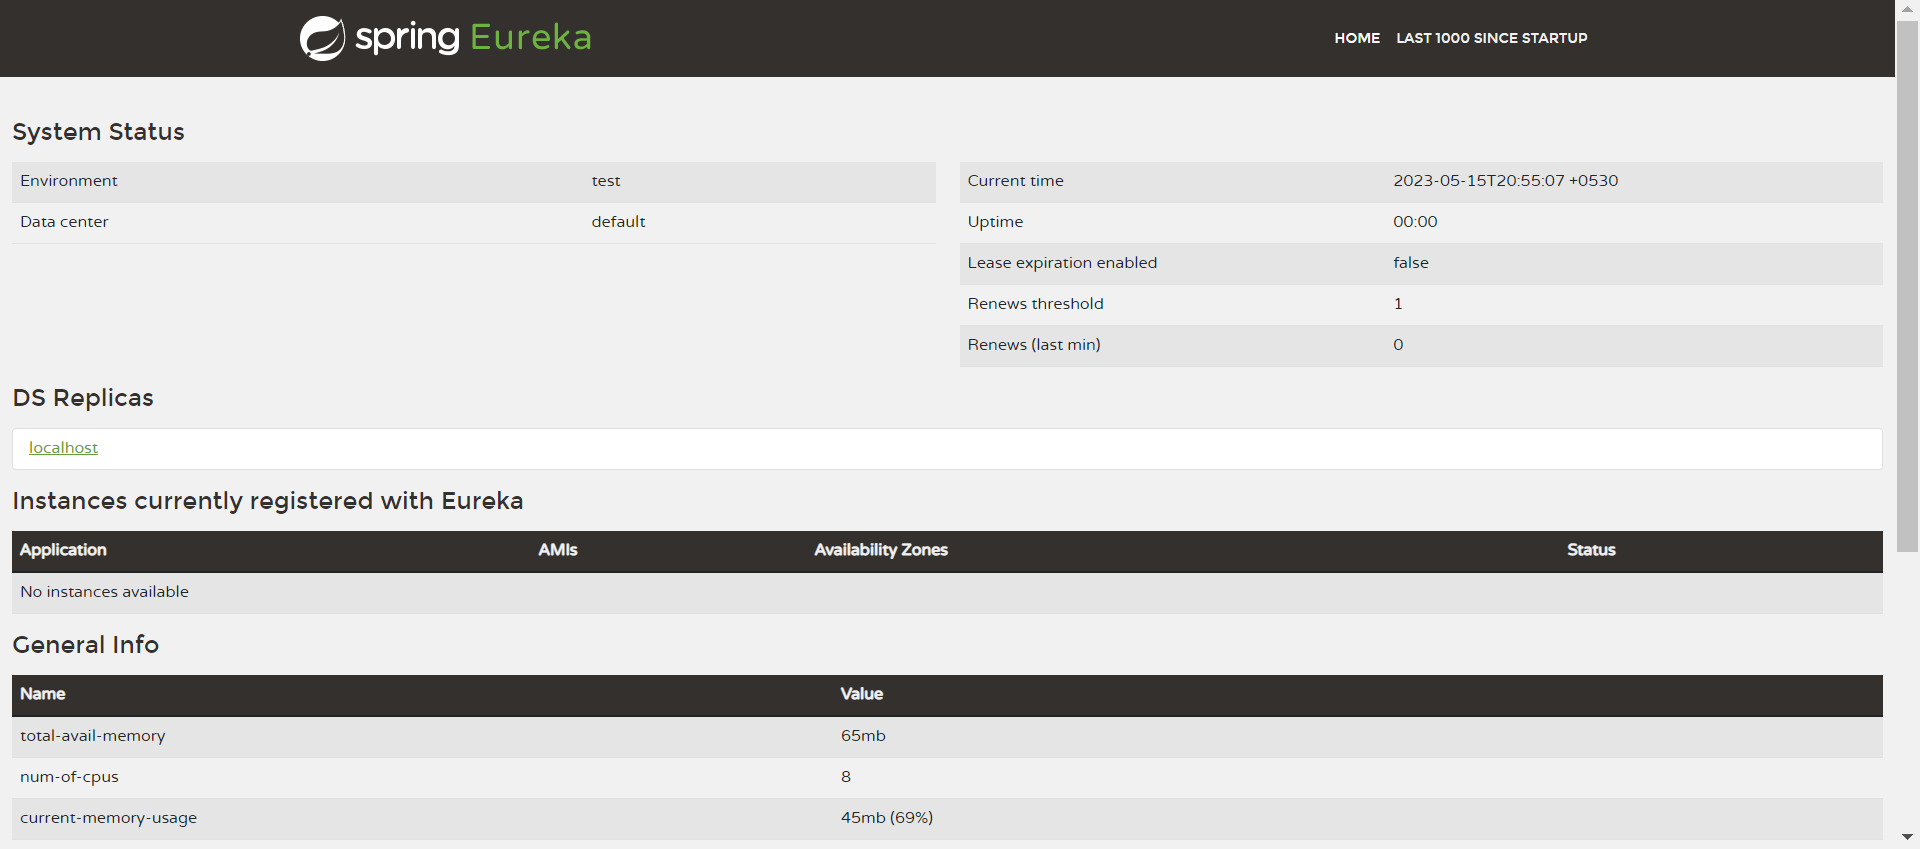
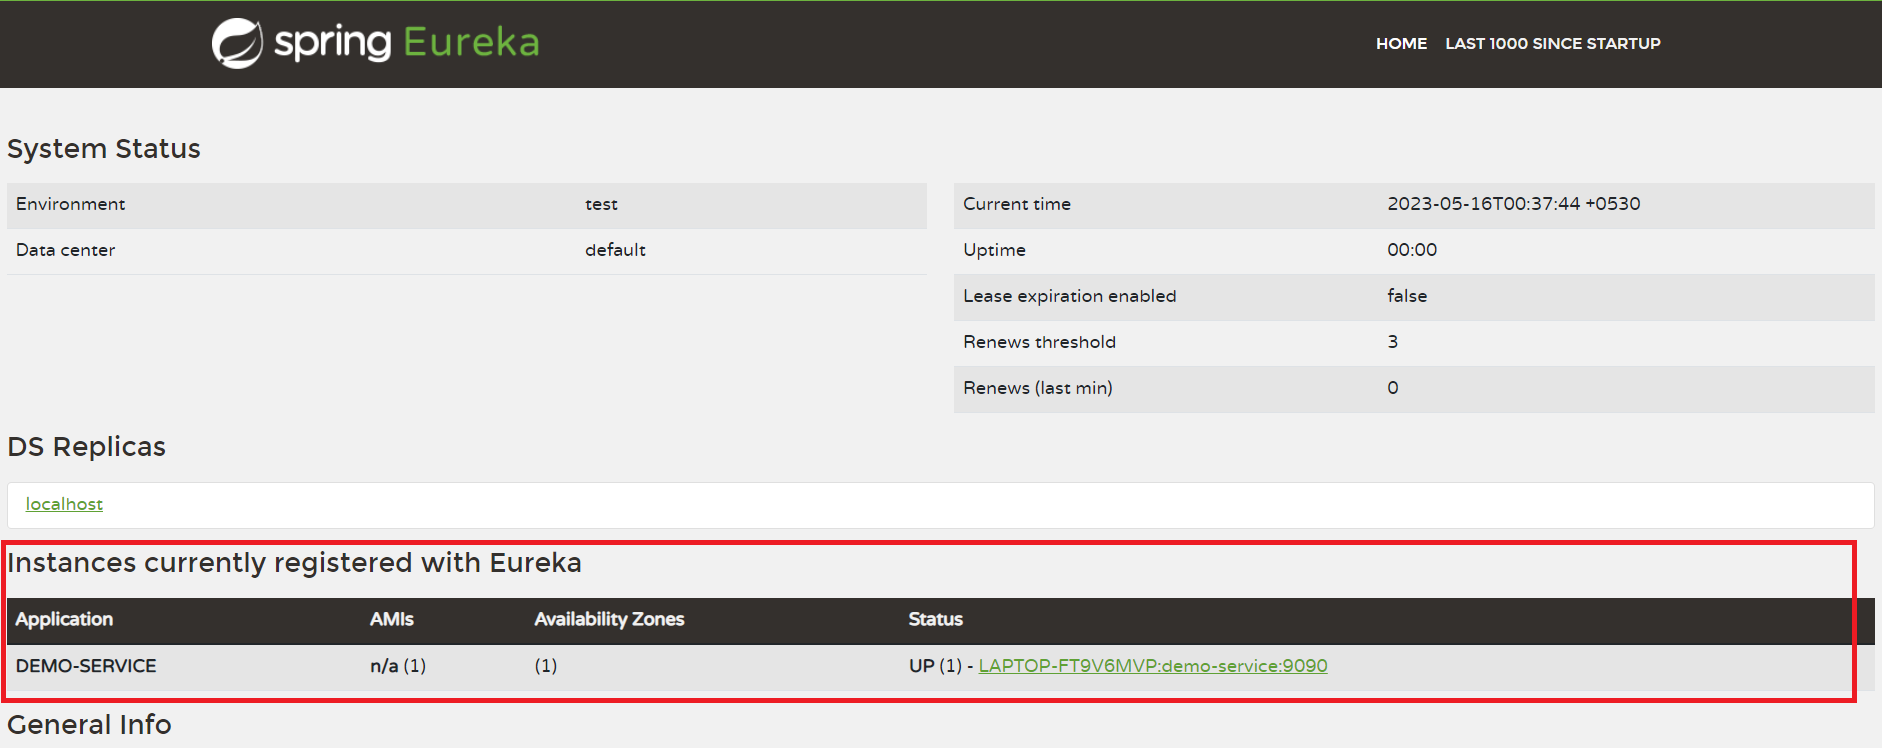
Now you can see there are no Instances currently registered with Eureka. Now run your demo-microservice that we have developed above. And you can see your DEMO-SERVICE has been registered with your Eureka Server. Please refer to the below image.
Share your thoughts in the comments
Please Login to comment...