Spring Boot Setup with Kotlin
Last Updated :
10 Jan, 2024
Spring Boot is one of the best frameworks available to build full-stack enterprise applications. Initially, Spring was used to build stand-alone applications on the Java Platform supporting easy-to-develop and providing lots of handy features to ease the application development.
Why Kotlin is Used?
Though Spring was meant for Java enterprise applications, Kotlin also got its place in the Spring framework. A few reasons for this are,
- Kotlin is very compact compared to Java for writing Codes in a large project.
- Kotlin is JVM compatible.
- Koltin solved the NullPointerException problem people had with Java.
- Support for older applications built on Java.
- Encourages application development on OOP principles.
Steps to Setup Spring Boot with Kotlin
Step 1: Initializing the project
a). Configure the architecture
Open any web browser on your computer and head over to the Spring Initializr website start.spring.io.

Choose the settings and options as shown in the above picture.
Select the project build as Gradle-Kotlin. You can also use Maven build for your project. Select the Language as “Kotlin”. Select Spring Boot version as “3.2.1” which is the stable one. ( Note: here we are using boot as it’s easier to initialize the application, instead selecting a maven build and then manually adding jar dependencies which takes lots of efforts). Write Group ID, Project name, the description for the project as you want. Select packaging as Jar, and Java version as 17.
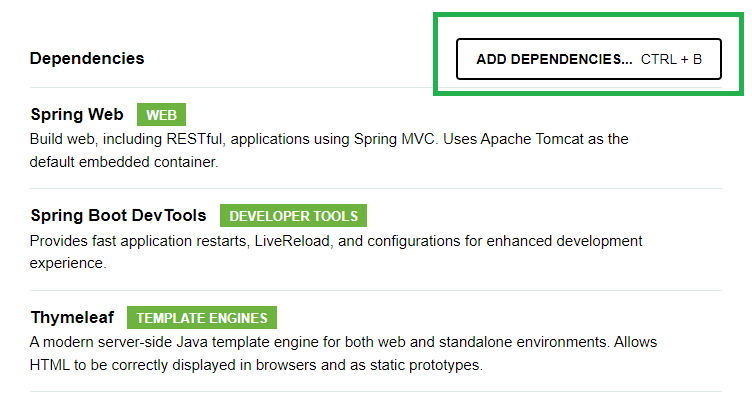
b). Add dependecies
On the right hand side of the screen in the dependencies tab, click on add dependencies and select depedencies like “Spring Web” and “Spring Boot DevTools”. These dependencies will help us our Spring web application. You can add dependencies like “Spring Data JPA” for DataBse operations using persistance API. Explore the dependencies section and add dependencies of your choice to your project.
Click on the explore button below to check the gradle build file.
Kotlin
import org.jetbrains.kotlin.gradle.tasks.KotlinCompile
plugins {
id("org.springframework.boot") version "3.2.1"
id("io.spring.dependency-management") version "1.1.4"
kotlin("jvm") version "1.9.21"
kotlin("plugin.spring") version "1.9.21"
}
group = "com.demoapp"
version = "0.0.1-SNAPSHOT"
java {
sourceCompatibility = JavaVersion.VERSION_17
}
repositories {
mavenCentral()
}
dependencies {
implementation("org.springframework.boot:spring-boot-starter-thymeleaf")
implementation("org.springframework.boot:spring-boot-starter-web")
implementation("com.fasterxml.jackson.module:jackson-module-kotlin")
implementation("org.jetbrains.kotlin:kotlin-reflect")
developmentOnly("org.springframework.boot:spring-boot-devtools")
testImplementation("org.springframework.boot:spring-boot-starter-test")
}
tasks.withType<KotlinCompile> {
kotlinOptions {
freeCompilerArgs += "-Xjsr305=strict"
jvmTarget = "17"
}
}
tasks.withType<Test> {
useJUnitPlatform()
}
|
c) Download the Project
Click on generate button on the bottom and it will download the project as a zip file for you.

click on GENERATE

Step 2: Open the Project
On your PC check the download folder for the project downloaded and extract it. Now open any IDE of your choice and follow the instructions below. Here we are going to use Intellij IDEA IDE.

Click on open and from the file explorer tab select the project file.
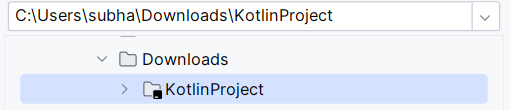
Click on OK and wait for some time for the IDE to configure the project on it’s own. It will download the dependencies and index the files. Now go to src->main->kotlin->com.demoapp.KotlinProject and open KotlinProjectApplication.

KotlinProjectApplication.kt
Kotlin
package com.demoapp.KotlinProject
import org.springframework.boot.autoconfigure.SpringBootApplication
import org.springframework.boot.runApplication
@SpringBootApplication
class KotlinProjectApplication
fun main(args: Array<String>) {
runApplication<KotlinProjectApplication>(*args)
}
|
Step 3: Run the Spring Application
On the KotlinProjectApplication.kt file click on the start button and select run KotilnProjectApplication.


Now you can see all details about running status on the console.
  .   ____          _            __ _ _
 /\\ / ___'_ __ _ _(_)_ __  __ _ \ \ \ \
( ( )\___ | '_ | '_| | '_ \/ _` | \ \ \ \
 \\/  ___)| |_)| | | | | || (_| |  ) ) ) )
  '  |____| .__|_| |_|_| |_\__, | / / / /
 =========|_|==============|___/=/_/_/_/
 :: Spring Boot ::                (v3.2.1)
2023-12-26T19:02:45.935+05:30  INFO 4248 --- [  restartedMain] c.d.K.KotlinProjectApplicationKt         : Starting KotlinProjectApplicationKt using Java 17.0.9 with PID 4248 (C:\Users\subha\Downloads\KotlinProject\build\classes\kotlin\main started by subha in C:\Users\subha\Downloads\KotlinProject)
2023-12-26T19:02:45.944+05:30  INFO 4248 --- [  restartedMain] c.d.K.KotlinProjectApplicationKt         : No active profile set, falling back to 1 default profile: "default"
2023-12-26T19:02:46.093+05:30  INFO 4248 --- [  restartedMain] .e.DevToolsPropertyDefaultsPostProcessor : Devtools property defaults active! Set 'spring.devtools.add-properties' to 'false' to disable
2023-12-26T19:02:46.094+05:30  INFO 4248 --- [  restartedMain] .e.DevToolsPropertyDefaultsPostProcessor : For additional web related logging consider setting the 'logging.level.web' property to 'DEBUG'
2023-12-26T19:02:47.347+05:30  INFO 4248 --- [  restartedMain] o.s.b.w.embedded.tomcat.TomcatWebServer  : Tomcat initialized with port 8080 (http)
2023-12-26T19:02:47.357+05:30  INFO 4248 --- [  restartedMain] o.apache.catalina.core.StandardService   : Starting service [Tomcat]
2023-12-26T19:02:47.357+05:30  INFO 4248 --- [  restartedMain] o.apache.catalina.core.StandardEngine    : Starting Servlet engine: [Apache Tomcat/10.1.17]
2023-12-26T19:02:47.441+05:30  INFO 4248 --- [  restartedMain] o.a.c.c.C.[Tomcat].[localhost].[/]       : Initializing Spring embedded WebApplicationContext
2023-12-26T19:02:47.444+05:30  INFO 4248 --- [  restartedMain] w.s.c.ServletWebServerApplicationContext : Root WebApplicationContext: initialization completed in 1346 ms
2023-12-26T19:02:48.146+05:30  INFO 4248 --- [  restartedMain] o.s.b.d.a.OptionalLiveReloadServer       : LiveReload server is running on port 35729
2023-12-26T19:02:48.180+05:30  INFO 4248 --- [  restartedMain] o.s.b.w.embedded.tomcat.TomcatWebServer  : Tomcat started on port 8080 (http) with context path ''
2023-12-26T19:02:48.191+05:30  INFO 4248 --- [  restartedMain] c.d.K.KotlinProjectApplicationKt         : Started KotlinProjectApplicationKt in 2.65 seconds (process running for 3.131)
2023-12-26T19:03:28.745+05:30  INFO 4248 --- [nio-8080-exec-1] o.a.c.c.C.[Tomcat].[localhost].[/]       : Initializing Spring DispatcherServlet 'dispatcherServlet'
2023-12-26T19:03:28.746+05:30  INFO 4248 --- [nio-8080-exec-1] o.s.web.servlet.DispatcherServlet        : Initializing Servlet 'dispatcherServlet'
2023-12-26T19:03:28.747+05:30  INFO 4248 --- [nio-8080-exec-1] o.s.web.servlet.DispatcherServlet        : Completed initialization in 0 ms
Go to localhost:8080 to check your application running. ( The tomcat server is started on port 8080).
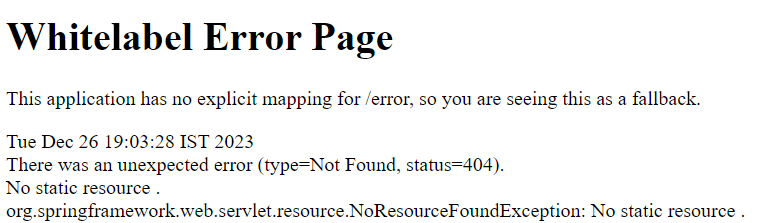
You will be able to see this Whitelabel Error Page as no view of controller is created to route and display content. This error is indicating that the Application is running but has no explicit mapping to display anything.
Step 4: Printing Hello World
a). Create new Controller
On the same package right click and select new Kotlin Class and name accordingly.

Write the following code in the class file
helloController.kt
Kotlin
package com.demoapp.KotlinProject
import org.springframework.web.bind.annotation.GetMapping
import org.springframework.web.bind.annotation.RestController
@RestController
class helloController {
@GetMapping("/hello")
fun hello(): String =
"Hello World"
}
|
@RestController annotation will help in denotaing the class as a routable class file, and @GetMapping provides the mapping for the class.
b). Run the application
Go to KotlinProjectApplication.kt file click on the start button and select run KotilnProjectApplication.
Check for the port number on consloe. (Usually port 8080).
c). Check Output
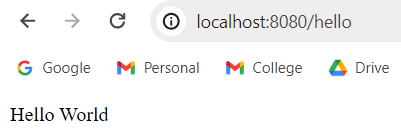
On your web browser’s url panel type
http://localhost:8080/hello
and now you will be able to see Hello World on the web page.
Now you can create Models, Views, and Controllers according to your need and configure them using Kotlin in Spring Frame Work and make stand alone applications according to your requirments.
Share your thoughts in the comments
Please Login to comment...