Spring Boot – Handle to Hibernate SessionFactory
Last Updated :
23 Apr, 2024
In Spring Boot applications, we use Hibernate as a JPA provider and it can manage the Hibernate SessionFactory. It is crucial for efficient database interactions. The SessionFactory acts as the factory for the Hibernate Sessions which can be used to perform the database operations. In this article, we will learn the process of managing the SessionFactory in the Spring Boot application and how it can ensure smooth database interactions and optimal performance.
The SessionFactory in Hibernate represents the single data source and is responsible for creating Session instances. In the Spring Boot application, the SessionFactory is typically managed by the Spring LocalSessionFactoryBean or LocalSessionFactoryBuilder. This bean is configured with the data source information, and entity mappings and hibernate the properties to create the SessionFactory instance.
Key Terminologies:
- HibernateSessionFactory: A SessionFactory in Hibernate is a thread-safe object application startup and it is used throughout the application lifecycle. It represents the single data source and it is responsible for managing the database connections and handling the entity mappings.
- JPA: JPA is defined as Java Persistence API and it is Java specification for accessing, managing, and persisting data between the Java objects and relational databases. It can provides the set of interfaces and it annotates for the defining entity classes, mapping the database tables and performing the CRUD operations
- Datasource: It is an interface provided by the JDBC( Java Database Connectivity) for the establishing the connection with the database. It can provides the methods for obtaining the database connections which are used by the Hibernate to the perform the database operations.
- Hibernate Dialect: It is the configuration setting that can specifies the SQL dialect of the underlying the database. It can determines the SQL statements generated by the Hibernate based on the database vendors syntax and features of the application.
- Hibernate Properties: It is the configuration settings used to the customize the Hibernate behavior. These properties can includes the settings related to the database connection, caching, fetching strategies and logging of the application.
Step-by-step implementation
By the following these steps, developers can effectively can manage the Hibernate SessionFactory in the Spring Boot applications and it can ensure the optimal database interaction and the streamlined the performance.
1. Configure the Hibernate Properties
Define the Hibernate properties in the application.properties or the application.yml file. These properties can includes the datasource configuration, Hibernate dialect and ddl-auto mode of the Spring application.
2. Define the Entity Classes
Create the entity classes can represents in the database tables. It can annotate these classes with the @Entity define the primary keys, relationships and other mappings of the application.
3. Create the Spring Application
Create the Spring Boot application class and it can annotate it with @SpringBootApplication to the bootstrap the application.
4. Manage the SessionFactory Bean
Define the configuration class annotated with the @Configuration to the manage the SessionFactory bean and it Autowire the Environment to the access the properties defined in the application.properties.
5. Inject the SessionFactory
Inject the SessionFactory bean into the Spring components such as the services or the repository where the database operations are performed. We can use the sessionFactory.getCurrentSession() to the obtain the current the Hibernate Session for the database operations of the application.
Project to handle to Hibernate SessionFactory in the Spring application
Now, we will demonstrate how to the handle to Hibernate SessionFactory in the Spring application.
Step 1: We can create the spring project using Spring STS IDE including the below mentioned dependencies into the project.
Dependencies:
- Spring Web
- Lombok
- Spring Data JPA
- MySQL Driver
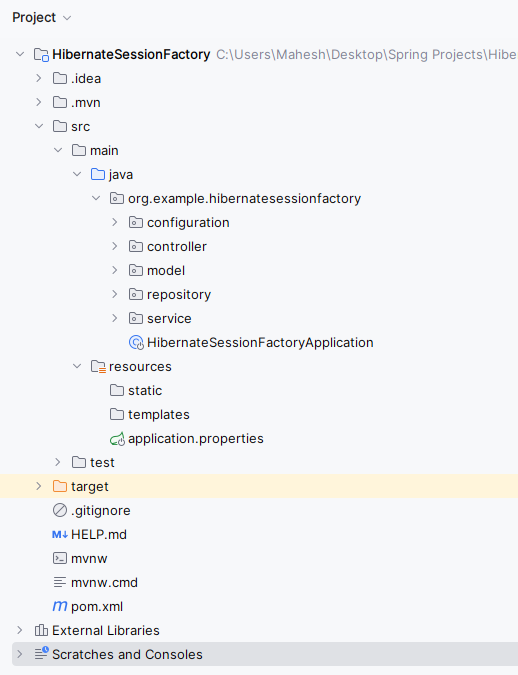
Once complete the creation of the spring project then the spring project file structure look like the below image.
Step 2: Open application.properties file, and write the below code for the server port and mongodb database configuration to the project.
spring.application.name=HibernateSessionFactory

server.port=8082

# Database Configuration
spring.datasource.url=jdbc:mysql://localhost:3306/example
spring.datasource.username=root
spring.datasource.password=

# Hibernate Configuration

spring.jpa.properties.hibernate.dialect=org.hibernate.dialect.MySQL5Dialect
spring.jpa.hibernate.ddl-auto=update
Step 3: Create the new package and it named as the model in that package create the new Java class and it named as Product.
Go to src > org.example.hibernatesessionfacotry > model > Product and put the below code.
Java
package org.example.hibernatesessionfactory.model;

import jakarta.persistence.Entity;
import jakarta.persistence.GeneratedValue;
import jakarta.persistence.GenerationType;
import jakarta.persistence.Id;
import lombok.AllArgsConstructor;
import lombok.Data;
import lombok.NoArgsConstructor;

@Entity
@Data
@AllArgsConstructor
@NoArgsConstructor
public class Product {

    @Id
    @GeneratedValue(strategy = GenerationType.IDENTITY)
    private Long id;
    private String name;
    private double price;

}
Step 4: Create a new package and named it as the repository. In that package, create the new Java interface and named it as ProductRepository.
Go to src > org.example.hibernatesessionfacotry > repository > ProductRepository and put the below code.
Java
package org.example.hibernatesessionfactory.repository;

import org.example.hibernatesessionfactory.model.Product;
import org.springframework.data.jpa.repository.JpaRepository;
import org.springframework.stereotype.Repository;

@Repository
public interface ProductRepository extends JpaRepository<Product, Long> {

    /**
     * Repository interface for accessing Product entities.
     * Extends JpaRepository to provide CRUD operations for Product entities.
     */
}
Step 5: Create the new package and it named as the configuration in that package create the new Java class and it named as HibernateConfig.
Go to src > org.example.hibernatesessionfacotry > configuration > HibernateConfig and put the below code.
Java
package org.example.hibernatesessionfactory.configuration;

import org.springframework.context.annotation.Configuration;
import org.springframework.data.jpa.repository.config.EnableJpaRepositories;
import org.springframework.transaction.annotation.EnableTransactionManagement;

@Configuration
@EnableTransactionManagement
@EnableJpaRepositories(basePackages = "org.example.hibernatesessionfactory.repository")
public class HibernateConfig {

    /**
     * Configuration class for Hibernate.
     */
}
Step 6: Create the new package and it named as the service in that package create the new Java class and it named as ProductService.
Go to src > org.example.hibernatesessionfacotry > service > ProductService and put the below code.
Java
package org.example.hibernatesessionfactory.service;

import jakarta.transaction.Transactional;
import org.example.hibernatesessionfactory.model.Product;
import org.example.hibernatesessionfactory.repository.ProductRepository;
import org.springframework.beans.factory.annotation.Autowired;
import org.springframework.stereotype.Service;

import java.util.List;
import java.util.Optional;

@Service
public class ProductService {

    @Autowired
    private ProductRepository productRepository;

    @Transactional
    public Product saveProduct(Product product) {
        return productRepository.save(product);
    }

    public List<Product> getAllProducts() {
        return productRepository.findAll();
    }
}
Step 7: Create a new package named as the controller, in that package, create the new Java class and it named as ProductController.
Go to src > org.example.hibernatesessionfacotry > controller > ProductController and put the below code.
Java
package org.example.hibernatesessionfactory.controller;

import org.example.hibernatesessionfactory.model.Product;
import org.example.hibernatesessionfactory.service.ProductService;
import org.springframework.beans.factory.annotation.Autowired;
import org.springframework.web.bind.annotation.*;

import java.util.List;

@RestController
@RequestMapping("/products")
public class ProductController {

    @Autowired
    private ProductService productService;

    /**
     * Creates a new product.
     */
    @PostMapping
    public Product createProduct(@RequestBody Product product) {
        return productService.saveProduct(product);
    }

    /**
     * Retrieves all products.
     */
    @GetMapping
    public List<Product> getAllProducts() {
        return productService.getAllProducts();
    }
}
Step 8: Open the main class and write the below code.
Java
package org.example.hibernatesessionfactory;

import org.springframework.boot.SpringApplication;
import org.springframework.boot.autoconfigure.SpringBootApplication;

@SpringBootApplication
public class HibernateSessionFactoryApplication {

    public static void main(String[] args) {
        SpringApplication.run(HibernateSessionFactoryApplication.class, args);
    }

}
Step 9: After completing the project, it will run as spring application and once it runs successfully, then it starts at port 8082.
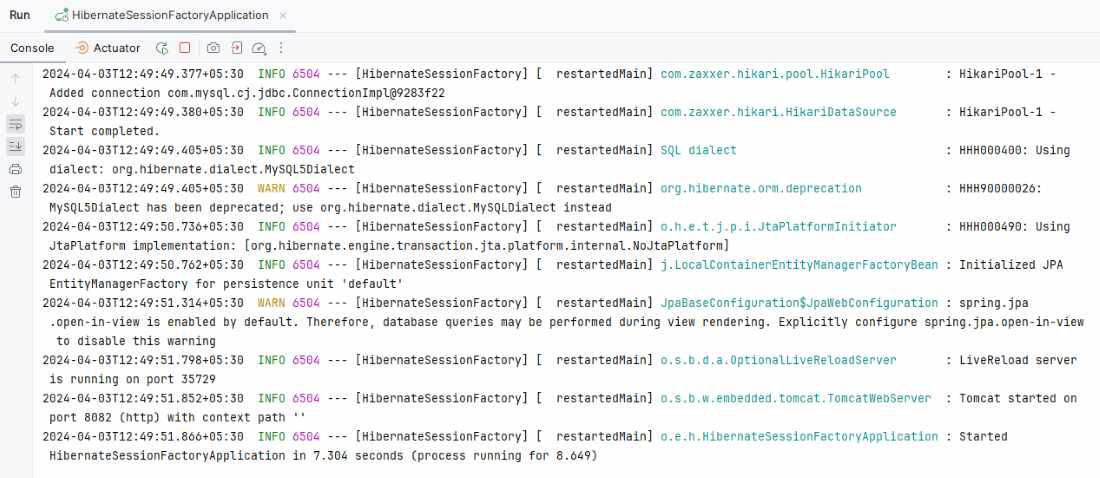
Output:
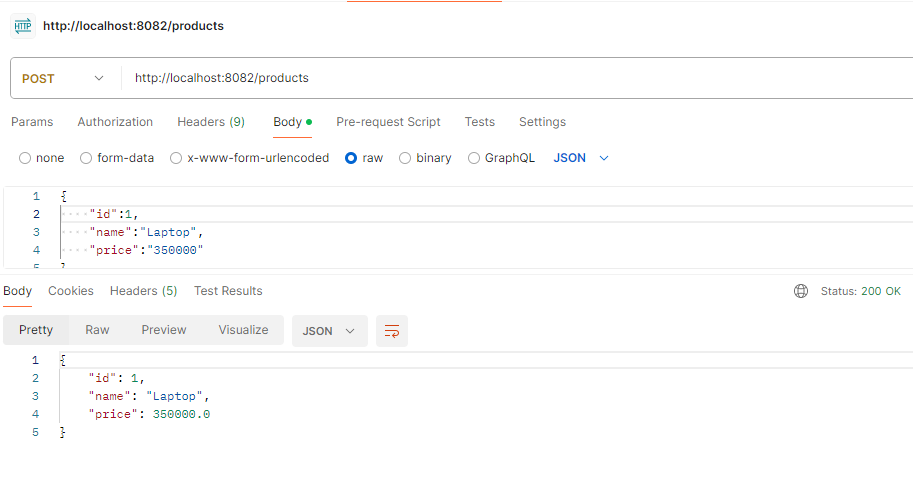
Save Product Endpoint:
POST http://localhost:8082/products
Output in Postman:
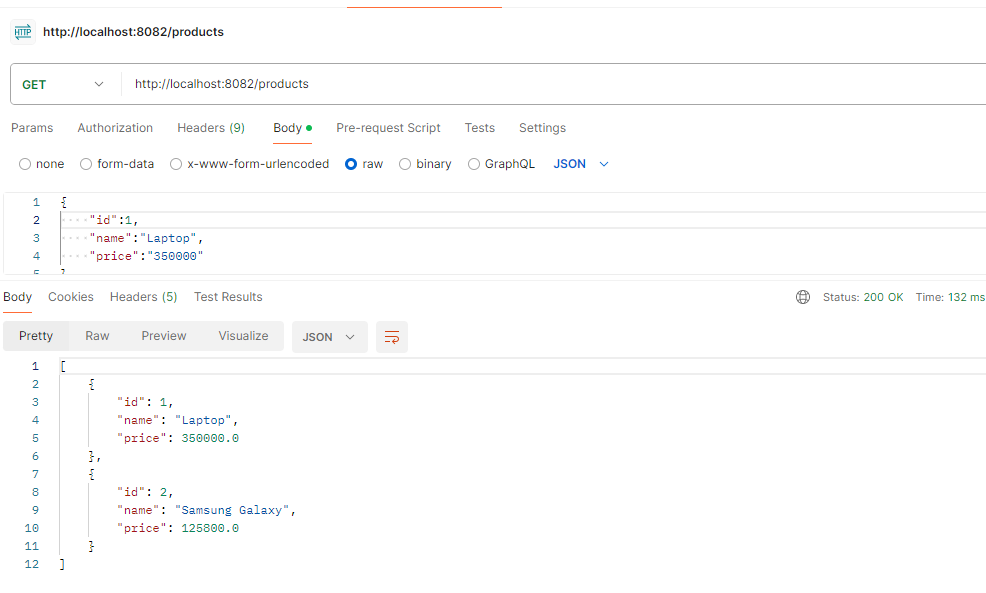
GET the Products Endpoint:
GET http://localhost:8082/products
Output in Postman:
If we follow the above steps, then we can demonstrate how to the handle to the Hibernate SessionFactory of the Spring application.
Share your thoughts in the comments
Please Login to comment...