React Native Picker Component
Last Updated :
07 Mar, 2024
In this article, We are going to see how to create a picker in react-native. For this, we are going to use the Picker component. It is used to select a particular item from multiple given options. Basically, it’s just like a dropdown list.
Syntax:
<Picker>
    <Picker.Item />
    <Picker.Item />
    <Picker.Item />
</Picker>
Props in Picker:
- enabled: If it is false then the user will not able to make a selection.
- itemStyle: It is used to style the item label.
- mode: It decides how the selected items will be displayed, and it is only available on the android platform.
- onValueChange: It is a callback function when the item is selected, and it takes two arguments first is changed value, and second is the index of the item.
- prompt: It displays as a title of the dialog box, and it is only available on the android platform.
- selectedValue: It shows the selected value.
- style: It basically styles the picker.
- testID: It is used to locate this view in end-to-end tests.
Now let’s start with the implementation:
Step 1: Open your terminal and install expo-cli by the following command.
npm install -g expo-cli
Step 2: Now create a project by the following command.
expo init myapp
Step 3: Now go into your project folder i.e. myapp
cd myapp
Step 4: For picker, we have a picker component in React Native, but that component is now deprecated, So in substitute for this we are going to use an external package called react-native-picker. Install that package by using the following command.
npm install @react-native-picker/picker
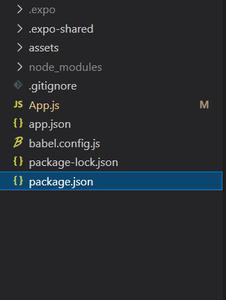
Project Structure:
Example: Now let’s implement the Picker. Here we created a picker of courses.
App.js
Javascript
import React , {useState} from 'react';
import { StyleSheet, View} from 'react-native';
import {Picker} from "@react-native-picker/picker";
export default function App() {
const [Enable , setEnable] = useState("courses");
return (
<View style={styles.container}>
<Picker
selectedValue={Enable}
style={{ height: 50, width: 250 }}
mode={"dialog"}
onValueChange={(itemValue) => setEnable(itemValue)}
>
<Picker.Item label="Courses" value="courses" />
<Picker.Item label="Data-Structures" value="DSA" />
<Picker.Item label="ReactJs" value="react" />
<Picker.Item label="C++" value="cpp" />
<Picker.Item label="Python" value="py" />
<Picker.Item label="Java" value="java" />
</Picker>
</View>
);
}
const styles = StyleSheet.create({
container: {
flex: 1,
alignItems: 'center',
justifyContent: 'center',
},
});
|
Start the server by using the following command.
npm run android
Output: If your emulator did not open automatically then you need to do it manually. First, go to your android studio and run the emulator. Now start the server again.
Share your thoughts in the comments
Please Login to comment...