Re-rendering Components in ReactJS
Last Updated :
14 Mar, 2024
Re-rendering components in ReactJS is a part of the React Component Lifecycle and is called by React only. React components automatically re-render whenever there is a change in their state or props and provide dynamic content in accordance with user interactions.
Re-render mainly occurs if there is
- Update in State
- Update in prop
- Re-rendering of the parent component
Unnecessary re-renders affect the app performance and cause loss of users’ battery which surely no user would want. Let’s see in detail why components get re-rendered and how to prevent unwanted re-rendering to optimize app components.
Prerequisites:
Steps to create the application
Step 1: Create a new React project named counter-app by running the below-given command.
npx create-react-app counter-app
Step 2: Once the installation is done, you can open the project folder as shown below.
cd counter-app
Step 3: After creating the React JS application, install the required module by running the below-given command.
npm install react-desktop
Application Structure:
Project structure will look like the following.
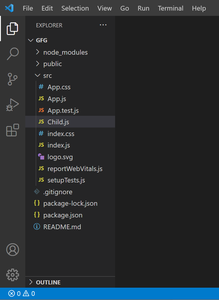
Project Structure
Approach 1: Simple Re-render
This approach uses a counter application. When the button is clicked it update the state data that cause the automatic re-render in the app and child components.
Example: Here props in a child are not modified but it is forced re-rendered when counter state changes.
Javascript
// App.js

import { useState } from "react";
import Child from "./Child"; // Child Component

function App() {
    const [Count, setCount] = useState(0);
    console.log("Parent rendered");
    return (
        <div className="wrap">
            <button onClick={() => setCount(Count + 1)}>
                Increase
            </button>

            <p>Count:{Count}</p>

            <Child name={"ABCD"} />
        </div>
    );
}

export default App;
// Child.js

function Child(props){
    console.log("Child Rendered");
    return(
        <div>
            <h1>Child Name={props.name}</h1>
        </div>
    );
}

export default Child;
Step to run the application: Open the terminal and type the following command.
npm start
Output: Check the rendering dialogue in the console. it shows both component rerenders on changing counter state.

The number of times Parent component is re-rendered, the number of times the child component is also re-rendered can be seen in the console area.
Approach 2: Optimized Re-render or Re-render prevention
We can prevent updated re-rendering of the react components e.g. change in counter state cause re-rendering of the child also. It can be prevented by using React memo. Unless there it any changes in the components it provide same version of the component present in the memory and provide optimized Re-render.
Example: Exporting react memo of the child component provide the latest version of the component preventing the auto or forced re-render until it is needed.
Javascript
// Child.js

import React from "react";

function Child(props) {
    console.log("Child Rendered");
    return (
        <div>
            <h1>Child Name={props.name}</h1>
        </div>
    );
}

// Export default Child;
export default React.memo(Child);
// App.js

import { useState } from "react";
import Child from "./Child"; // Child Component

function App() {
    const [Count, setCount] = useState(0);
    console.log("Parent rendered");
    return (
        <div className="wrap">
            <button onClick={() => setCount(Count + 1)}>
                Increase
            </button>

            <p>Count:{Count}</p>

            <Child name={"ABCD"} />
        </div>
    );
}

export default App;
Step to run the application: Open the terminal and type the following command.
npm start
Output: Check the rendering dialogue in the console. it precents child re-render on changing counter state.
Now the child component is not re-rendered on re-rendering of the parent component. Can be seen clearly in the console area.
Note: This method only exists as a performance optimization. Do not rely on it to prevent render, as this can lead to bugs.
Approach 3: Forced Re-render
This approach shows how we can manage to force the rendering of a component without any state, prop or parent state update. This approach uses a usestate hook to force the component to re-render.
Example: A button is given which on click cause a force re-render of the document.
CSS
/* App.css */
.App {
    text-align: center;
    overflow-y: scroll;
}
.geeks {
    color: green;
}
// App.js

import { useState } from "react";
import "./App.css";

function App() {
    const [Count, setCount] = useState(0);
    const [, forceRender] = useState(undefined);

    const handleClick = () => {
        forceRender((prev) => !prev);
    };

    console.log("App.js rendered");
    return (
        <div className="App">
            <h1 className="geeks">GeeksforGeeks</h1>
            <button onClick={() => setCount(Count + 1)}>
                Increase
            </button>

            <p>Count:{Count}</p>

            <button onClick={() => handleClick()}>
                Force Update
            </button>
        </div>
    );
}

export default App;
Step to run the application: Open the terminal and type the following command.
npm start
Output: Check the rendering dialogue in the console. it shows force re-renders on clicking the button
.

Share your thoughts in the comments
Please Login to comment...