Next.js Static HTML Export
Last Updated :
28 Sep, 2023
Next.js is one of the favorite React frameworks of many web developers for developing modern applications. Different types of features are bounded in the Next.js framework, and one of the features is to generate static HTML exports, which can improve the performance, and user experience.
Next.js enables us to develop static HTML exports by using the (SSG) feature which is “Static Side Generation“. In SSG, the web pages are rendered at the build time and generate the HTML files for each page. In simple terms, when the user visits our developed website, they are served pre-rendered HTML pages, which improves the performance of our website.
Prerequisites:
Steps to Create the Next Application:
Step 1: Open the terminal in the VSCode IDE and create the new directory or folder by using the below command.
mkdir nextjs-static-export
Step 2: Now, navigate to the newly created directory using the below command.
cd nextjs-static-export
Step 3: We have to initialize the new Node.js project, so for that, use the below command and then install Next.js.
npm init -y
npm install next react react-dom
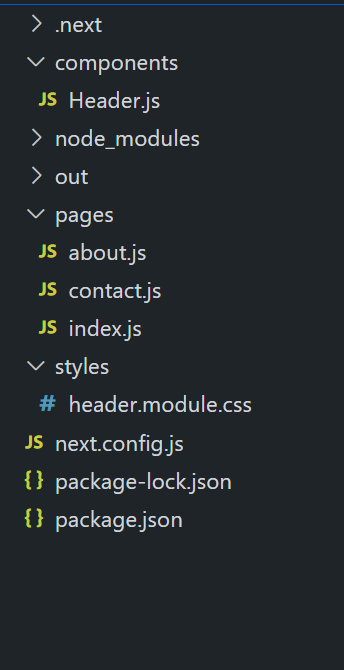
Project Structure: It will look as follows:
Example: In this example, we are setting up the Next.js application to generate the static HTML version of our developing application. This will enable and allow us to pre-render the pages at the build time and then export them as static HTML files. This will increase the performance and also it will assure the fast loading of our application without any issues.
Step 4: Now, we need to create index.js, contact.js, and about.js in the pages directory.
Javascript
import React from 'react';
import Header from '../components/Header';
export default function Home() {
return (
<div>
<Header />
<h1>Welcome to my Next.js website!</h1>
</div>
);
}
|
Javascript
import React from 'react';
export default function About() {
return (
<div>
<h1>About Us</h1>
<p>
We are a team of developers building
amazing websites.
</p>
</div>
);
}
|
Javascript
import React from 'react';
export default function Contact() {
return (
<div>
<h1>Contact Us</h1>
<p>
Feel free to reach out to us at
contact@example.com.
</p>
</div>
);
}
|
Step 5: We will create a “components/Header.js” module and its styling CSS file in “styles/header.module.css” that consists of a simple navbar.
Javascript
import React from 'react';
import Link from 'next/link';
import styles from '../styles/header.module.css';
export default function Header() {
return (
<header className={styles.header}>
<nav>
<ul className={styles.navList}>
<li className={styles.navItem}>
<Link href="/">Home</Link>
</li>
<li className={styles.navItem}>
<Link href="/about">About</Link>
</li>
<li className={styles.navItem}>
<Link href="/contact">Contact</Link>
</li>
</ul>
</nav>
</header>
);
}
|
CSS
.header {
background-color: #333;
color: white;
padding: 1rem;
text-align: center;
}
.navList {
list-style: none;
display: flex;
justify-content: center;
padding: 0;
}
.navItem {
margin: 0 1rem;
padding: 0.5rem;
transition: background-color 0.3s ease;
}
.navItem:hover {
background-color: #555;
}
.navItem>a {
text-decoration: none;
color: white;
font-weight: bold;
font-size: 1rem;
}
|
Step 6: Now, add the below script code in the packge.json file:
  "scripts": {
    "dev": "next dev",
    "build": "next build",
    "export": "next export",
    "start": "next start"
  },
Our final package.json file looks like this:
{
  "name": "nextjs-static-export",
  "version": "1.0.0",
  "description": "",
  "main": "index.js",
  "scripts": {
    "dev": "next dev",
    "build": "next build",
    "export": "next export",
    "start": "next start"
  },
  "keywords": [],
  "author": "",
  "license": "ISC",
  "dependencies": {
    "next": "^13.4.13",
    "react": "^18.2.0",
    "react-dom": "^18.2.0",
    "serve": "^14.2.0"
  }
}
Step 7: Now, in the project directory we need to create the config file for the Next.js application. After creating the file, we need to insert the below code into it.
module.exports = {};
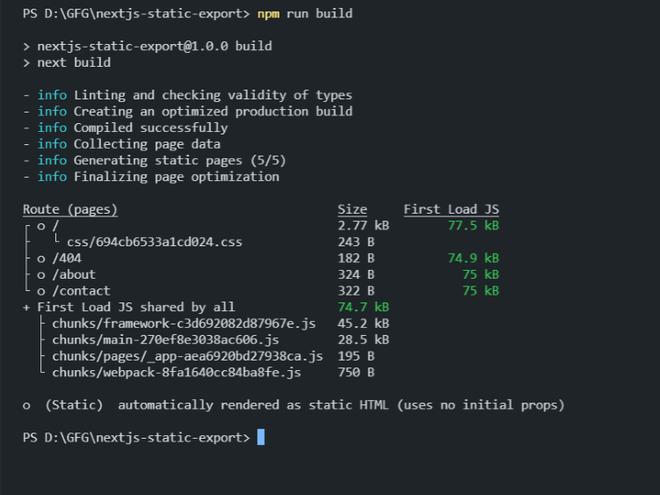
Step 8: Now we need to build our Next.js application by executing the below command in the VSCode terminal.
npm run build
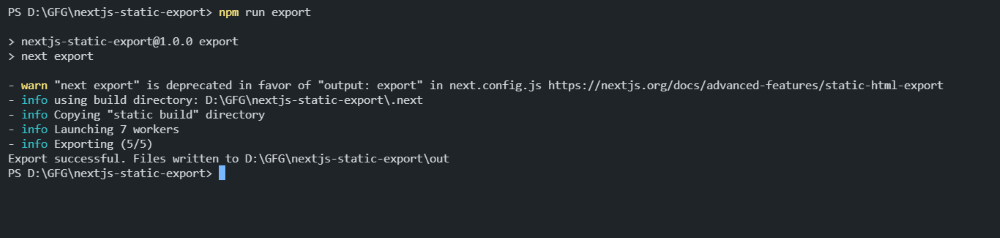
Step 9: After successfully build of the application, we need to export static HTML files by using the below command in the terminal.
npm run export
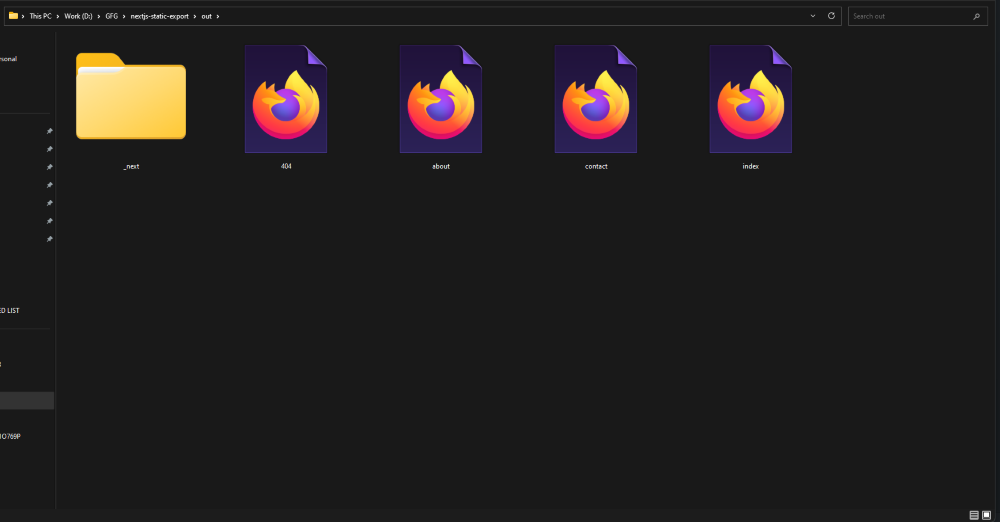
Step 10: After successfully exporting the application, a new directory will be created which will be named “out“. All the static HTML files will be saved in this directory. In the below screenshot, you can see that after exporting the project, our project HTML files are been created in the out directory.
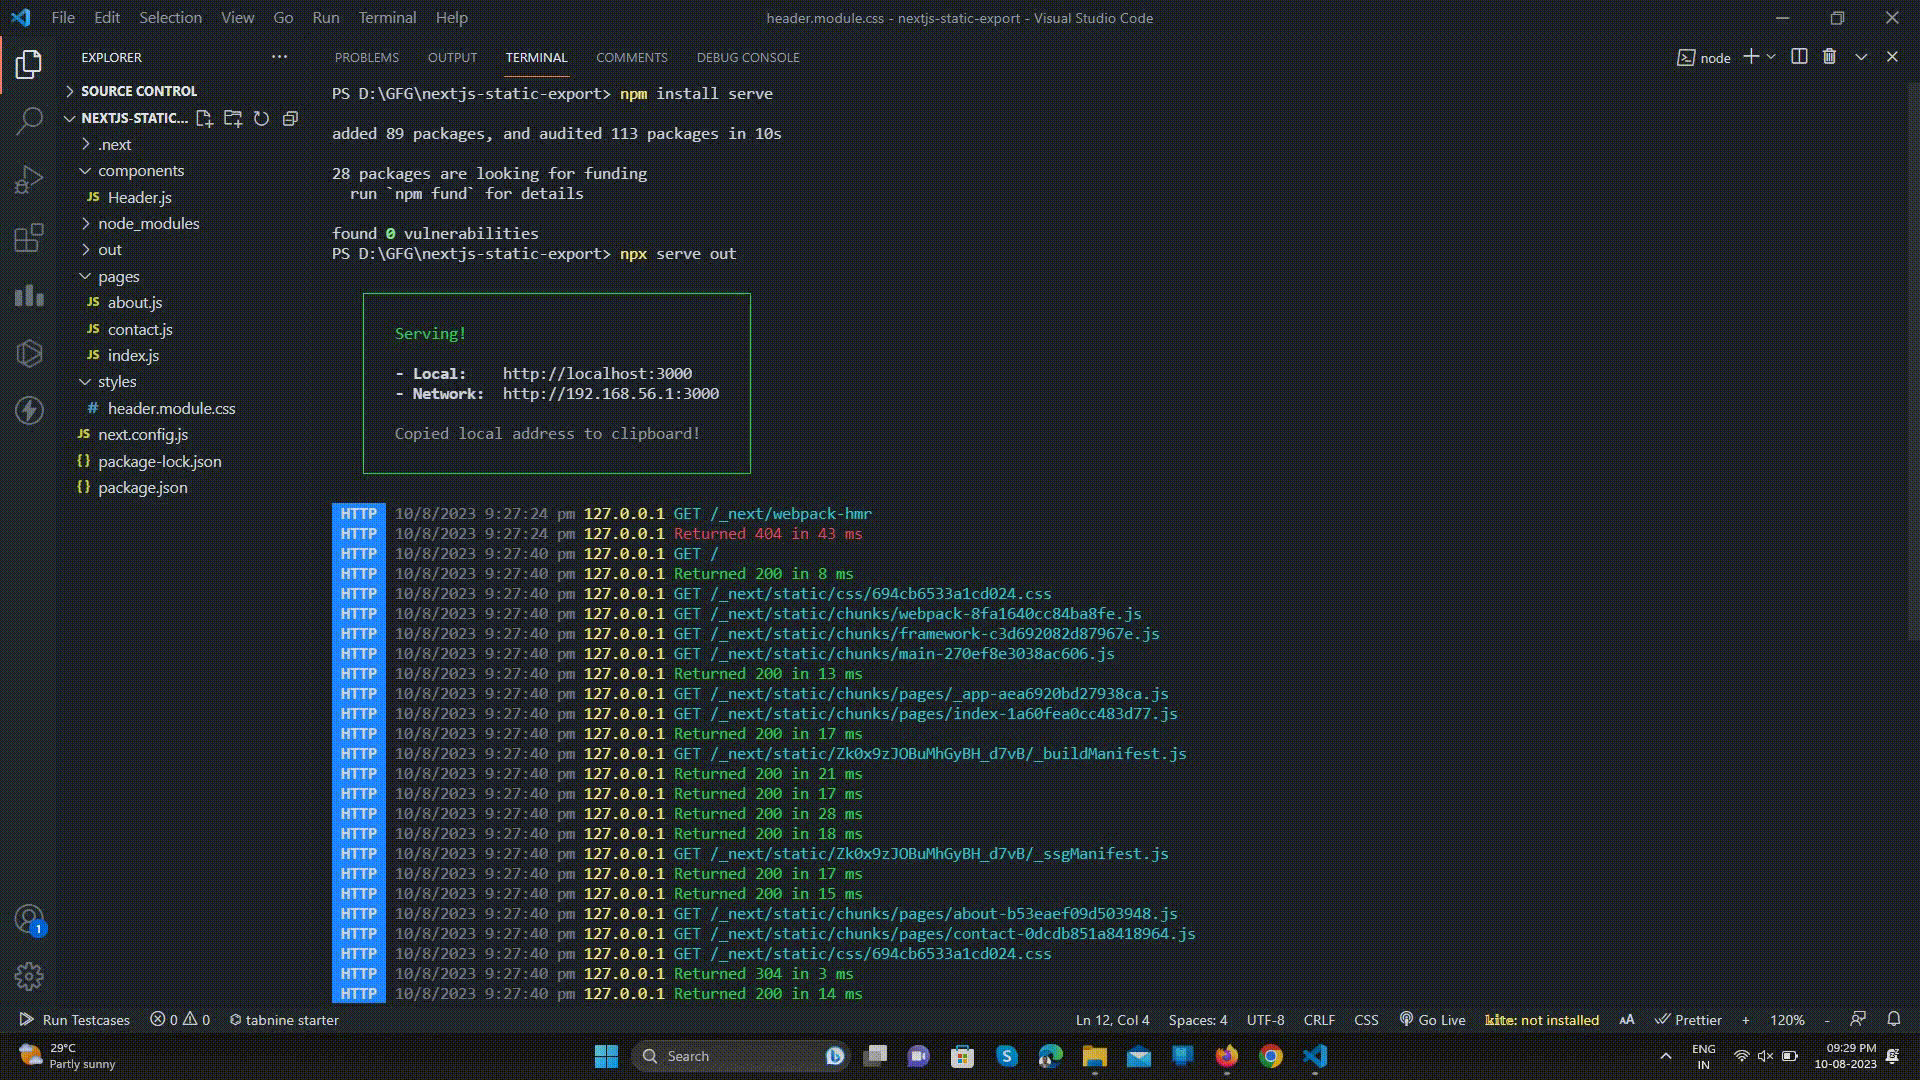
Step 11: We can serve the exported files by installing the local server package and then starting the server. Use the below command to install and serve.
npm install serve
npx serve out
Output:
Conclusion: In conclusion, Next.js has various features like SSG (Server Site Generation), SSR (Server Side Rendering), and also dynamic routing. Using Next.js, we can export static HTML pages which actually enhances and improves the SEO performance and also boosts the capabilities of web developers to reliably develop modern web applications. By using this feature of exporting, the overall website loading also becomes faster and contributes to the enhancement of user experience.
Share your thoughts in the comments
Please Login to comment...