Microsoft Azure – Create Windows Based Virtual Machine Scale Sets (VMSS)
Last Updated :
31 Jul, 2023
Typically, We will create each virtual machine manually. But what if we want to create 100s of similar VMs? It’s time-consuming and requires lots of human effort. This is possible with the help of Virtual Machine Scale Sets (VMSS). In this article, we’ll see what these Virtual Machine Scale Sets are and how to create them in Microsoft Azure Portal.
Virtual Machine Scale Sets(VMSS)
VMSS is a service provided by Microsoft Azure that allows us to create, manage and monitor multiple Virtual Machines of similar properties. We can also scale up or scale down the number of VMs in a VMSS based on our requirements.
Types of Scaling
- Manual Scaling: Manual Scaling requires human intervention for scaling up or down instances in a Virtual Machine Scale Set. You can scale horizontally or vertically based on your requirement.
- Auto Scaling: Scaling of Virtual Machines in a VMSS is done automatically where you can set rules to trigger the scaling feature. You can set a threshold on the number of instances that can be created by providing conditions.
Horizontal Scaling
Horizontal Scaling alias Scaling Out refers to increasing or decreasing the virtual machines in a Virtual Machine Scale Set. This type of scaling can be performed manually or automatically at any moment to extend or reduce the instance count. While increasing the instance count, a similar kind of Azure Virtual Machines i.e. with the same properties such as SKU, size, etc. is added to the VMSS. Horizontal Scaling is beneficial when there is a workload demand or there is a need to reduce the cost. Ultimately, it helps in improving performance by dividing the workload amongst instances.
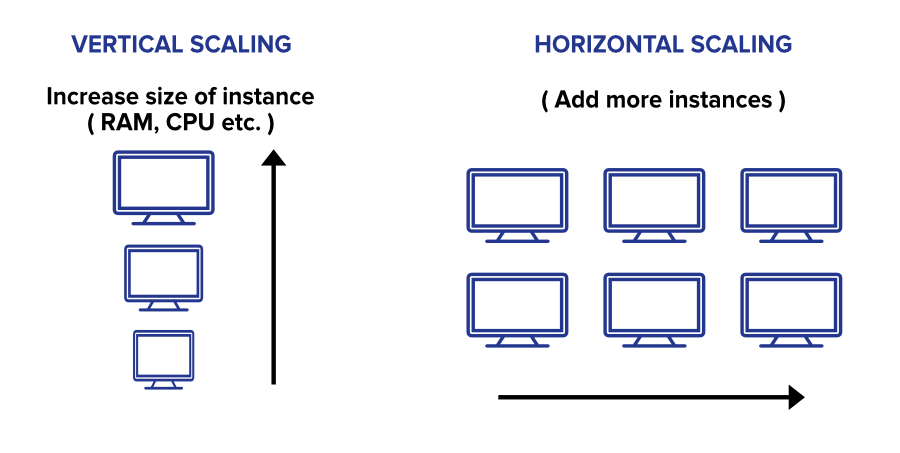
Vertical Scaling
Vertical Scaling is also known as Scaling In, where you can alter the size of instances in a Virtual Machine Scale Set. This type of scaling is useful when you don’t want to add extra instances but instead want to increase the capacity, performance, and other features of existing instances in a VMSS. Microsoft Azure provides the ability to not only increase the size but also decrease the size of VMs when there is low workload demand.
Autoscale Settings
Autoscale Settings enables us to set conditions for scaling up or down of instances dynamically. Scale out feature allows to increase the number of instances when there is a demand and Scale In feature allows us to reduce or cut down the running instances from the VMSS when there is low demand. These scale-in and scale-out settings are set based upon metrics such as utilization of resource/CPU, disk usage or based on time schedule. We can also set a maximum limit and a minimum limit up to which the instances can scale up or scale down.
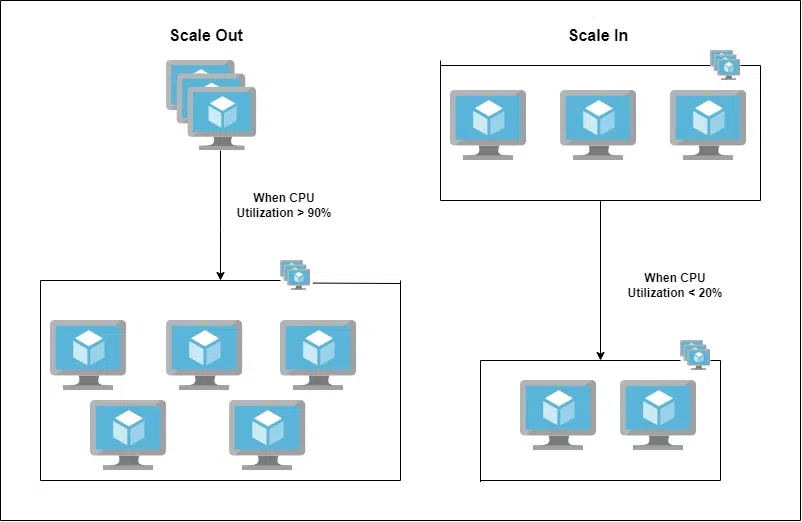
Scale Out and Scale In
A Beginner’s Guide to Creating a VMSS with 3 Windows VMs in Azure
Step 1: Sign in to Azure Portal using your user credentials. Ensure that you have a Microsoft Azure subscription and a resource group in your subscription.
Step 2: On your Azure Portal, Search for Virtual Machine Scale Sets in the search bar and select it.
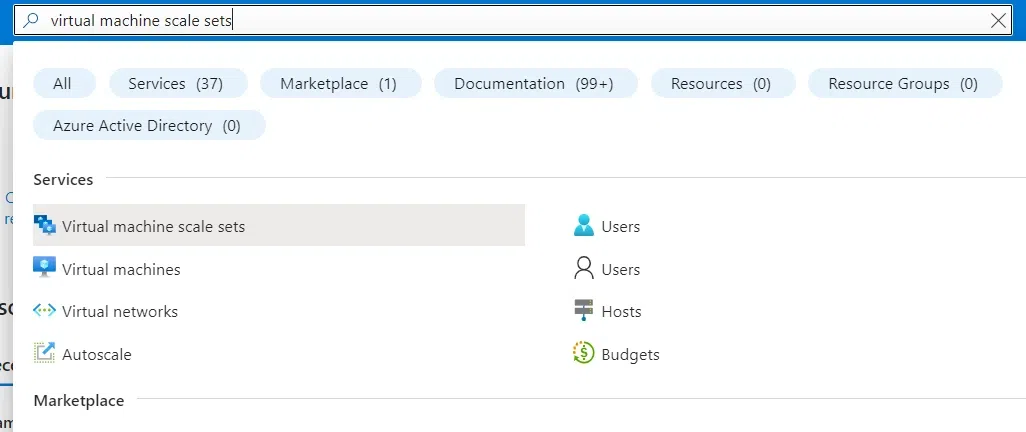
Azure Home page
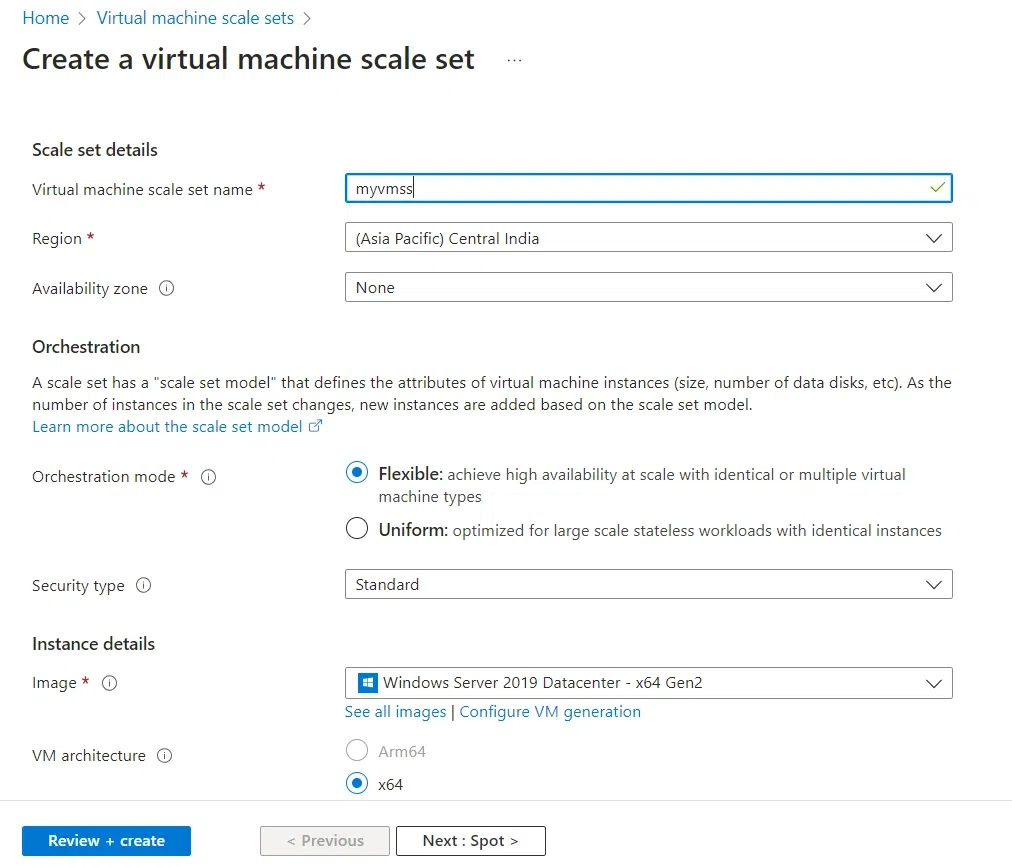
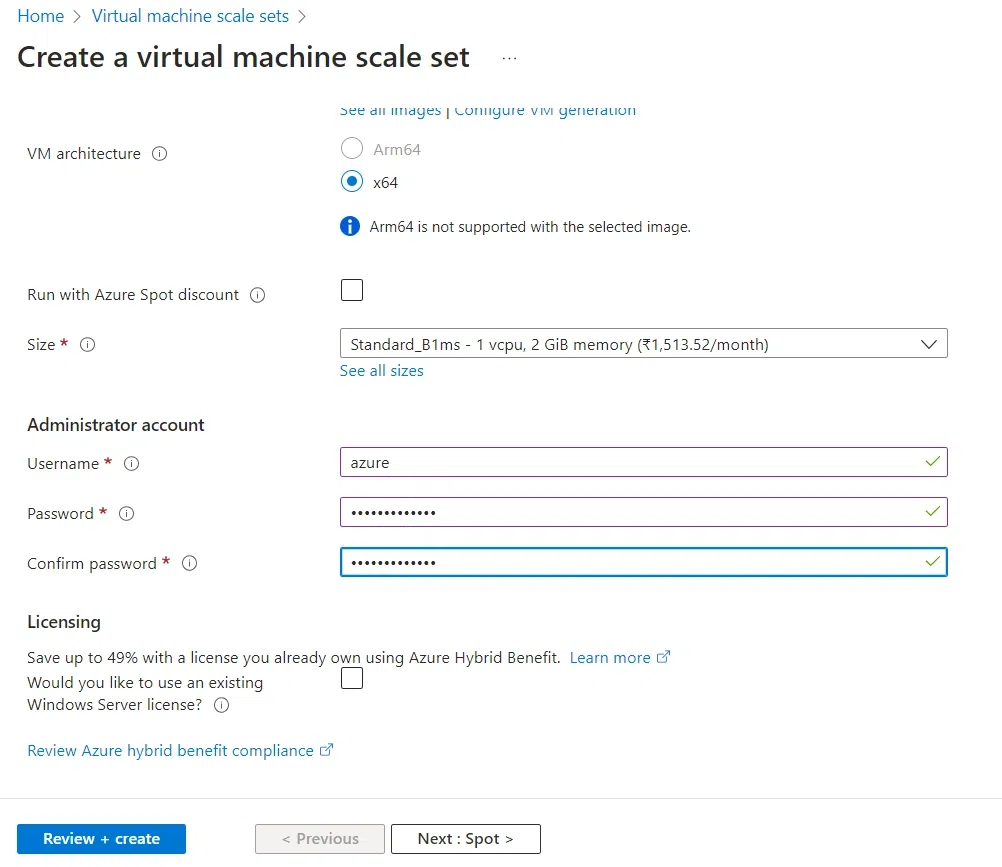
Step 3: On Basics Tab, Set the configurations as per your requirements.
- Select your subscription and resource group.
- Enter the name of the Virtual Machine Scale Set.
- Select the region from the drop-down menu.
- Select Flexible for Orchestration mode and Security type as Standard.
- For creating Windows VMs inside the scale set, Select any Windows image. eg: Windows 2019
- Select your size as per your need. eg: Standard_B1s for small-sized Virtual Machines
- For username, Enter a valid name such as azure/azure user.
- Enter the Password with letters, numbers, and special characters. eg: P@ssword1234
Step 4: On the Spot and Disks tabs, you can add disks to your VMs if needed. On Networking Tab,
Adding Virtual Network:
- Select the virtual network(Vnet) if you already have one, else you can create a VNet by clicking on create a virtual network.
- Enter the name of the virtual network. eg: my net
- A default subnet is available in every virtual network, but if needed you can create a new subnet.
- Click OK.
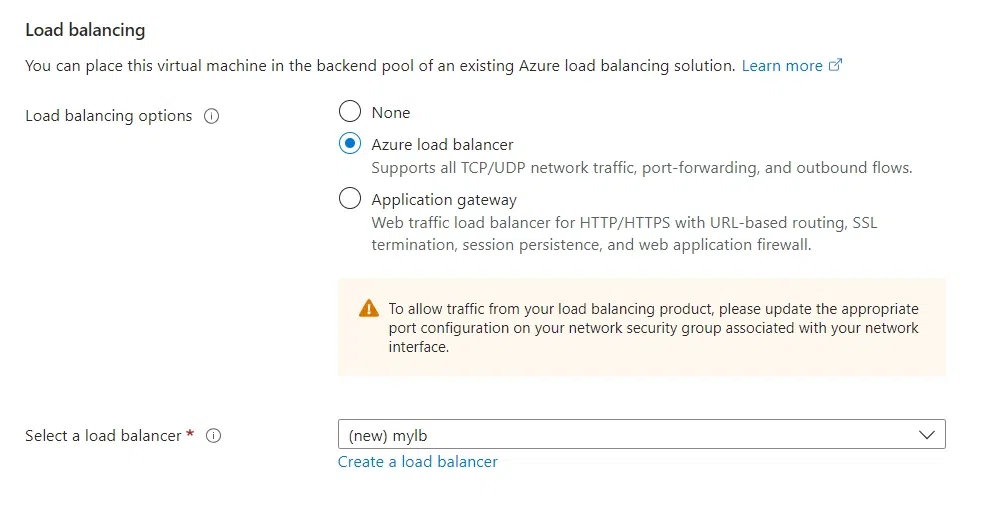
Adding Load Balancer and Backend Pool:
- You can add a load balancer and Backend pool if you already have one.
- Else, Choose Load Balancer for load balancing options.
- Click on create new for the load balancer and give your desired name. eg: lb
- If available, Click on create new for backend pool and give your backend pool a name. eg: maybe
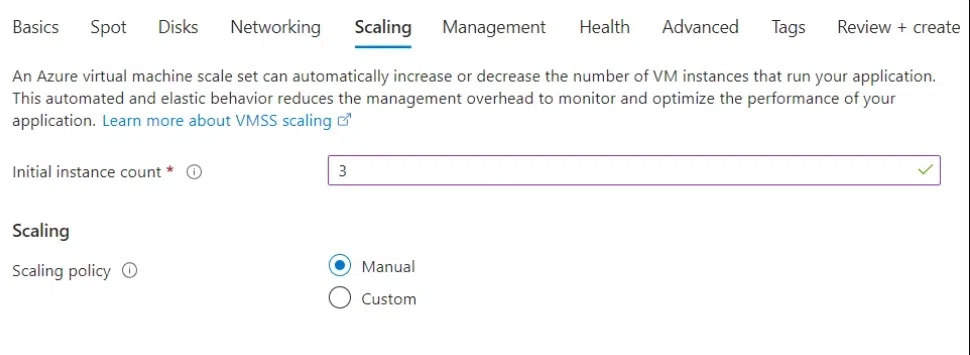
Step 6: On Scaling Tab, For the Initial instance count, give the number of VMs you want to create. For now, We are mentioning Three as we want 3 Windows Virtual Machines.
Step 7: Click on Review+ Create. Once the validation is successful, Click Create for the deployment. Once the deployment is completed, Click on Go to Resource to view the resource. To view the instances, From the left navigation bar, Select Instances.
Advantages of VMSS
- Enables the ability to scale up or down the instances.
- Helps in optimizing the cost.
- Allows to define autoscale rules to automate the process of scaling.
- Provides secure communication between machines.
- Less human intervention is required for scaling.
- Provides an option to add disks to the instances.
- Allows to monitor the performance of the instances.
FAQs On Azure Virtual Machine Scale Sets (VMSS)
1. How many VMs in a scale set?
Platform images 0 to 1000 and Custom images 0 to 600 VMs.
2. What are virtual machine scale sets and virtual machine availability sets?
Vitual machine scale set is added to availability sets after the creation.
Share your thoughts in the comments
Please Login to comment...