Microsoft Azure – Container Registry For Deploying .NET Core Apps
Last Updated :
02 Aug, 2023
Azure Container Registry to run a .NET Core App Azure Container Registry is a place where you can store your container images securely. Let’s deploy a container image to it and see how we can use it. To follow along, we’ll need to Visual Studio and Docker Desktop. Dockerfile is the source code for Docker image before pushing the images into the ACR you need to write the Dockerfile according to your needs in an efficient manner.
Features Of Microsoft Azure – Container Registry
Following are some of the key features of the Azure container registry.
- Private Container Image Registry: Azure Container Registry will store your Docker images in a private Docker registry and secure repository where without proper permissions no one can access the images the images are more secure than in the DockerHub.
- Standard Image Pushing: You can push the images to Microsoft Azure – Container Registry in a standard and the same you use to push into the DockerHub. You can store any type of image like Linux, Windows, and any other OS images easily and securely.
- Fully Managed service: Microsoft Azure – Container Registry is a fully managed service there is no need to worry about anything like infrastructure and security you just need to focus on building the image proficiently.
- High Availability Of Images: Once you pushed your Docker image to Azure – Container Registry you can be very confident that whenever you had the usage of the image you can access the image if you had proper authorization.
Moreover, you can integrate the Microsoft Azure – Container Registry with the Azure services according to your requirements like AKS services and so on.
Security of Azure Container Registry
- Role-Based Access Control (RBAC): ACR can be managed with the help of RABAC microsoft azure you can assign a certain level of permissions to the users and resources available in Azure like what exactly a user or service can perform on the RBAC. You can give access to some users only to pull the images and for other certain users you can provide to pull and push the images and the same applies to resources also.
- Image Scanning: The images which are pushed to the ACR will be scanned before storing into the repositories and if it finds any type of vulnerabilities you can it will detect and give the notifications to us.
- Image Encryption: Images that are going to be stored in the repositories will be encrypted.
- Logging History: ACR maintains each and every task performed on the repositories and images in the form of logs where you can access the logs and see all the tasks performed on the repositories.
- Isolate The Image: ACR can block the IP address which you don’t want to access the images this will add an extra layer of protection to our images registry.
Pricing of Azure Container Registry
The pricing of ACR is depended on the amount of storage you are going to use and the size of the image you can store one image for free and sometimes it may charge based on the data transfer you have done also.
- Storage Usage: The pricing of ACR is mainly based upon the amount of storage you going to use the size of images is high then the storage usage will be high and the pricing will vary according to it.
- Free Tier: You can store the Docker images in the ACR for free up to 30 days from the beginning. The maximum limit of the ACR free tier is 10 GB.
|
Standard
|
$0.165
|
10 GB
|
|
premium
|
$0.668
|
100 GB
|
|
Shared
|
$1.669
|
500 GB
|
The above-mentioned prices may vary depending on the usage of the storage this approximate prices of certain usage.
Use Cases Microsoft Azure – Container Registry
- Integrates With Other Services: You can integrate the ACR with other resources like AKS and Azure Container Apps with proper permissions these services can push and pull the images.
- CI/CD: You can push and pull the images while Continuous integration and continuous deployment also and some of the most commonly used tools are Jenkins pipeline and Azure pipelines.
- Completely Private Registry: ACR is a complete private registry where pushing and pulling the images to the repositories is very hard without complete authorization and authentications. So your image is completely free from unauthorized access.
- Hybrid Cloud Deployments: You can deploy your images in the form of containers on your on-premises servers while storing the images in the ACR.
Create An Azure Container Registry Using The Azure Portal
Follow the below steps to use the Azure container registry for deploying .NET core Apps
Step 1: In Visual Studio, we’ve created a new .Net Core Console App. It’s very simple and only outputs “Hello World” to the console.

Step 2: Let’s add Docker supports to it, and choose a “Linux“. Now, it has a Dockerfile that describes the container image for the app.


Step 3: Let’s publish this to an Azure Container Registry. First, we choose Azure and the Azure Container Registry, that’s it.

Step 4: We’ll choose an existing Azure container Registry. We can also create a new one if we like, and finish and now publish it.

In the Azure Container Registry. We can store many container images here and use lots of features like tasks that automate deployment and patching of the images.
Step 5: Let’s go to the Repositories menu. Here, is the tag of the image that we’ve just published. Now from here, we can deploy and run this container image to a web app or to a container instance.

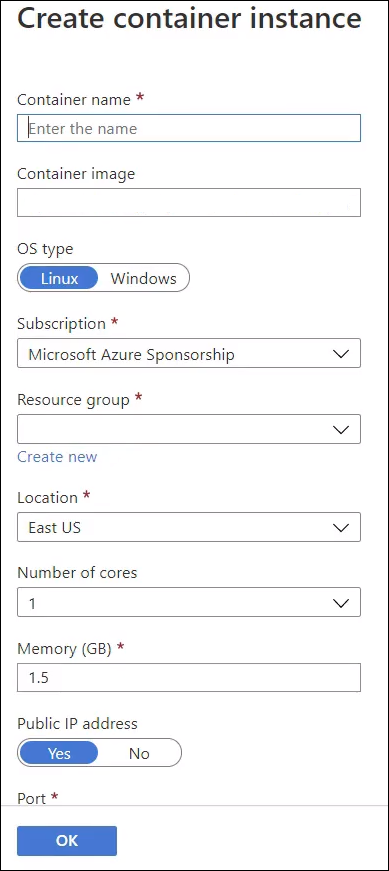
Step 6: Let’s do the last one. We just need to enter a name and we’ll leave the rest as it is. This creates an Azure Container Instance, which is perfect for running a single container.
Step 7: In the Azure Container Instance. Let’s see its containers here. It has been busy with our container. Let’s see. Here in the logs, we can see the output of the console app that now runs in a container in the Container Instance.

The Azure Container Registry is a managed and safe place to store our container images that provides features like geo-replication and an easy way to run our containers in Azure Container Instances.
FAQs On Microsoft Azure Container Registry
Q.1: What Are The Two Types Of Registries In Docker?
The two types of Docker Registries are Private registry and public registry it can be on DockerHub or Azure Container Registry.
Q.2: What is ECS in Azure?
The Azure Container Apps is replace of Amzon Elastic Container Service (ECS) in Microsot Azure.
Share your thoughts in the comments
Please Login to comment...