Linux tune2fs command With Examples
Last Updated :
04 Nov, 2023
Linux, as a versatile and powerful operating system, offers a myriad of command-line tools to manage and manipulate various aspects of the file system. Among these tools, the tune2fs command stands out as a crucial utility for fine-tuning the ext2, ext3, and ext4 file systems. This command empowers Linux administrators to customize file system parameters, making it an indispensable part of the Linux toolkit.
The syntax for the `tune2fs` command in linux:
tune2fs [options] device
Here,
[options]: Refers to the various options that you can use to modify specific file system attributes.
device: Specifies the path to the block device representing the file system you want to tune.
Example : tune2fs -c /dev/sda1
Commonly Used Options in the`tune2fs` command in Linux
|
This displays the file structure and current values of the parameters.
|
|
Used to set the Volume Label of the file system.
|
|
This option is used to set the maximum count size of the file system.
|
|
You can disable and enable some specific features using this option.
|
|
Used to set the reserved block.
|
1. List the file system files using the `-l` option using the tune2fs command
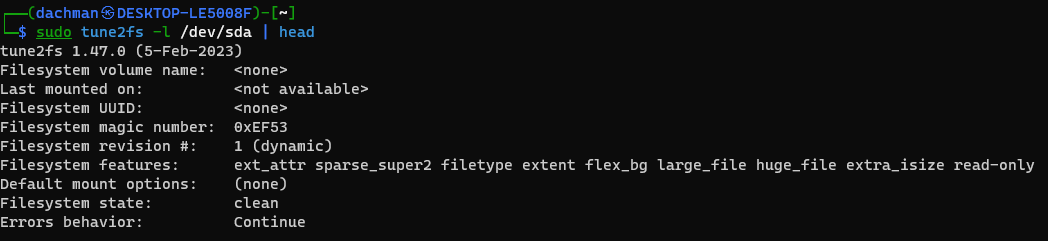
The ‘-l’ option is used with the ‘tune2fs’ command in Linux to display file system information. When using this option, the command can provide a lot of detailed information about the file system, which can be overwhelming. To make it more manageable, you can use the ‘head’ command to display only the first few lines of the output. Here’s an example :
Example:
sudo tune2fs -l /dev/sda | head
2. How to set the label of the drive?
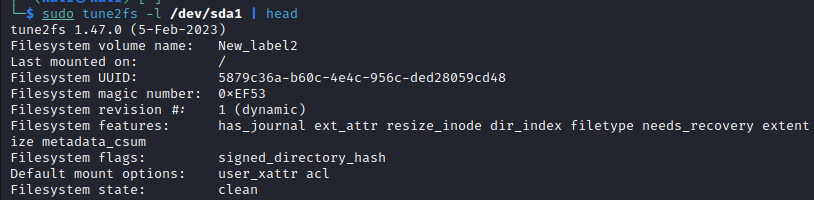
The ‘-L’ option in the ‘tune2fs‘ command is used to change the label (name) of a filesystem on a drive in Linux. Here’s an example of how to use it to set the label of a drive:
Example:
sudo tune2fs -L "New Label" /dev/sda1

To verify that the label of the filesystem has been successfully changed using the ‘-L’ option with the ‘tune2fs’ command, you can use the ‘-l‘ option to display the filesystem information, including the label. Here’s an example of how to do that:
3. How to set the count in a file system?
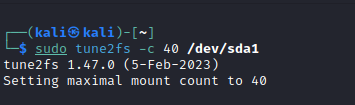
The ‘-c’ option in the ‘tune2fs’ command is used to set the maximum mount count for the filesystem before it should be checked for errors. Here’s an example of how to use it:
Example:
sudo tune2fs -c 40 /dev/sda1
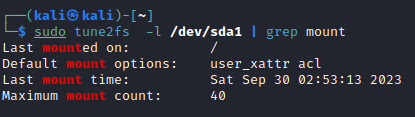
To check the current maximum mount count setting using the ‘tune2fs’ command, you can use the ‘-l’ option to display the filesystem information and then ‘grep’ for the “Maximum mount count” line. Here’s an example:
sudo tune2fs -l /dev/sda1 | grep mount
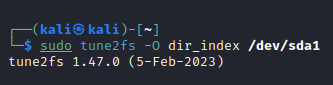
4. How to enable or disable some specific features of file system?
The ‘-O’ option in the ‘tune2fs’ command is indeed a powerful feature that allows you to enable or disable specific filesystem features on an ext2, ext3, or ext4 filesystem. It’s often used for tuning filesystem options. Here’s an example of how to use the ‘-O’ option:
Example:
sudo tune2fs -O dir_index /dev/sda1
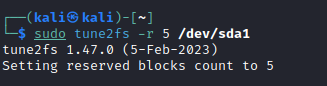
5. How to set reserved blocks in file system?
The ‘-r‘ option in the ‘tune2fs’ command is used to set the reserved block percentage for a filesystem. The reserved blocks are space on the filesystem that is reserved for use by the system administrator. They can be useful to ensure that there is always some space available for system maintenance, even if the filesystem becomes full.
Here’s an example of how to use the ‘-r’ option to set the reserved block percentage:
Example:
sudo tune2fs -r 5 /dev/sda1
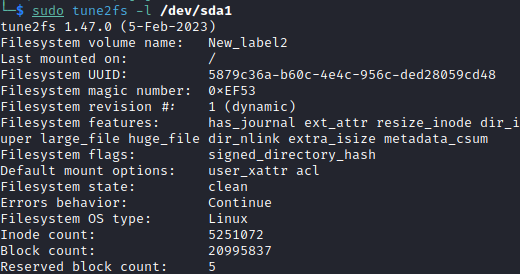
To verify whether the reserved block percentage has been successfully set using the ‘-r’ option in the tune2fs command, you can use the ‘-l’ option to display the filesystem information and check the reserved block count. Here’s an example:
Frequently Asked Questions:
Q1. What is the the tune2fs command?
Answer:
The tune2fs command in Linux is a versatile tool used for changing and manipulating various parameters and settings of ext2, ext3, and ext4 file systems. It allows system administrators to fine-tune and modify various aspects of the filesystem to suit their needs.
Q2. What is the use of the ‘-L’ option in tune2fs command?
Answer:
You can change the label of a filesystem using the ‘-L’ option followed by the desired label, like this: ‘sudo tune2fs ‘-L’ “New_Label” /dev/sda1′. You can then verify the change using the ‘-l’ option.
Q3. What is the purpose of the the ‘-c’ option in tune2fs command?
Answer:
The ‘-c’ option is used to set the maximum mount count before the filesystem should be checked for errors during system startup. For example, ‘sudo tune2fs -c 40 /dev/sda1’ sets the maximum mount count to 40.
Q4. How can you enable or disable specific features of a filesystem using the ‘tune2fs’ command?
Answer:
The ‘-O’ option allows you to enable or disable specific filesystem features. For example, ‘sudo tune2fs -O dir_index /dev/sda1’ enables the “dir_index” feature, while ‘sudo tune2fs -O ^has_journal /dev/sda1‘ disables the “has_journal” feature.
Q5. What is the purpose of the the ‘-r’ option in tune2fs command?
Answer:
The ‘-r’ option in tune2fs command is used to set the reserved block for the file system.
For example : ‘tune2fs -r 5 /dev/sda’
Conclusion
The tune2fs command in Linux empowers administrators with the ability to fine-tune various parameters and attributes of ext2, ext3, and ext4 file systems. By using this versatile tool, you can enhance performance, customize file system properties, and meet specific requirements to ensure the smooth operation of your Linux system. Understanding and utilizing the tune2fs command is essential for Linux administrators, as it enables them to maintain and optimize file systems effectively.
Share your thoughts in the comments
Please Login to comment...